seat Workshop Repair Guides

SEAT Workshop Service and Repair Manuals

Removing and installing multi-pin connector on back of relay plate > < Relay plate ??08.97
Removing and installing relay plate
  Note!
t  If vehicle has a security-coded radio, obtain anti-theft code before disconnecting battery.
t  When the battery is reconnected, check operation of electrical equipment (radio, clock and so on) according to the workshop manual and/or the owner's manual.
t  
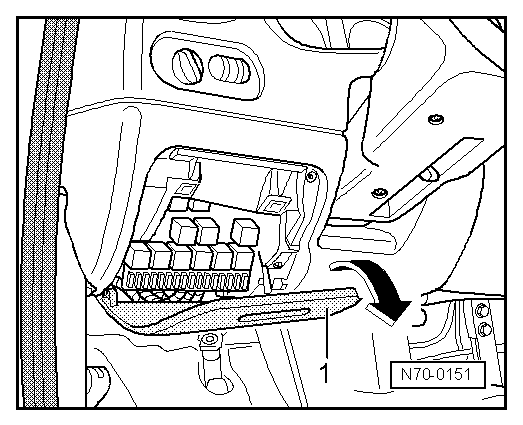
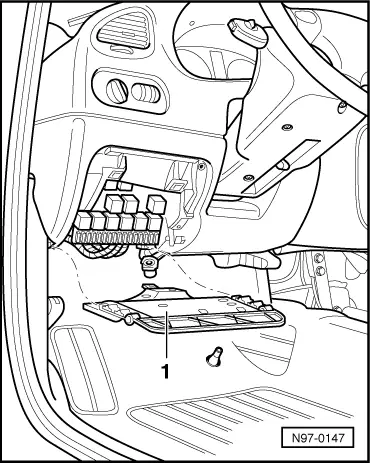
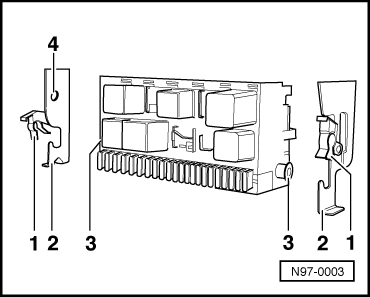
The relay plate with fuse holder is located behind a cover for the relay plate on the driver side.
Removing:
–  Disconnect battery → Chapter.
   
–  Open cover -1- for relay plate, unclip from dash panel trim and remove.
  N70-0151
–  Pull out lower cover -1- for relay plate.
  N97-0147
–  Release securing clips -1- from pins -3- on left and right of relay plate and swing upwards.
–  Press left retaining arm -2- outwards, until the locking device on the relay plate is pulled out of the hole -4- of the retaining arm.
–  Swing relay plate to rear, to ensure sufficient clearance to additional relay plate above the relay plate. Then unhook relay plate.
Installing:
  N97-0003
When installing, ensure the relay plate locking device engages in the hole -4- of the retaining arm. The securing clips -1- engage on the pins -3-.
Installation is carried out in the reverse sequence.
  N97-0003

Removing and installing multi-pin connector on back of relay plate > < Relay plate ??08.97