seat Workshop Repair Guides

SEAT Workshop Service and Repair Manuals

Brake servo / Master brake cylinder: general assembly diagram > < Removing
Installing
Installing
  Note
The surfaces of the piston and seal must be cleaned only with methylated spirits and then dried.
–  Before installation, apply a thin coating of assembly paste (assignment → Electronic parts catalogue (ETKA)) to the pistons and seals.
   
–  Insert the sealing ring in the brake calliper -arrow-.
  Note
When doing this hold piston in front of calliper housing.
  A47-0154
–  Insert protective cap -A- in the installation tool for protective covers -T10146/1--1-.
  N47-0221
–  Press protective cap onto brake caliper so that seal is fitted correctly all round using assembly tool -1- and piston resetting tool -2-.
Check seat of protective cap:
–  The protective cap of the brake calliper must not be able to be removed by hand.
  A47-0202
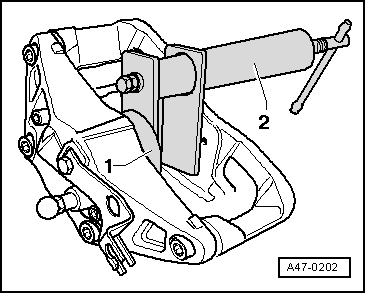
–  Slightly press the piston against the cap using an extension and a ratchet insert -1-. Fix the piston in this position.
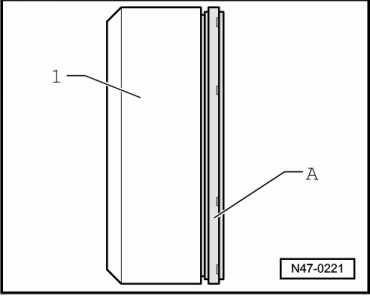
  Note
Keep piston straight to prevent damage to sealing collar.
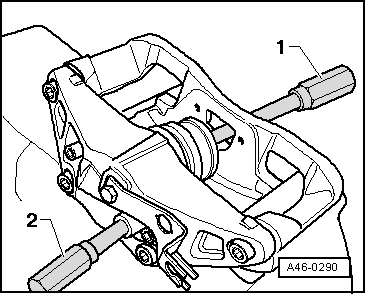
–  Use compressed air (max. 3 bar) -2- on the protective cap on the brake calliper. The protective cap jumps over the piston when doing so.
–  Press the piston into the brake calliper by hand. If necessary, then use the thrust tool -T10145-.
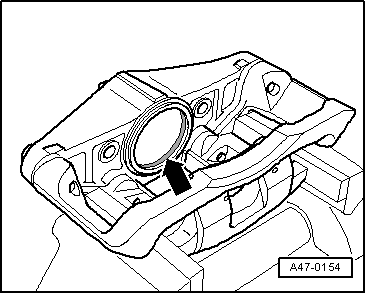
The outer sealing lip will then spring into the piston groove.
–  Close the bleeder valve.
  A46-0290

Brake servo / Master brake cylinder: general assembly diagram > < Removing