skoda Workshop Repair Guides

Skoda Workshop Service and Repair Manuals

Size of screws and the tightening torque > < Removing and installing the timing gear cover
Install
Install
  Note
t  
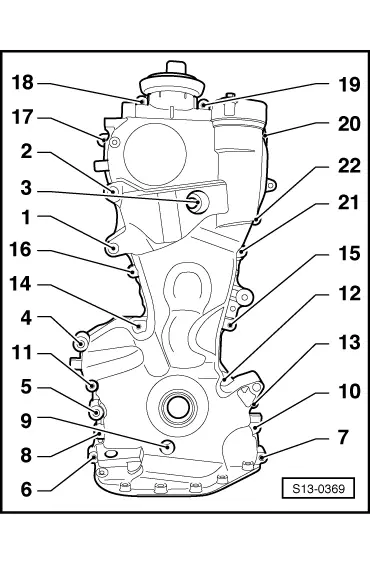
Install housing → Chapter (Pos. 17) only after putting the timing gear cover in place otherwise the gasket ring can be damaged.
t  Check whether the oil scraper has been damaged while removing (e.g. broken off wings).
t  Pay attention to the use by date on sealant.
t  The timing gear cover must be installed within 5 minutes after applying the silicone sealant.
t  if no blue sealant mass is left in the thread of the M6 screws, replace the screws for ones which have sealant on them.
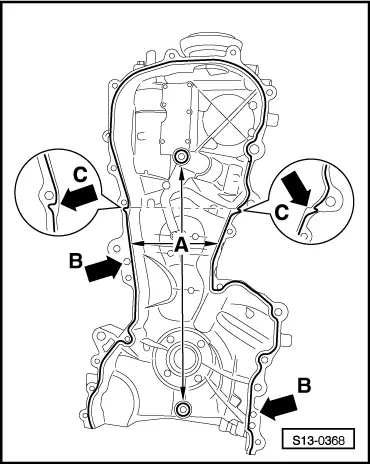
–  Cut off nozzle tube at the front marking (Ø of nozzle approx. 3 mm).
–  Apply silicone sealant to the clean sealing surface of the timing gear cover, as shown in the illustration -arrow A-.
  Note
   
Apply silicone sealant to the separation point of the cylinder head/cylinder block according to the parting plane -arrows C-.
B - Position of the fitting sleeves
t  Thickness of sealant bead: 2…3 mm.
  Note
The sealant bead must not be thicker than 3 mm otherwise excess sealant may get into the oil pan and clogg the oil pump strainer.
–  Fit timing gear cover immediately and lightly tighten all bolts.
  S13-0368
–  Tighten all bolts fully in the given sequence: Tightening torques → Chapter.
–  Install housing → Chapter (Pos. 17).
  Note
The sealing of the housing must be carried out with an O-ring → Chapter (Pos. 16).
  S13-0369

Size of screws and the tightening torque > < Removing and installing the timing gear cover