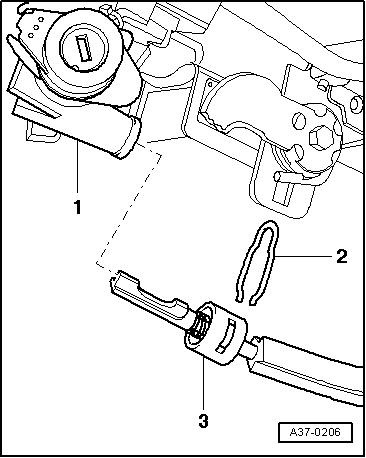
Press off the locking clip -2- for the interlock cable -3-.
Note
In order to achieve clearance, if necessary remove steering wheel, left trim panels below the instrument panel, steering column trim panel, grip for steering column adjuster → Chassis → Rep. Gr.48.
–
Turn the ignition key to the position “Ignition on”.
–
Detach the interlock cable from the ignition starter switch -1-.
–
Unhook the interlock cable from the locking lever.
–
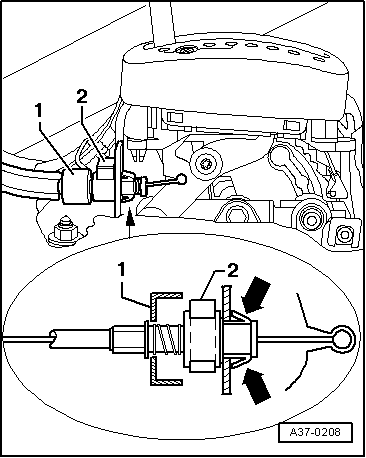
Press together the tabs of the retaining clip -arrows-.
–
Pull the interlock cable out of the gearshift mechanism.
Note
Do not kink the interlock cable.
Install
Installation is performed in the reverse order, pay attention to the following points:
–
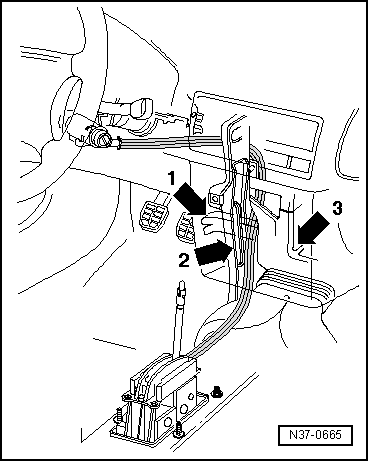
Route the interlock cable correctly:
t
1 - footwell vent
t
2 - support/dash panel
t
3 - heater unit
–
Shift selector lever into position “P”.
–
Press the interlock cable into the support on the gearshift bracket until the catches -arrows- are spread open.
–
Hook the interlock cable into the locking lever.
–
Turn the ignition key to the position “Ignition on”.
–
Insert the interlock cable -3- fully into the support opening on the ignition starter switch -1- and lock it with the locking clip -2-.
 Note
Note