skoda Workshop Repair Guides

Skoda Workshop Service and Repair Manuals

Removing and installing track control arm with bracket - aluminium assembly carrier > < Removing and installing the assembly carrier - aluminium assembly carrier RHD - vehicles with right-hand drive
Replacing rubber-metal bearing for pendulum support - aluminium assembly carrier
Special tools and workshop equipment required
t  Ejection tool -T30082 (3372)-
t  Assembly device -T10214-
t  Assembly device -T10244-
t  Pressure plate -MP3-406-
t  Pressure plate -MP3-407-
Pulling out the rubber-metal bearing
–  Remove assembly carrier → Chapter.
–  Install assembly device -T10244- on the assembly carrier.
   
–  Pull out both rubber-metal bearings as shown.
  Note
t  The flat side of the ejection tool -3372/1 (T30082)- must point towards the insert -A- of the assembly device -T10244- otherwise the insert can be damaged.
t  The pipe -T10244/3- has a larger and a smaller inner diameter. The assembly carrier must be positioned on the large inner diameter of the pipe -T10244/3-.
Inserting the rubber-metal bearing
  N40-10075
–  Screw both rubber-metal bearings with the original screw, while doing so the cutouts -arrows- must be positioned exactly one above the other.
  N40-10071
–  Insert the screwed rubber-metal bearing into the pipe -T10214/2- with the screw head downwards.
1 - Thrust piece -T10214/3-
2 - Rubber-metal bearing
3 - Pipe section -T10214/2-
4 - Pipe section -T10214/1-
5 - ,
6 - Pressure plate -MP3-406-
7 - Pressure plate -MP3-407-
  N40-10072
–  Insert the rubber-metal bearing -1- until the dimension -a- is achieved.
Dimension -a- = 2 - 3 mm.
  Note
t  There are two different versions of rubber-metal bearings.
t  Assignment → Electronic Catalogue of Original Parts
I - The edge of the inner core -1- points to the recess of the rubber-metal bearing.
  N40-10073
lI - The edge of the inner core -2- points away from the recess of the rubber-metal bearing.
  N40-10530
–  Align the pipe -T10214/2- with the pressed-in rubber-metal bearings in such a way that the corners of the inner core are positioned on an imaginary line parallel to the edge of the assembly device -T10244--1- and the cutouts in the rubber-metal bearings point to the opening of the assembly carrier.
The distance -a- must be identical on the right and left so that the parallelism is assured.
–  Place the assembly carrier on the smaller inner diameter of the pipe -T10244/3-.
  N40-10532
–  Press in the bearing up to the stop so that a press force of 20 kN is reached.
–  Remove assembly device -T10244- from assembly carrier and check the seating of the pressed-in rubber-metal bearing.
   Pressure plate -MP3-406 (VW 401)-
   Pressure plate -MP3-407 (VW 402)-
  N40-10077
l  
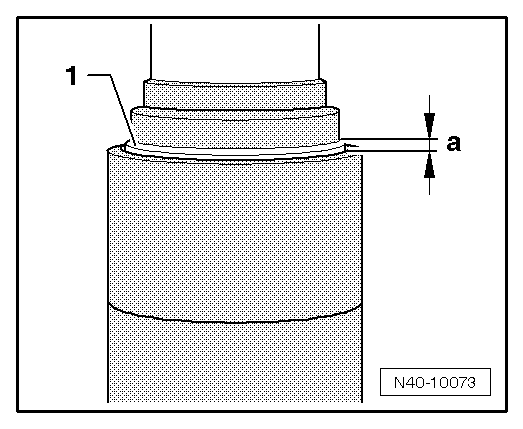
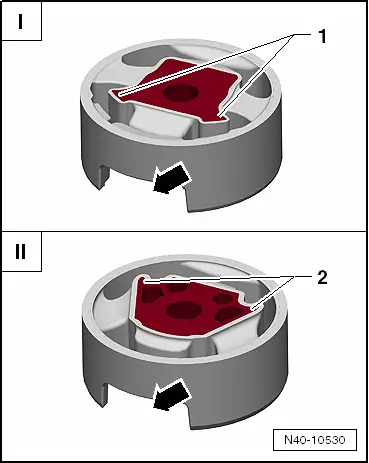
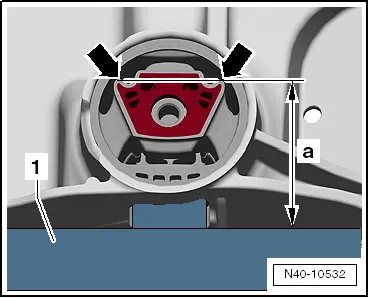
The outside diameter -1- of both rubber-metal bearings must protrude up to 2 mm beyond the edge in the area of the opening for the pendulum support.
l  The cutouts of the rubber-metal bearing must be centered in the opening of the assembly carrier.
l  A gap -arrow- between the rubber-metal bearings is allowed.
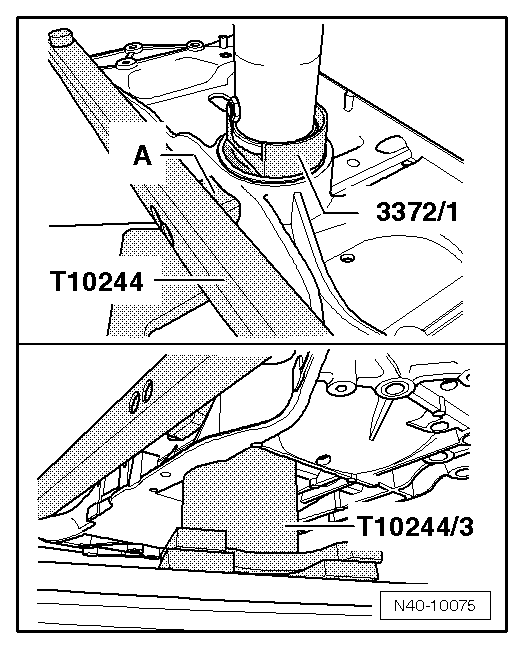
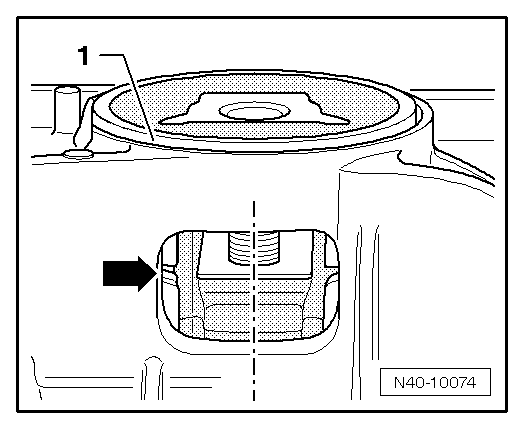
–  Install assembly carrier.
–  Perform a test drive.
–  Check the steering wheel position during the test drive.
  Note
If after the test drive and with the wheels pointing straight ahead the steering wheel is off straight, perform a chassis alignment → Chapter.
  N40-10074

Removing and installing track control arm with bracket - aluminium assembly carrier > < Removing and installing the assembly carrier - aluminium assembly carrier RHD - vehicles with right-hand drive