skoda Workshop Repair Guides

Skoda Workshop Service and Repair Manuals

Removing and installing bottom suspension arm > < Removing and installing rear suspension
Removing and installing top suspension arm
Removing:
–  Remove wheel.
–  Remove coil spring → Chapter.
   
–  Unhook cable -arrow A- for wheel speed sensor at top suspension arm.
–  Release screw -1-.
  S42-0170
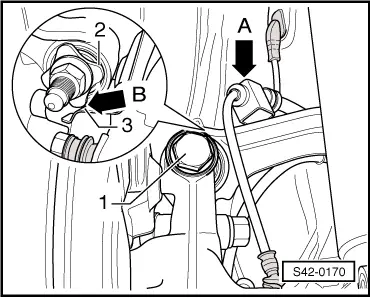
–  For example mark with a felt-tip pen the position of the eccentric bolt -arrow- to the assembly carrier.
–  Release screw -arrow-.
–  Remove top suspension arm.
Installing:
Installation is carried out in the reverse order. Pay attention to the following:
–  Insert top suspension arm into the vehicle and tighten the screws by hand.
  Note
The bolted connection of the top suspension arm must only be performed, if the measured dimension „a“ between the wheel hub centre and the lower edge of the wheel house is respected (unladen weight position)! → Chapter
  S42-0171
–  Screw top suspension arm onto the assembly carrier and tighten the nut.
Observe the marked marking of the position of the eccentric bolt -arrow- to the assembly carrier!
  S42-0171
–  Tighten screw -1- for top suspension arm at wheel-bearing housing. The tightening torque must be applied via the screw, in order not to put the bearing under tension.
  Note
The washer -2- must be fitted so that there is -arrow B- a gap between the washer and the cover plate -3-
–  Hook cable -arrow A- for wheel speed sensor at top suspension arm.
–  Install coil spring → Chapter.
–  Installing and tightening the wheel.
–  Perform chassis alignment → Chapter.
  S42-0170
Tightening torques:
Top suspension arm to assembly carrier
t  Use new nut!
t  Tighten in unladen weight position! → Chapter
95 Nm
Top suspension arm to wheel-bearing housing
t  Use new screws and nuts!
t  Tighten in unladen weight position! → Chapter
130 Nm + 90°
Wheel bolts120 Nm


Removing and installing bottom suspension arm > < Removing and installing rear suspension