skoda Workshop Repair Guides

Skoda Workshop Service and Repair Manuals

Removing and installing top trim panel for pillar D (Octavia Combi II) > < Removing and installing the finishing strip
Removing and installing bottom trim panel for pillar D (Octavia Combi II)
Removing:
–  Remove the tailgate/luggage compartment cover → Chapter.
   
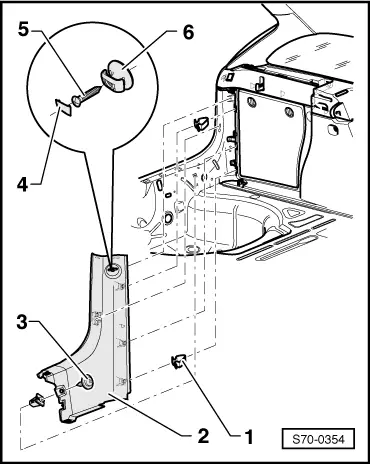
–  Release screw -3- (1,5 Nm).
–  Lever out cap (Pos. 4).
–  Remove screw -5- (1.5 Nm) and remove clip (Pos. 6).
–  Unclip bottom trim panel of pillar D (Pos. 2) from pillar D.
Installing:
–  Installation is carried out in the reverse order; pay attention to the following points:
–  Recondition the clips (Pos. 1) in the bottom trim panel of pillar D (Pos. 2), if necessary replace with new ones.
  S70-0354

Removing and installing top trim panel for pillar D (Octavia Combi II) > < Removing and installing the finishing strip