skoda Workshop Repair Guides

Skoda Workshop Service and Repair Manuals

Enginecrankshaft group, pistons > < Checking the assembly bracket
Adjusting the unit mounting
Special tools and workshop equipment required
t  Supporting device -T30099-
t  Base -T30099/1-
t  Adapter -MP9-200/3 (10-222A/3)-
t  Lifting eye -10-222A/12-
t  Snap hook
–  Remove battery and battery tray → Electrical System; Rep. Gr.27.
–  Remove the cooling water tank cover → Body Work; Rep. Gr.66.
   
–  Install supporting device -T30099- and support engine in fitting position.
–  Uniformly pre-tension the engine/gearbox unit with both spindles, but do not raise.
  S10-0410
–  Release the screws -arrows- of the assembly bracket at the engine.
  A10-1898
–  Slightly loosen the screws -arrows- of the assembly bracket at the gearbox (less than 1 revolution).
–  Successively replace all the screws of the assembly bracket (as long as it has not already been performed when installing the engine) and insert these loosely.
  A10-1634
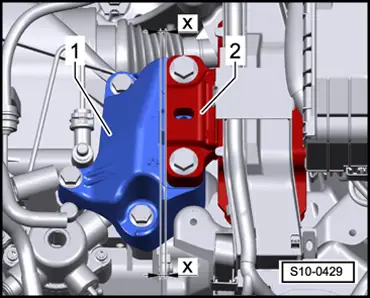
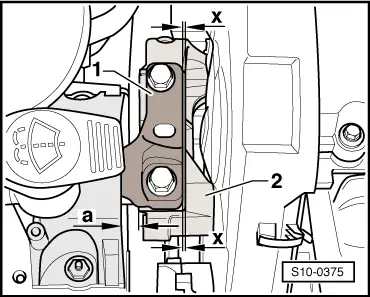
–  Move the engine/gearbox unit with an assembly lever between engine support -2- and supporting arm -1- for engine mount until the following dimensions are set:
l  Between engine bracket and engine support there must be a distance -a- of 10 mm.
l  The cast iron edge on the engine support -2- must be parallel to the supporting arm -1- the dimension -x- must be the same at the front and rear.
  Note
The distance -a- = 10 mm can be checked e.g. with suitable round bars.
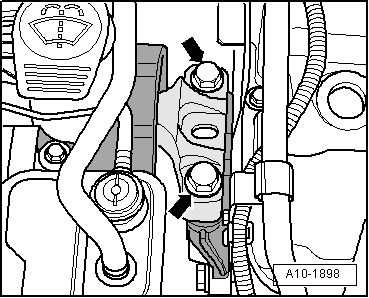
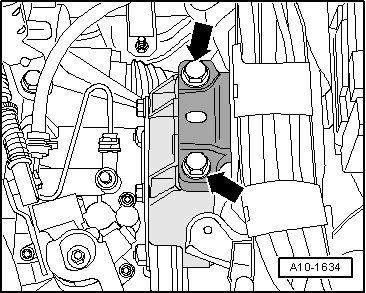
–  Tighten the screws for the engine side assembly bracket → Chapter.
  S10-0375
–  Make sure that on the gearbox side the edges of the supporting arm -2- and gearbox support -1- are parallel.
l  The dimension -x- must be the same on both mount sides.
–  Tighten the screws for the gearbox side assembly bracket → Chapter.
Further installation occurs in reverse order.
  S10-0429

Enginecrankshaft group, pistons > < Checking the assembly bracket