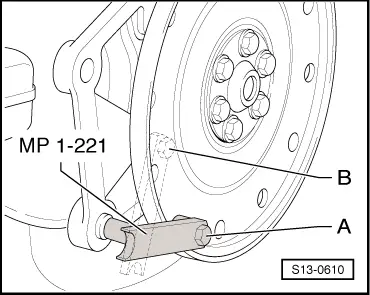
Attach counterholder -MP 1-221- with hexagon bolt -M8x45- to the drive plate. Insert two hexagon nuts -M10- between the counterholder and the driver disc.
Fitting position of the counterholder:
-A- for slackening -B- - for tightening
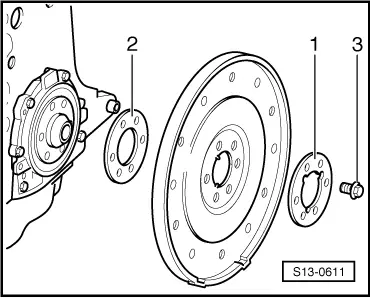
Installing the drive plate
–
Insert the drive plate using the washer with recesses -1-.
–
Insert new bolts -3- and tighten to 30 Nm.
–
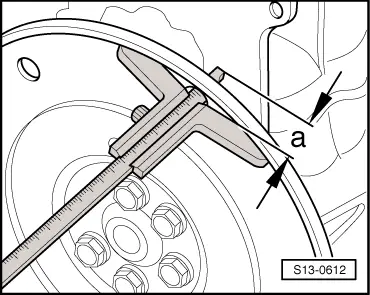
Check dimension -a- in three points and determine mean value.
l
Specified value: 19.5…21.1 mm
Note
The measurement is made through the hole of the drive plate to the milled surface of the cylinder block.
If the measurement is less than the specification:
–
Remove driver disc again and use compensating washer -2-. Insert screws -3- again and tighten to 30 Nm.
–
Tighten screws -3- to 60 Nm and torque a further 90° (1/4 turn) (the tightening may occur in several stages).
 Note
Note