Skoda Workshop Service and Repair Manuals
HOME
FEATURES
MENU
INDEX
ABOUT US
Replacing middle or rear part of the exhaust system >
< Exhaust system - Summary of components for vehicles with engine identification characters CDAA, CDAB and four-wheel-drive
Octavia Mk2
Drive unit
1.8/112; 118 kW TSI; 2.0/147 kW TSI engine
Exhaust system / Removing and installing parts of the exhaust system
Removing and installing exhaust pipe
Removing and installing exhaust pipe
Removing and installing exhaust pipe
Special tools and workshop equipment required
t
Ring spanner set for lambda probe
t
Hot screw paste -G 052 112 A3-
Removing
–
Remove the air filter housing
→ Chapter
.
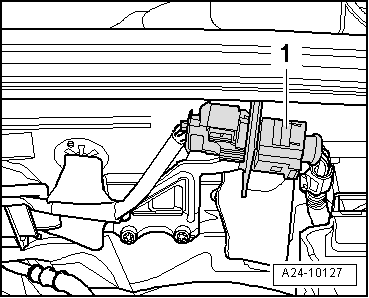
For engine with identification characters CDAA, CDAB, CCZA
–
Remove the plug connection
-1-
for lambda probe upstream of catalytic converter -G39- from the bracket on the partition wall and disconnect.
Continued for all engines
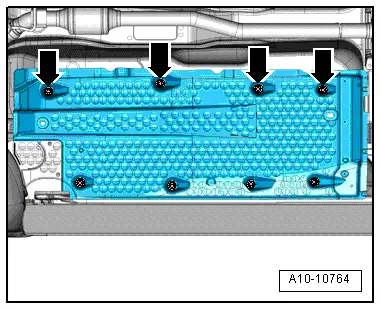
–
Unscrew the nuts
-arrows-
and unfold the floor cover on the right inner side downwards.
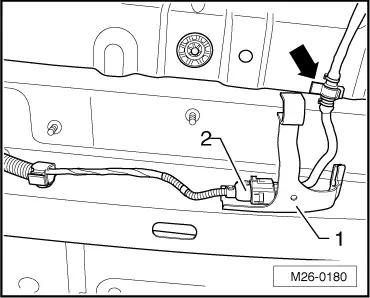
–
Unclip cable
-arrow-
, detach bracket
-1-
and disconnect plug connection
-2-
for lambda probe -G39/G130-.
Vehicles with four-wheel drive
–
Remove propshaft
→ Gearbox; Rep. Gr.39
.
Continued for all vehicles
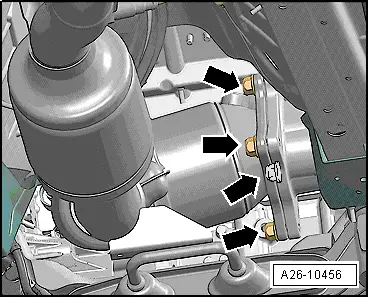
–
Unscrew both upper fixing nuts
-arrows-
of the exhaust pipe/exhaust turbocharger.
–
Unscrew both lower fixing nuts
-arrows-
of the exhaust pipe/exhaust turbocharger.
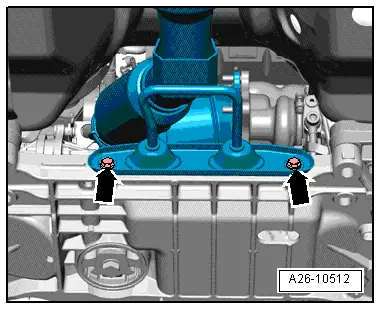
–
Unbolt bracket for exhaust system
-arrows-
.
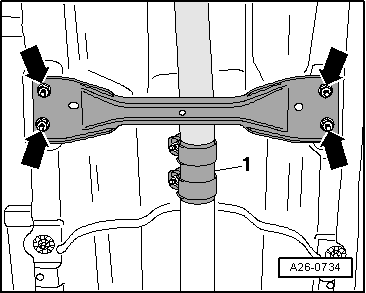
–
Remove front tunnel bridge
-arrows-
.
Caution
Danger of damaging the decoupling element.
Do not twist decoupling element more than 10°.
–
Slacken the clamping sleeve
-1-
and slide backwards.
–
Remove pre-exhaust pipe.
Install
Installation is carried out in the reverse order. Pay attention to the following:
–
Replace the gaskets and the self-locking nuts.
–
Coat stud bolts of the turbocharger with hot bolt paste -G 052 112 A3-.
–
Align exhaust system free of stress
→ Chapter
.
Drive unit
1.8/112; 118 kW TSI; 2.0/147 kW TSI engine
Exhaust system / Removing and installing parts of the exhaust system
Removing and installing exhaust pipe
Replacing middle or rear part of the exhaust system >
< Exhaust system - Summary of components for vehicles with engine identification characters CDAA, CDAB and four-wheel-drive

 Caution