Turn engine at hexagonal head of central screw at front end of the crankshaft, if necessary using counterholder -T10172- or using counterholder -MP1-216 (3036)- at camshaft sprocket.
–
Turn the crankshaft until the corresponding cam pair of the relevant unit injector to be removed points uniformly upwards.
–
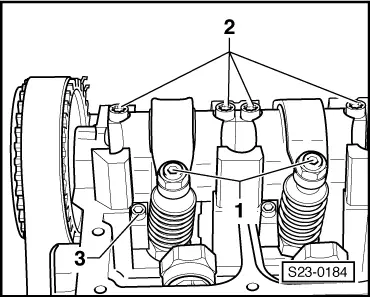
Release the counternuts of the adjusting screws -1- and unscrew the adjusting screws until the valve lever rests against the ball pin of the unit injectors.
–
Screw out fixing screws -2- for the valve-lever shaft from the outside to the inside and remove the valve-lever shaft.
–
Set the camshaft in such a way that the cam for Cylinder 2 points in -direction of arrow-. All clamping pads can be removed in this position.
–
Unplug the connector from the unit injector. Support the opposite side of the connector with your finger in order to avoid twisting the connector.
–
Screw out fixing screw -3- of the clamping pad and remove the pad in the direction towards the camshaft.
–
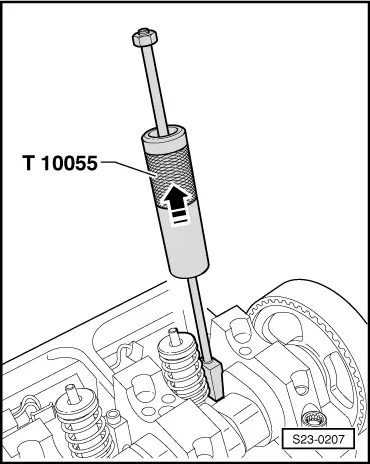
Insert extractor -T10055- in direction of the camshaft instead of the clamping pad in the slot of the unit injector.
–
Remove the unit injector through movements of the sleeve at the nut up to the stop in -direction of arrow-.
Note
Do not interchange the unit injectors, if necessary mark the assignment to each cylinder.
 Note
Note