skoda Workshop Repair Guides

Skoda Workshop Service and Repair Manuals

Checking fuel pump (Superb II, Octavia II) > < Removing and installing fuel tank (Octavia II)
Removing and installing the fuel tank on vehicles with four-wheel drive (Octavia II)
Special tools and workshop equipment required
t  Engine/gearbox jack, e.g. -V.A.G 1383 A-
Removing
  Note
Observe the safety instructions before starting fitting work → Chapter.
–  Disconnect the battery-earth cable with the ignition off → Electrical System; Rep. Gr.27.
–  Drain the fuel tank.
–  Removing rear seat bench → Body Work; Rep. Gr.72.
–  Remove the cover from the fuel delivery unit and the fuel gauge sender 2 -G169-.
  Note
For vehicles with auxiliary heating, the plug connection for the dosing pump -V54- must also be separated.
   
–  Disconnect the plug from the flange of the fuel delivery unit and from the flange of the fuel gauge sender 2 -G169--arrows-.
–  Unscrew right rear wheel → Chassis; Rep. Gr.44.
–  Remove the rear right wheelhouse liner → Body Work; Rep. Gr.66.
  S20-0235
–  Unscrew fixing bolts on filler neck -arrows-.
–  Remove rear exhaust pipe → Chapter.
–  Remove propshaft → Gearbox; Rep. Gr.39.
  S20-0196
–  Disconnect plug -arrow- from four-wheel drive control unit -J492-.
–  Disconnect the feed line and the return-flow line on the front right of the fuel tank.
  Note
t  For vehicles with auxiliary heating, the fuel line of the dosing pump -V54- must also be separated.
t  Press in the securing rings in order to unlock the connections of the fuel lines.
–  Unscrew the straps and fixing screws. Support the fuel tank with engine/gearbox jack -V.A.G 1383 A- when removing.
–  Lower the fuel tank.
Install
  S20-0236
–  Clip on cable from four-wheel drive control unit -J492- at the fuel tank -arrows-.
–  Support the fuel tank using the engine/gearbox jack e.g. -V.A.G 1383 A -.
–  Raise fuel tank in its installation position and install.
  S20-0237
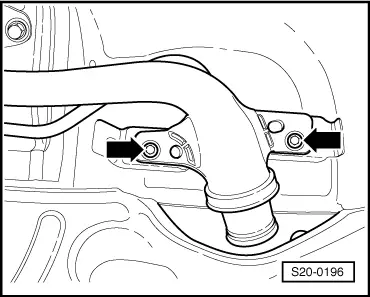
–  Connect plug -arrow- at four-wheel drive control unit -J492 -.
Further installation occurs in reverse order to removal. Pay attention to the following:
t  
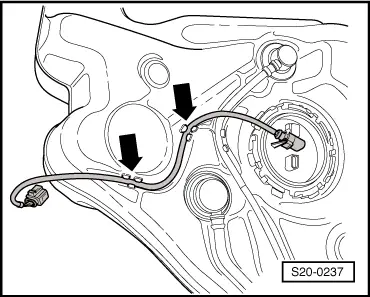
Lay the vent and fuel hoses without any kinks.
t  Do not mix-up the feed line and the return-flow line (the return-flow line is blue, the feed line is black).
t  
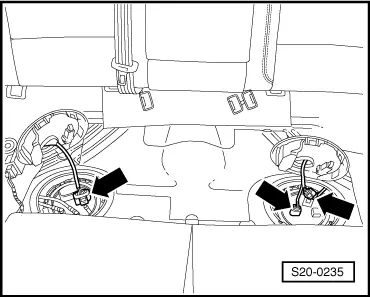
Make sure the fuel line connections fit tightly.
t  Check feed line, return-flow line and ventilation line at fuel tank for firm seating.
t  Check earth connection of fuel tank/body at filler neck.
  S20-0236

Checking fuel pump (Superb II, Octavia II) > < Removing and installing fuel tank (Octavia II)