| –
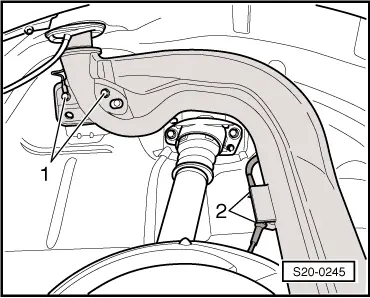
| Unscrew screws -1- for filler neck on the body. |
| –
| Unclip the wiring loom from the holder -2- at the top and bottom of the filler neck. |
| –
| Slacken front double clamp at exhaust pipe and push to the rear. |
| –
| Push out all suspensions of the middle and rear part of the exhaust system from the retaining straps. |
| –
| Slightly lower the middle and rear part of the exhaust system and tie with wire to the body. |
| –
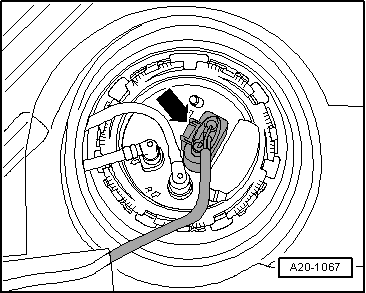
| Disconnect the fuel feed line and the fuel return-flow line on the front right of the fuel tank. |

Note | t
| For vehicles with auxiliary heating, the fuel line for the dosing pump -V54- must also be disconnected. |
| t
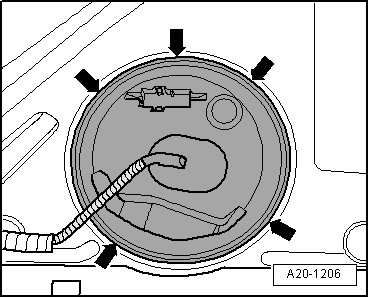
| Press down the securing rings in order to unlock the connections of the fuel lines. |
| –
| Unscrew tensioning strap. |
| –
| Support fuel tank using the engine and gearbox jack -V.A.G 1383 A-. |
| –
| Unscrew securing bolts. |
| –
| Lower fuel tank and swivel out. |
| Installation occurs in reverse order to removal. Pay attention to the following: |
| t
| Lay the fuel lines avoiding any kinks. |
| t
| Do not mix-up the fuel feed line (black) and the fuel return-flow line (blue). |
| t
| Make sure the fuel line connections fit tightly. |
| t
| Check fuel feed line and the fuel return-flow line at fuel tank for firm seating. |
| t
| Check earth connection of fuel tank/body at filler neck. |
|
|
|