skoda Workshop Repair Guides

Skoda Workshop Service and Repair Manuals

Replace gasket ring for flange on the Haldex coupling on installed rear final drive|Install > < Replace gasket ring for flange on the Haldex coupling on installed rear final drive
Removing
Removing
–  Raise vehicle.
   
–  Separate exhaust system at the double clamp and remove bracket for the exhaust system from the assembly carrier → Engine; Rep. gr.26.
–  Tie up pre-exhaust pipe.
  Note
The decoupling element in the exhaust pipe should not be bent by more than 10° - risk of damage.
–  Remove the rear part of the exhaust system from the double clamp → Engine; Rep. gr.26.
Vehicles Octavia II and Superb II
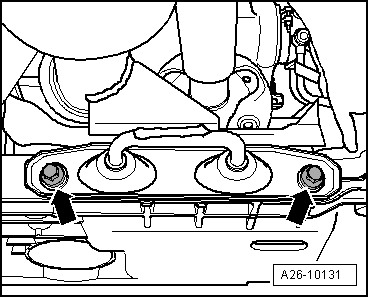
–  Remove the heat shield below the propshaft.
  A26-10131
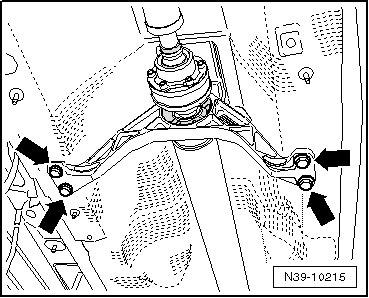
–  Slacken intermediate bearing of propshaft from the structure by approx. 4 turns -arrows-.
Vehicles Yeti
  N39-10215
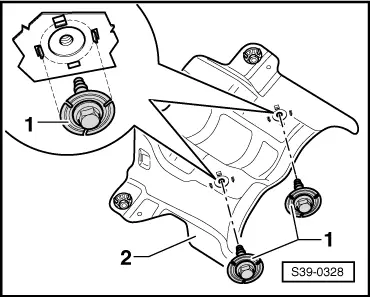
–  Remove the heat shield -2- below the propshaft, to do so release the screws -1-.
–  After removing the heat shield screw on again the intermediate bearing of the propshaft -arrow- with the screws -1- until the intermediate bearing can be moved.
Continued for all vehicles
  S39-0328
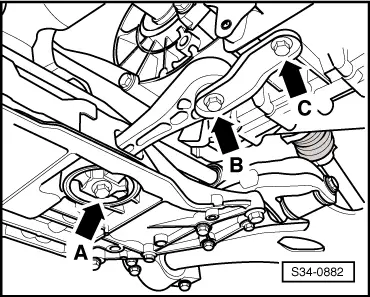
–  Remove pendulum support from gearbox, to do so release the bolts -arrow B- and -arrow C-.
  Note
Do not release screw -arrow A-.
  S34-0882
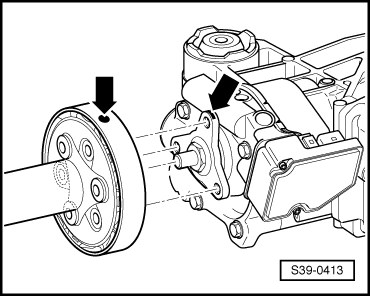
–  Check, if a marking (colour point) is present on the flexible disk/oscillation damper and at the flange on the Haldex coupling -arrows-. If not, mark the position of the flexible disk and the flange on the Haldex coupling to each other -arrows-.
  S39-0413
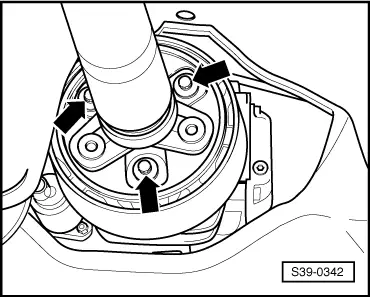
–  Unscrew propshaft with flexible disk and oscillation damper from rear final drive -arrows-.
  S39-0342
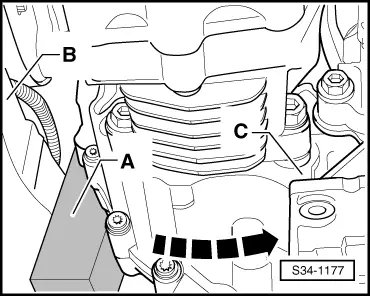
–  Subsequently push the engine/gearbox unit to the front with a 2nd mechanic -direction of arrow- and insert a suitable wooden wedge -A- (approx. 50 mm thick) between the assembly carrier -B- and the gearbox -C-.
–  While doing so, remove the propshaft from the flange at the Haldex coupling (centering stud) on the rear final drive.
  Note
  S34-1177
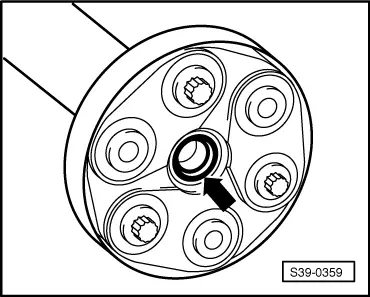
Do not tilt propshaft when removing, pull off horizontally from centering stud of final drive towards the rear. The gasket ring/centering bushing -arrow- must not be damaged, otherwise the propshaft has to be replaced.
  S39-0359
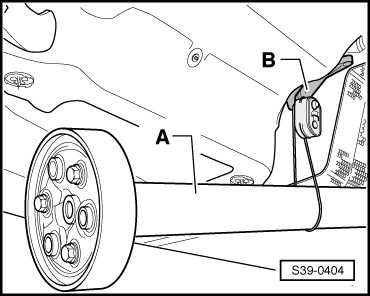
–  Tie up the rear part of the propshaft -A- to the suspension -B- of the exhaust gas system.
  S39-0404
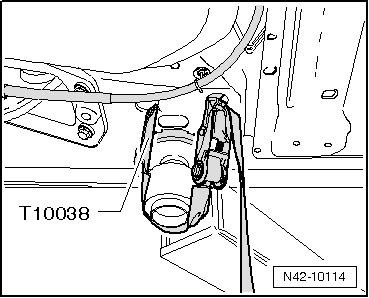
–  Lash the vehicle to the lift platform using the tensioning straps -T10038-.
  WARNING
If the vehicle is not lashed, there is a risk of the vehicle toppling off the lift platform.
  N42-10114
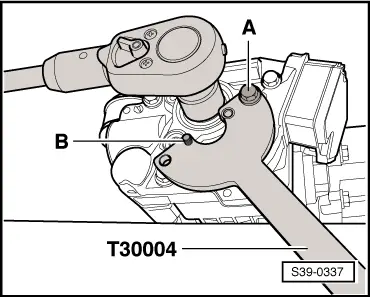
–  Unscrew hexagon nut at flange of Haldex coupling.
-A- Screw M10 x 25
-B- Allen screw M8 x 15 (is screwed in from the reverse side into the counterholder -T30004 -)
  S39-0337
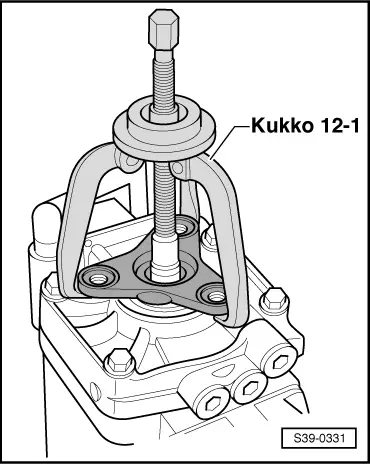
–  Disconnect flange for Haldex coupling. If there is any resistance, use three armed extractor, e.g. -Kukko 12/1-, -Kukko 12/1-.
  S39-0331
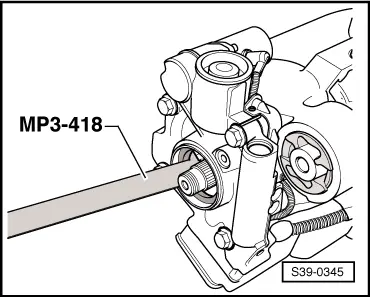
–  Pull out gasket ring with ejection lever -MP3-418-.
  S39-0345

Replace gasket ring for flange on the Haldex coupling on installed rear final drive|Install > < Replace gasket ring for flange on the Haldex coupling on installed rear final drive