skoda Workshop Repair Guides

Skoda Workshop Service and Repair Manuals

Removing and installing shift mechanism (Octavia II, Superb II)|Install > < Removing and installing shift mechanism (Octavia II, Superb II)
Removing
Removing
–  Removing the handle and cover for the shift mechanism → Chapter.
–  Shift selector lever into position „P“.
–  Switch off ignition.
  Note
If the battery earth strap is disconnected and connected, carry out certain additional operations → Electrical System; Rep. gr.27.
–  Disconnect the battery-earth strap with the ignition off → Electrical System; Rep. gr.27.
–  Remove ashtray or storage area in front of the shift mechanism → Body Work; Rep. gr.68.
–  Remove the centre console and air guide → Body Work; Rep. gr.68.
   
–  Pull out the plug connector housing of the plug connection -A- towards the front.
–  Disconnect plug connection -A- from the shift mechanism to the vehicle wiring harness.
  Note
t  Ignore pos. -B-, -C- and -1-.
t  As of production date 06.09 the shift mechanism is changed, the 4-pin plug connection -B- and the selector lever lock solenoid -N110--1- are already located in the shift mechanism → Chapter.
–  Remove engine cover → engine; Rep. gr.10.
–  Remove air filter → Engine; Rep. gr.24 or → Engine; Rep. gr.23.
  S37-0198
–  Release lock washer -1- and remove to the top.
–  Remove lock washer -3- towards the top.
–  Press off the selector lever control cable -2- from the lever/gearshift shaft in -direction of arrow- and place on top.
  Note
t  The lock washer for the selector lever control cable -3- must always be replaced → Electronic Catalogue of Original Parts.
t  Do not bend or buckle selector lever control cable.
t  Do not press the selector lever control cable out of the cable support towards the rear. The selector lever control cable is only guided out of the cable support when removing the gearshift mechanism.
–  Raise vehicle.
–  Remove the sound dampening system → Body Work; Rep. gr.50.
  S34-0916
–  Remove the rear tunnel bridge -1- and the front tunnel bridge -2- from the body (if present).
–  Detach the bracket -3- for the exhaust system from the assembly carrier.
–  Release double clamp -4-.
  Note
t  The decoupling element in the pre-exhaust pipe should not be bent by more than 10° - risk of damage.
t  A second mechanic is needed to remove the rear part of the exhaust system.
–  Remove the rear part of the exhaust system -5- from the double clamp → Engine; Rep. gr.26.
–  Slacken the trim panels for the underfloor on left -6- and right -7- from the body.
–  Unclip the cable of the lambda probe at the heat shield.
Vehicles with front-wheel-drive
  S34-1143
–  Remove the heat shield below the shift mechanism towards the rear, to do so slacken the clips -arrows-.
Vehicles with four-wheel drive
–  Removing the whole exhaust gas system → Engine → Rep. gr.26.
–  Unscrew heat shield for propshaft.
–  Remove propshaft → Chapter.
–  Remove the heat shield under the shift mechanism.
Continued for all vehicles
  Note
A second mechanic is needed under the vehicle to remove the shift mechanism.
  A37-10736
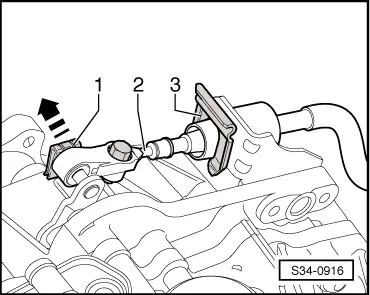
–  Unscrew nuts -1- and -2-.
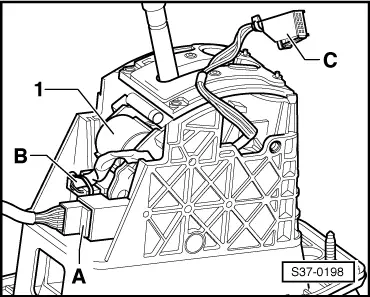
–  Remove the shift mechanism together with the selector lever control cable downwards. Thus, guide the selector lever control cable out of the gearshift mechanism.
  Note
Do not bend or buckle selector lever control cable.
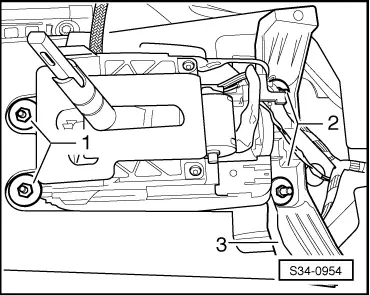
The shift mechanism (only vehicles up to production date 05.09 „old shifting“ → Chapter) can also be replaced without selector lever control cable, to do so the selector lever control cable must be separated from the shift mechanism, remove the selector lever control cable → Chapter.
  S34-0954

Removing and installing shift mechanism (Octavia II, Superb II)|Install > < Removing and installing shift mechanism (Octavia II, Superb II)