Skoda Workshop Service and Repair Manuals
HOME
FEATURES
MENU
INDEX
ABOUT US
Removing and installing clutch position senderG476 (Octavia II) >
< Removing and installing bearing bracket (Octavia II)
Octavia Mk2
Power transmission
Gearbox 02Q
Clutch, control / Repairing clutch control
Removing and installing the master cylinder
Removing and installing the master cylinder
Removing and installing the master cylinder
Removing
–
Remove bearing bracket.
For vehicles Octavia II
→ Chapter
.
For vehicles Superb II
→ Chapter
For vehicles Yeti
→ Chapter
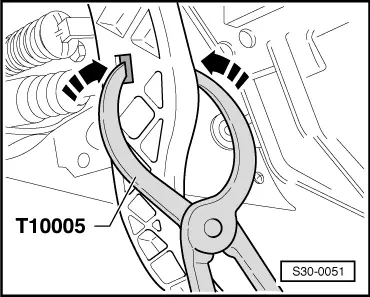
–
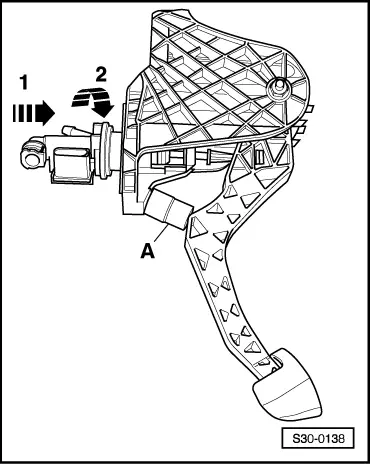
Release support of actuating rod of master cylinder with the pliers -T10005-.
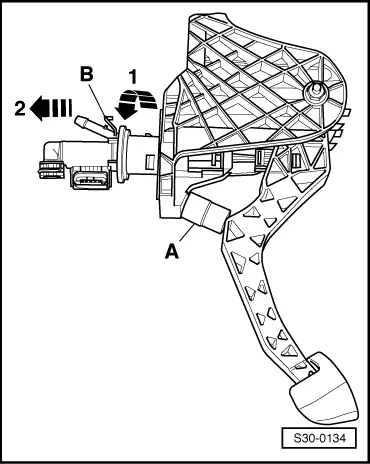
–
Place a spacer
-A-
between clutch pedal and stop and press clutch pedal forwards.
t
Length of spacer = approx. 40 mm
–
Release release pin
-B-
and pull master cylinder out of bracket
-arrow 1-
and
-arrow 2-
.
Install
l
Move clutch pedal up to the stop into home position.
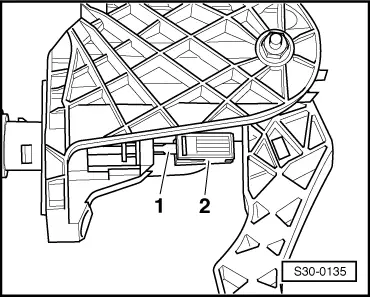
–
Attach support
-2-
to the actuator rod
-1-
of the master cylinder.
–
Place a spacer
-A-
between clutch pedal and stop and press clutch pedal into operating position.
t
Length of spacer = approx. 40 mm
–
Lock master cylinder at bracket
-arrow 1-
and
-arrow 2-
.
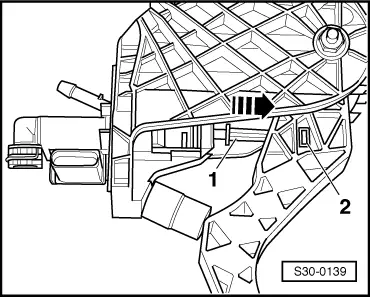
–
Press actuating rod
-1-
of master cylinder into direction of arrow, until the support
-2-
locks audibly into the clutch pedal.
–
Install bearing bracket.
For vehicles Octavia II
→ Chapter
.
For vehicles Superb II
→ Chapter
For vehicles Yeti
→ Chapter
Power transmission
Gearbox 02Q
Clutch, control / Repairing clutch control
Removing and installing the master cylinder
Removing and installing clutch position senderG476 (Octavia II) >
< Removing and installing bearing bracket (Octavia II)