skoda Workshop Repair Guides

Skoda Workshop Service and Repair Manuals

Disassembling and assembling Haldex coupling > < Removing
Install
Install
Installation is performed in the reverse order, pay attention to the following points:
–  Insert new O-ring and slightly oil with high efficiency oil for Haldex coupling → Chapter Pos. 3.
   
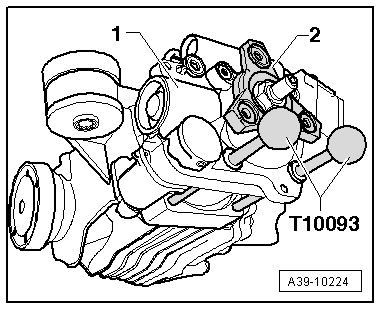
–  Insert Haldex coupling -1- into the rear final drive. Screw in guide bars -T10093- for precise guidance.
–  Turn at flange/propshaft -2- and insert Haldex coupling up to the stop.
  A39-10224
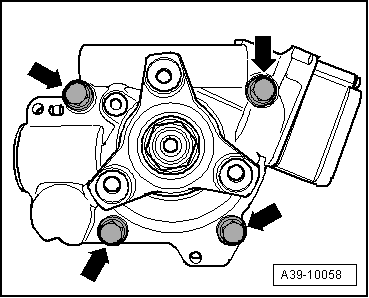
–  Unscrew guide bars -T10093- and tighten screws -arrows- to specified tightening torque.
–  Install propshaft at rear final drive → Chapter.
  A39-10058
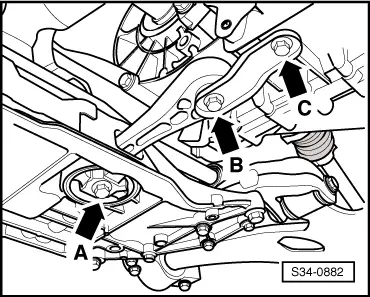
–  Tighten the pendulum support with »new« screws -screws B and C- at the gearbox. Tightening torques → Engine; Rep. gr.10.
–  Align intermediate bearing free of stress and tighten. Tightening torque → Chapter.
  S34-0882
For vehicles Superb II
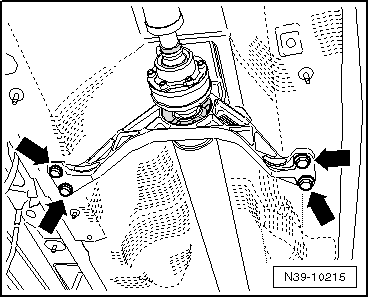
–  Install the heat shield below the propshaft.
For vehicles Octavia II and Yeti
  N39-10215
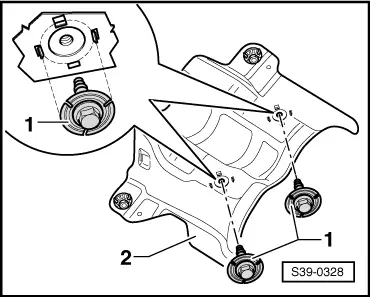
When screwing the heat shield -2- with the intermediate bearing make sure that the screws -1- are within the four centering tabs.
For all vehicles
–  Install exhaust system and align free of stress → Engine; Rep. gr.26.
–  Fill up with high efficiency oil for Haldex coupling and check oil level in the Haldex coupling → Chapter.
  S39-0328
Tightening torques Octavia II
ComponentNm
Oil check screw1)15
Oil drain plug1)30
Flexible disk at propshaft (two-piece propshaft) → Chapter
Propshaft to rear final drive → Chapter
Haldex coupling to rear final drive → Chapter Pos.1

1) Replace screw with sealing ring → Electronic Catalogue of Original Parts.
   
Tightening torques Superb II and Yeti
ComponentNm
Oil check screw1)15
Oil drain plug1)30
Propshaft to rear final drive → Chapter
Haldex coupling to rear final drive → Chapter Pos.1

1) Replace screw with sealing ring → Electronic Catalogue of Original Parts.
   

Disassembling and assembling Haldex coupling > < Removing