skoda Workshop Repair Guides

Skoda Workshop Service and Repair Manuals

E - Pressing down the rotor > < C - Pressing the rotor onto the crankshaft flange
D - Inspecting the fitting position of the rotor on the crankshaft
   
–  Unscrew hexagon nut -E- up to the end of the threaded spindle.
–  Unscrew two M6x35 mm screws -A- from the cylinder block.
–  Unscrew three knurled screws -B- from the sealing flange.
–  Unscrew two Allan screws and remove assembly tool.
–  Remove sealing lips supporting ring.
  S13-0428
The fitting position of the rotor on the crankshaft is accurate if there is a distance -a- of 0.5 mm between the crankshaft flange -A- and the rotor -B-.
  S13-0501
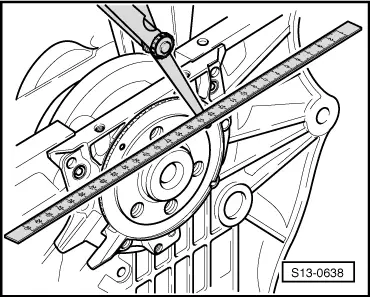
–  Position the steel striaghtedge onto the crankshaft flange.
–  Measure the distance between the steel straightedge and the rotor with a feeler gauge.
If the measured distance is less than 0.5 mm:
–  Press down rotor → Chapter.
If the dimension is correct:
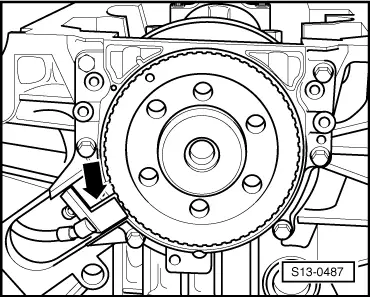
–  Tighten the new fixing screws of the sealing alternately crosswise. Tightening torque: 12 Nm.
  S13-0638
–  Install engine speed sender -G28--arrow-. Tightening torque: 5 Nm.
–  Installing the oil pan → Chapter.
–  Installing intermediate plate.
–  Install flywheel with new screws. Tighten fixing bolts to 60 Nm + torque a further 1/4 turn (90°).
  S13-0487

E - Pressing down the rotor > < C - Pressing the rotor onto the crankshaft flange