skoda Workshop Repair Guides

Skoda Workshop Service and Repair Manuals

Removing and installing 4/2 way valve with coolant regulator > < Removing and installing coolant pump
Removing and installing coolant regulator
(Octavia II up to 05.10)
Special tools and workshop equipment required
t  Flexible-head wrench SW 10 -3185-
t  Socket insert -T10058-
t  Catch pan, e.g. -VAS 6208-
t  Pliers for spring strap clamps
Removing
–  Drain coolant → Chapter.
–  Remove fan shroud with radiator fans → Chapter.
   
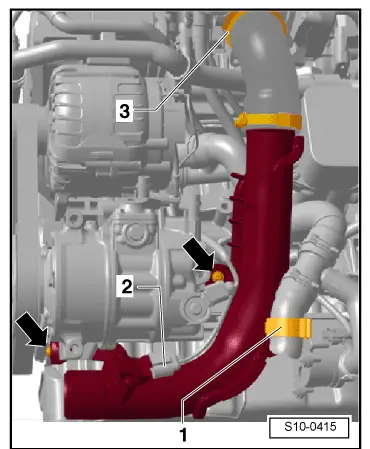
–  Release screws -arrows-.
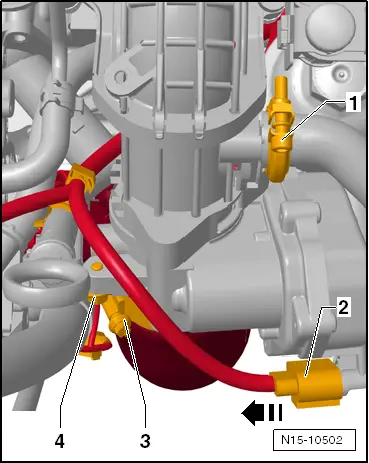
–  Expose coolant hose -1-.
–  Loosen hose clamp -3-.
–  Disconnect the plug -2- at the charge pressure sender -G31- with intake air temperature sender -G42- and remove the right charge air pipe.
  S10-0415
–  Disconnect the plug -2- from the throttle valve control unit -J338-.
–  Unscrew the top fixing screw of the guide pipe for the oil dipstick -4-.
–  Remove throttle valve control unit -J338- and take off.
  N15-10502
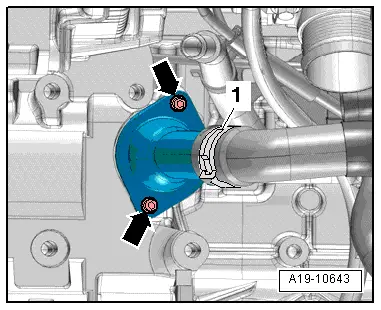
–  Remove the coolant hose from the connection fitting, to do so slacken the hose clamp -1-.
–  Slacken the screws -arrows- using the hinged wrench SW 10 -3185-, screw out with socket insert -T10058- and remove the connection fitting.
  A19-10643
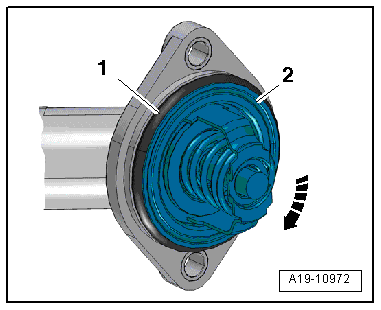
–  Turn the coolant thermostat -2- approx. 15° clockwise -arrow- and remove it from the connection fitting.
–  Remove O-ring -1-.
Install
Installation is performed in the reverse order, pay attention to the following points:
  Note
Replace O-ring.
–  Clean sealing surface for O-ring, if necessary smoothen.
  A19-10972
–  Moisten O-ring -2- with coolant additive.
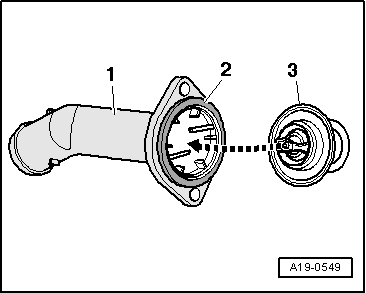
–  Insert the coolant regulator -3- with the O-ring -2-.
  A19-0549
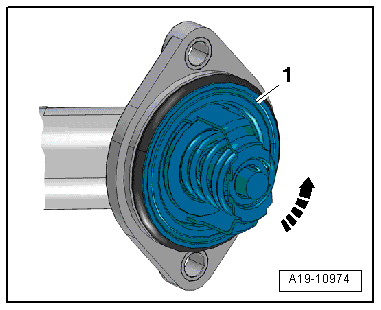
–  Screw in coolant thermostat -1- anti-clockwise as far as the stop -arrow-.
  A19-10974
–  Position the connection fitting onto cylinder block and tighten the screws -arrows- to 13 Nm.
–  Top up coolant → Chapter.
  A19-10643

Removing and installing 4/2 way valve with coolant regulator > < Removing and installing coolant pump