skoda Workshop Repair Guides

Skoda Workshop Service and Repair Manuals

Installing (set the timing) > < Removing and installing toothed belt
Removing
Removing
  Caution
When undertaking all installation work, particularly in the engine compartment due to its cramped construction, please observe the following:
t  Lay lines of all kinds (e.g. for fuel, hydraulic fluid, cooling fluid and refrigerant, brake fluid, vacuum) and electrical lines in such a way that the original line guide is re-established.
t  In order to avoid damage to the cables, ensure that there is adequate free access to all moving or hot components.
  Note
t  Observe safety measures when working on the fuel system → Chapter.
t  Observe rules for cleanliness → Chapter.
t  The engine support does not have to be removed in order to remove the camshaft sprocket.
–  Put the shift lever into neutral position or the selector lever into position „N“ in order to turn the crankshaft.
–  Switch off ignition and withdraw ignition key.
–  Remove engine cover → Chapter.
   
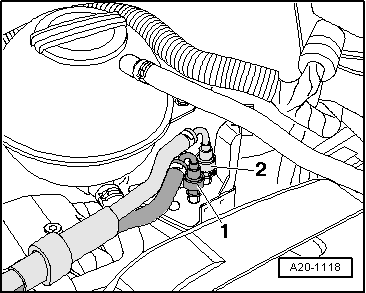
–  Remove fuel feed line -2- and fuel feed line -1-, to do so press in securing ring. Unlock the quick coupling and disconnect → Chapter.
  A20-1118
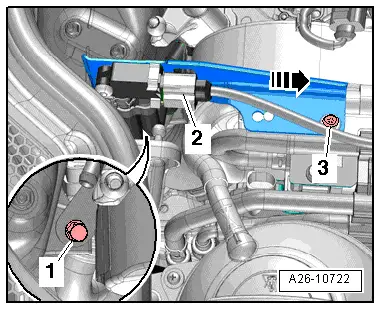
–  Disconnect plug connection -2- at exhaust gas pressure sensor 1 -G450-.
–  Screw out screw -3- and remove bracket with exhaust gas pressure sensor 1 -G450- from the bracket for the additional fuel pump in -direction of arrow-.
–  Place the bracket with the exhaust gas pressure sensor 1 -G450- to the rear.
  Caution
Risk of damage!
The exhaust gas pressure sensor 1 -G450- is very sensitive and must therefore not touch somewhere when laying it down with the bracket.
  A26-10722
–  Release screw -1-.
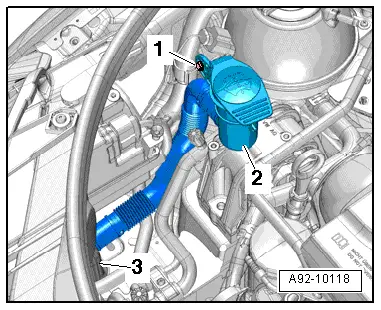
–  Push the filler tube with the filler neck -2- for the washer-fluid reservoir to the side.
  Note
For reasons of clarity the fuel filter is not shown.
  A92-10118
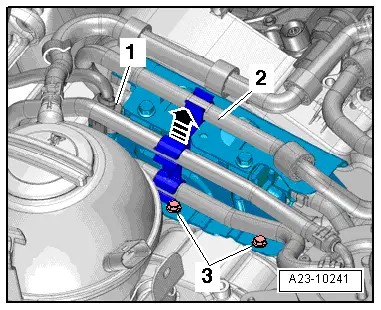
–  Unhook the fuel hose -2- from the bracket.
–  Remove the bracket for the fuel lines upwards -arrow- and lay to the side.
–  Disconnect plug -1- at the additional fuel pump -V393-.
–  Unscrew bolts -3-.
  A23-10241
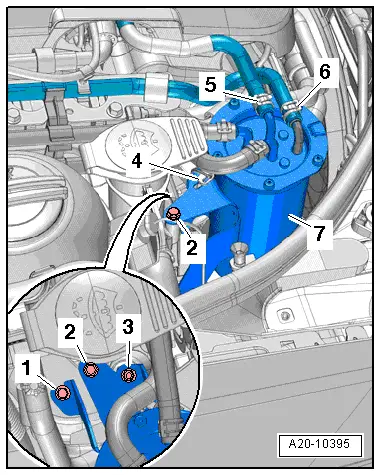
–  Release screw -1- by two turns.
–  Release screw -2- and nut -3-.
–  Unclip bracket -4- for coolant line at fuel filter.
–  Lay the compensation bottle with the hoses connected and the fuel filter with the hoses connected -5- and -6- onto the engine.
  A20-10395
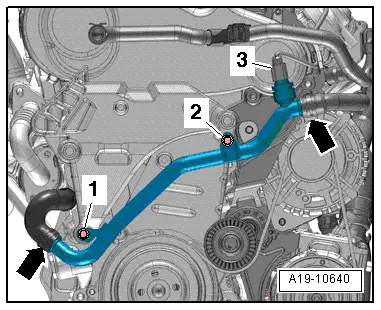
–  Disconnect plug -3- at the coolant temperature sender at radiator outlet -G83-.
–  Release nut -1- and screw -2-.
–  Press the right coolant pipe with the hoses connected -arrows- to the side.
  A19-10640
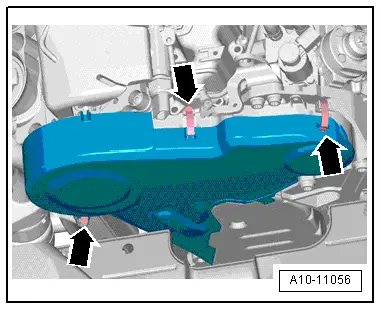
–  Remove top part of toothed belt guard; to do so release retaining clips -arrows-.
–  Remove crankshaft-belt pulley → Chapter.
  Note
Do not lock tensioning element for V-ribbed belt.
  A10-11056
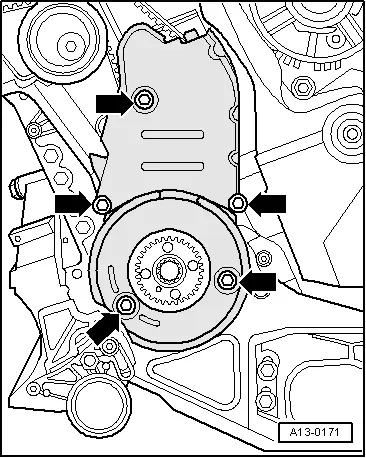
–  Release screws -arrows-.
–  Remove bottom part and middle part of toothed belt guard.
  A13-0171
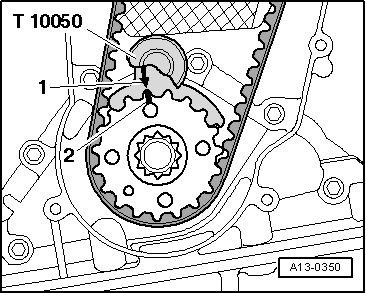
–  Rotate the crankshaft on TDC in direction of rotation of the engine, interlock the crankshaft - toothed belt sprocket with the crankshaft arrester -T10050-. To do so, insert crankshaft arrester from the front side of the toothed belt sprocket into the teeth. Tooth segment of camshaft sprocket must be at the »12 o'clock« position. If this is not the case, turn the crankshaft 360°.
  Note
The markings on the crankshaft - toothed belt sprocket -2- and on the crankshaft arrester -T10050--1- must be aligned. While doing so, the stud of the crankshaft arrester -T10050- must engage in the hole of the sealing flange.
  A13-0350
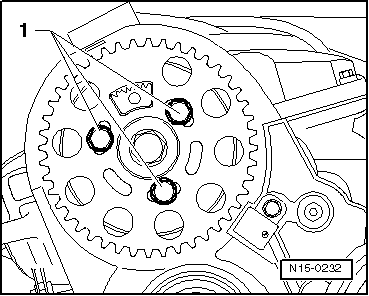
–  Successively release screws -1- for camshaft sprocket, replace screws and do not fully screw in the new screws.
  N15-0232
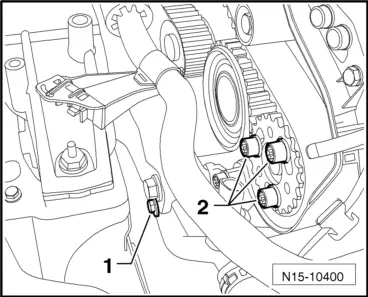
–  Successively release screws -2- for toothed belt gear on the high pressure pump, replace screws and do not fully screw in the new screws.
  N15-10400
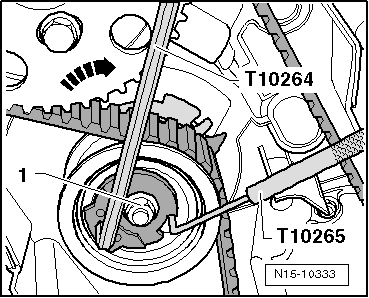
–  Loosen nut -1- for tensioning pulley.
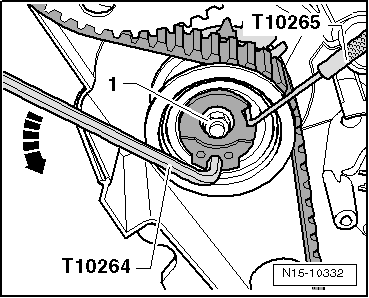
–  Turn the eccentric of the tensioning pulley with the offset screwdriver -T10264- in -direction of arrow- (anti-clockwise) until the tensioning pulley can be interlocked with the rig tool -T10265-.
  N15-10332
–  Afterwards, turn the eccentric of the tensioning pulley with the offset screwdriver -T10264- in -direction of arrow- up to the stop and tighten nut -1- by hand.
  Caution
When installing, risk of damage through reversing the rotation direction of an already used toothed belt.
If the toothed belt is re-installed, mark the direction of rotation with chalk or a felt-tip pen before removing it.
–  First of all remove the toothed belt from the large guide pulley and then from the remaining toothed belt gears.
  N15-10333

Installing (set the timing) > < Removing and installing toothed belt