Vehicle electricsRadio Navigation System
| Removing and installing Radio-Navigation System |
Diagram not available
Note | t
| The part number for the complete Radio-Navigation System is indicated on a sticker on the housing of the Radio-Navigation System! |
| t
| This procedure is valid for the Radio-Navigation System with colour display. The removal of the Radio-Navigation System SatCompass is identical. |
| Special tools and workshop equipment required |
Diagram not available
Note | Ask the customer for the code number of the radio navigation system before removing. If the Radio-Navigation System is replaced, the electronic anti-theft lock should be activated (refer to → Operating Instructions for the radio navigation system). The new code number must be advised to the customer. |
| –
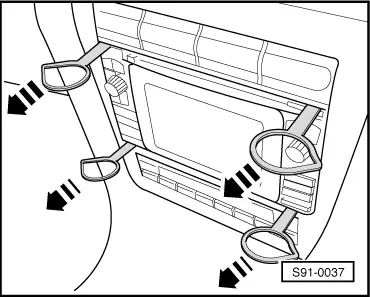
| Insert release tool into the slots until it locks in place. |
|
|
|
| –
| Pull the radio navigation system out of the dash panel by holding at the eyes of the release tool -arrows-. |
| –
| Unlock plug connections and separate. |
|
|
|
| –
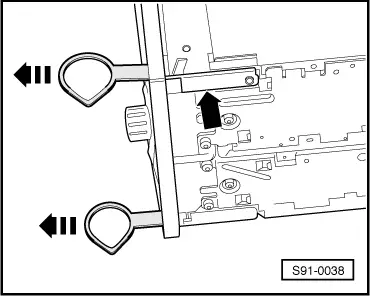
| Press the locking catch -arrow- and pull out the release tool forwards. |
| –
| Fit together plug connections at Radio-Navigation System. |
| –
| Insert radio navigation system into dash panel until it locks in the installation slot. |
Diagram not available
Note | When inserting the radio navigation unit on no account press on the display or on the operating buttons otherwise it will be damaged. |
| If the radio navigation system was replaced: |
|
|
|
07 General