Outback F6-3.0L DOHC (2006)

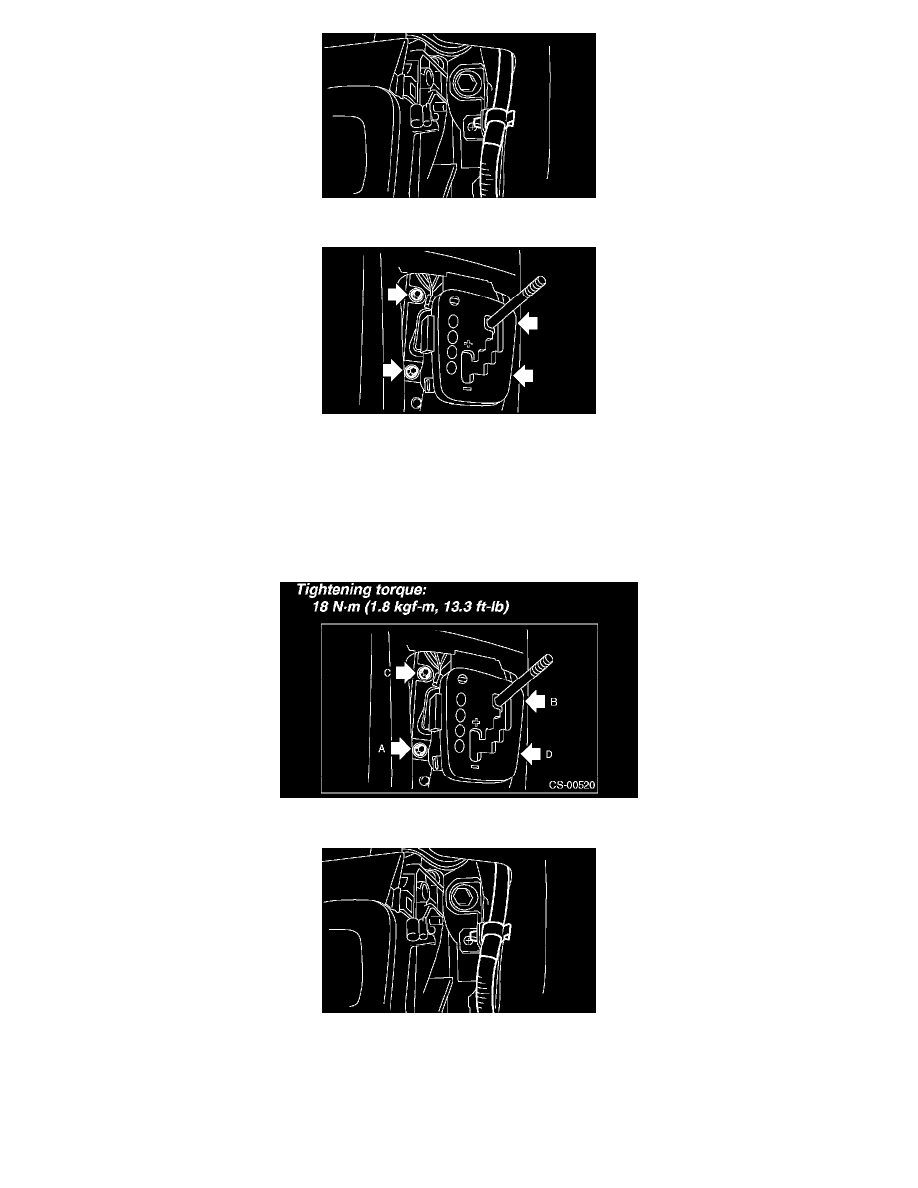
13. Disconnect the connectors, and then remove the four bolts to take out the select lever assembly from vehicle body.
INSTALLATION
1. Set the select lever to vehicle body.
2. Tighten the four bolts to install the select lever to vehicle body, and then connect the connector.
1. Temporarily tighten the bolt A.
2. Tighten the bolt B.
3. Tighten the bolt A.
4. Tighten the bolts C and D.
Tightening torque: 18 Nm (1.8 kgf-m, 13.3 ft. lbs.)
3. Install the harness clips to the bracket.
4. Install the center console.
5. Install the console box.
6. Shift the select lever to "N" range.
7. Lift up the vehicle.
8. Shift the range select lever to the "N" range.
9. Secure the cable to the bracket.
10. Adjust the select cable position.
