
Previa Van DX 4WD L4-2438cc 2.4L DOHC SC MFI (1997)
Installation is in the reverse order of removal.
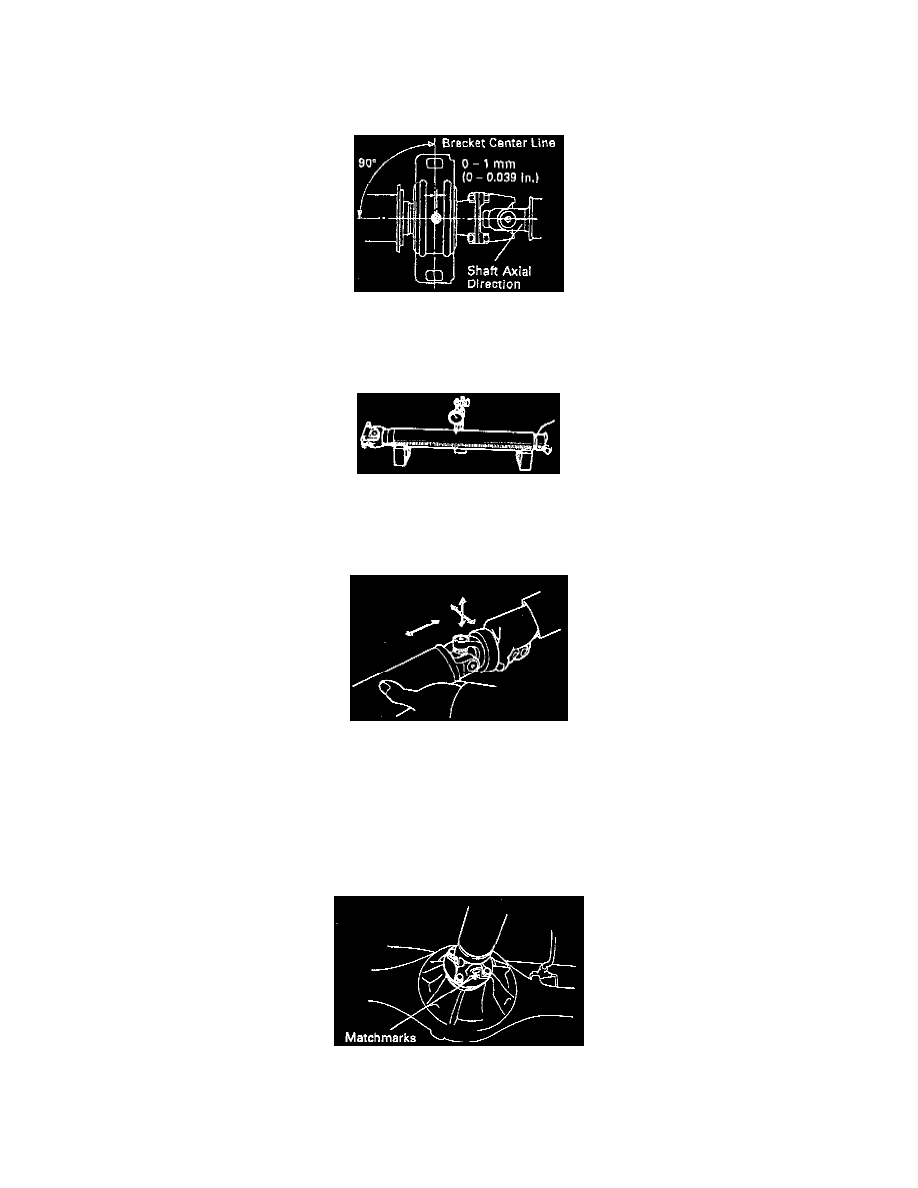
HINT:
-
Make sure the bearing is installed with the drain hole downwards.
-
Adjust the center support bearing to keep the intervals, as shown with the vehicle unladen condition.
-
At the same condition, check that the center line of axial direction. Adjust the bearing if necessary.
FRONT PROPELLER SHAFT INSPECTION
1. Inspect propeller shaft runout.
Using a dial indicator, check the runout of shafts.
Maximum runout: 0.8 mm (0.031 in.)
If the runout exceeds the maximum, replace the propeller shaft.
2. Inspect spider bearing.
Inspect the spider bearings for wear or damage.
Check the spider bearing axial play by turning the yoke of flange while holding the shaft tightly.
Bearing axial play: 0 mm (0 in.)
Rear Propeller Shaft
REAR PROPELLER SHAFT REMOVAL
1. Remove rear propeller shaft.
a. Place matchmarks on the rear differential and propeller shaft flange.
b. Remove the 4 nuts and washers.
Torque: 74 N.m (54 ft. lbs.)