|
Con-rod Bearing Play, Check (with Plastigage)
 Remove Remove
|
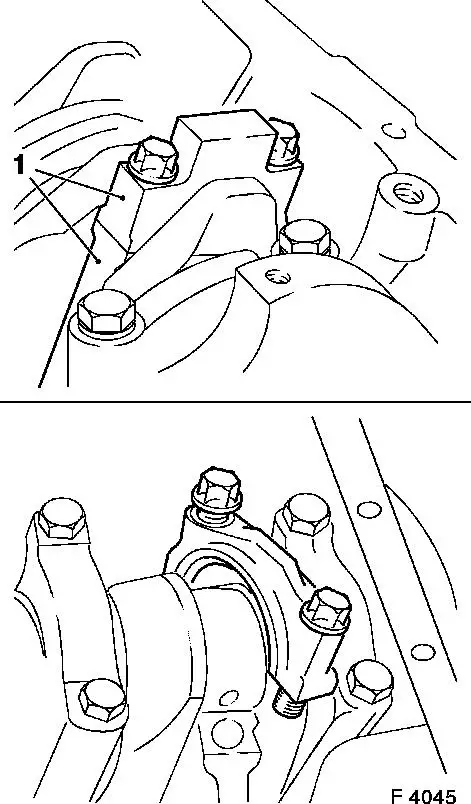
Mark installation position (1) of con-rod bearing cap. Detach
con-rod bearing shell with con-rod bearing cap.
|
|
 Measure
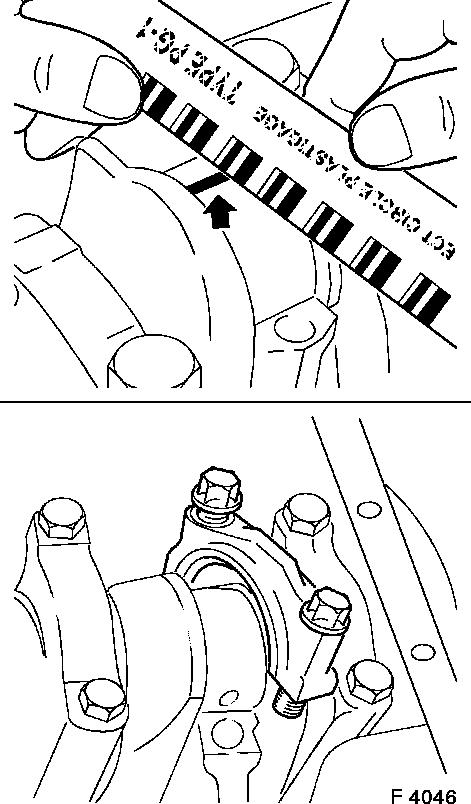
Measure with Plastigage (deformable plastic thread). Plastigage
is available for various tolerance ranges.
Cut thread to width of con-rod bearing and lay axially between
the con-rod bearing journal and con-rod bearing shell. Install
con-rod bearing cap
|
|
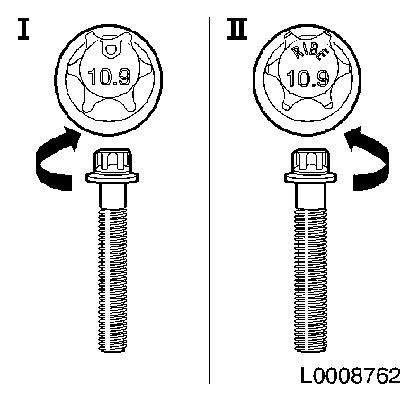
I:
|
M6 bolt:
|
Tightening torque 10 Nm / 7.5 lbf. ft. +60° + 15°
|
|
II:
|
M6.5 bolt:
|
Tightening torque 13 Nm / 9.5 lbf. ft. +60° + 15°
|
|
Caution
To prevent the thread from tearing when removing the con-rod
bearing cap, remove grease from the con-rod bearing journal and
lightly oil con-rod bearing shell. Do not turn the crankshaft.
Measure
|
Detach con-rod bearing cap. Measure width of flattened
Plastigage thread with measurement scale (see illus.).
Do not confuse millimetre and inch details on the measurement
scale.
Permissible con-rod bearing play: 0.013 mm to 0.061 mm
|
|
 Clean Clean
Clean con-rod bearing journal and con-rod bearing shell.
 Install
Lightly lubricate con-rod bearing shells.
Caution
From engine number 19P13554 onwards, strengthened con-rods and
updated con-rod bolts (M6.5) were used - take care that the new
con-rod bolts are used in conjunction with the modified
con-rods.
Fit con-rod bearing shell and con-rod
bearing cap
|
Tightening torque of M6 bolt:
|
10 Nm / 7.5 lbf. ft. + 60° + 15°
|
|
Tightening torque of M6.5 bolt:
|
13 Nm / 9.5 lbf. ft. + 60° + 15°
|
|
