|
Tapered Roller Bearing Outer Rings –
Differential, Remove, Install and adjust Pretension (AF20)
 Remove Remove
Remove transmission – see operation "Transmission, Remove
and Install (AF 20)". Secure converter against falling out.
|
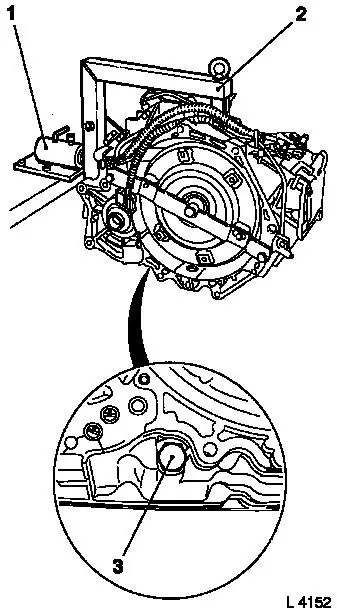
Attach transmission to KM-694-A (2). Attach assembly to KM-113-2
(1).
Remove fluid drain bolt (3), drain transmission fluid and
collect for damage diagnosis – see operation "Transmission
Fluid Condition, Check (AF 13-II/AF 17/AF 20/AF 22)".
Remove converter and fluid pump seal ring – see operation
"Converter and/or Fluid Pump Seal Ring, Replace (AF 13-II/AF 17/AF
20/AF 22)".
|
|
|
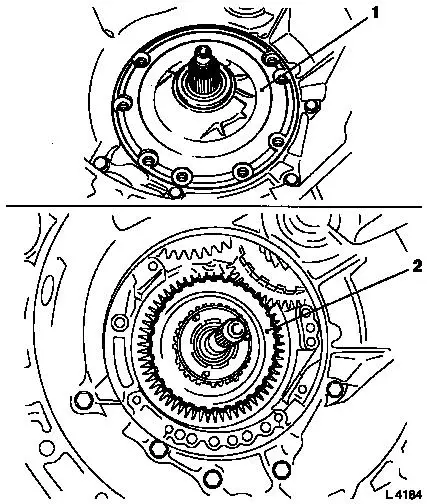
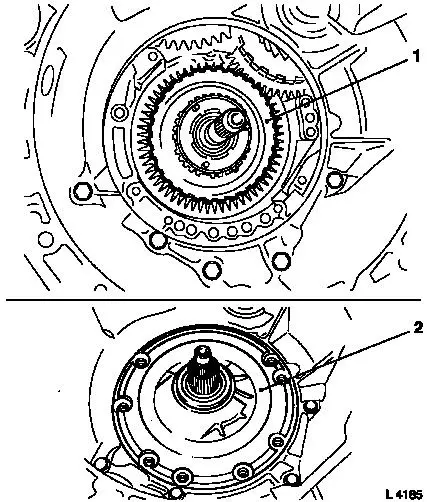
Remove fluid pump assembly (1) with multi-disc brake B1 and B2
– see operation "Fluid Pump Assembly with Multi-disc Brakes
B1 and B2, Remove and Install (AF 20)".
Remove freewheel F1 (2) – see operation "Freewheel F1,
Remove and Install (AF 20)".
Remove differential – see operation "Differential, Remove
and Install (AF 20)".
|
|
Remove both axle shaft seal rings out of main and/or auxiliary
housing with KM-557-A – do not damage sealing surfaces.
|
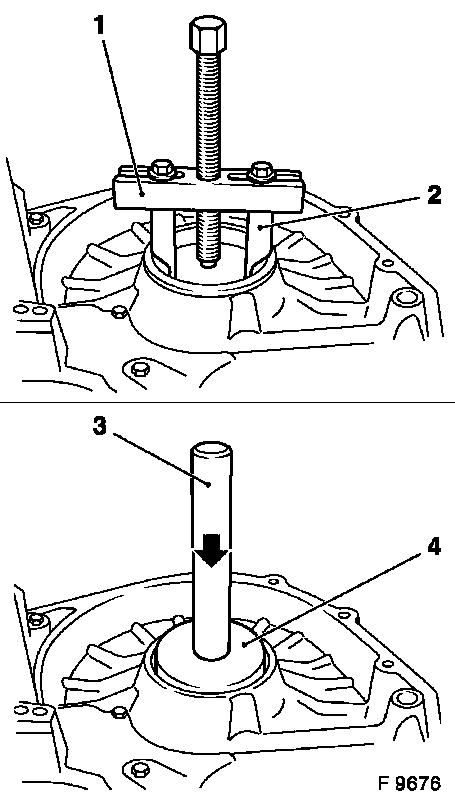
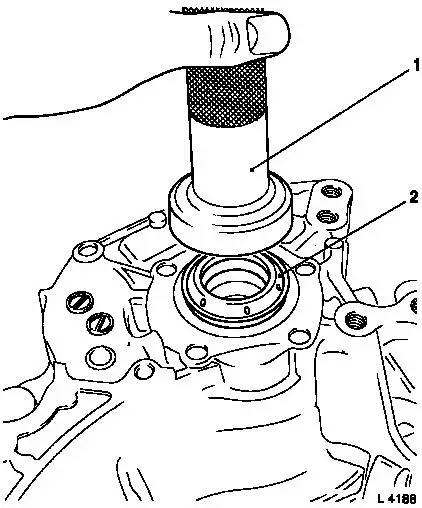
Detach both tapered roller bearing outer races together with the
thrust washers using KM-210-B (1), KM-709 (2) – remover hooks
grip in the recess under the thrust washer. Before detaching (tool
inserted as described and slightly pre-tensioned), heat housing to
approx. 80 °C with hot air blower.
 Install
Press new tapered roller bearing outer race with thrust washer
into auxiliary housing – use KM-695 and KM-305. Press new
tapered roller bearing outer race with thrust washer into main
housing – use KM-710 (4) and KM-305 (3). For new tapered
roller bearing outer race in main housing, use the smallest thrust
washer thickness from the "Aftersales" division.
|
|
 Adjust Adjust
Adjust pretension of differential tapered roller bearing: Insert
differential into main housing. Attach auxiliary housing to main
housing – tightening torque 30 Nm / 22 lbf. ft.
 Measure
|
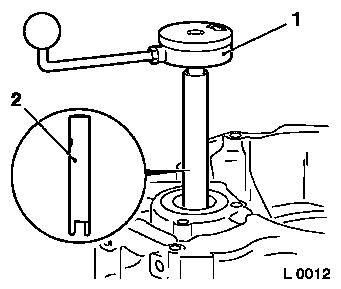
Measure starting torque of
differential with KM-995-A (1) and MKM-536-A (2):
|
Measurement value:
|
|
New bearing: 0.7 to 1.2 Nm / 0.5 to 0.9 lbf. ft.
|
|
Run-in bearing: 0.35 to 0.6 Nm / 0.2 to 0.4 lbf. ft.
|
|
|
If necessary, correct starting torque by installing a suitable
thrust washer from the "Aftersales" division.
Remove
Remove auxiliary housing from main housing. Remove differential
out of main housing. If necessary, remove tapered roller bearing
outer race of main housing (only if adjustment is necessary).
Install
|
After adjusting pretension: Install axle shaft seal rings (2) in
main and auxiliary housing – coat seal rings with
transmission fluid and drive in flush with KM-519 (1).
|
|
Install differential – see operation "Differential, Remove
and Install (AF 20)".
|
Install freewheel F1 (1) – see operation "Freewheel F1,
Remove and Install (AF 20)".
Install fluid pump assembly (2) with multi-disc brake B1 and B2
– see operation "Fluid Pump Assembly with Multi-disc Brakes
B1 and B2, Remove and Install (AF 20)".
Install fluid pump seal ring and converter – see operation
"Converter and/or Fluid Pump Seal Ring, Replace (AF 13-II/AF 17/AF
20/AF 22)". Secure converter against falling out.
|
|
|
Attach fluid drain bolt (3) with new seal ring to transmission
– tightening torque 40 Nm / 29.5 lbf. ft.
Remove transmission assembly from KM-113-2 (1) with
KM-694-A.
Remove transmission from KM-694-A (2).
Install transmission – see operation "Transmission, Remove
and Install (AF 20)".
Charge transmission fluid.
 Inspect
Check and correct level of transmission fluid – see
operation "Transmission Fluid Level, Check and Correct (AF 13-II/AF
17/AF 20/AF 22)".
|
|
|
