|
Synchromesh Body Assembly, Remove and Install (F17
new)
Note: Transmission
remains installed.
 Remove Remove
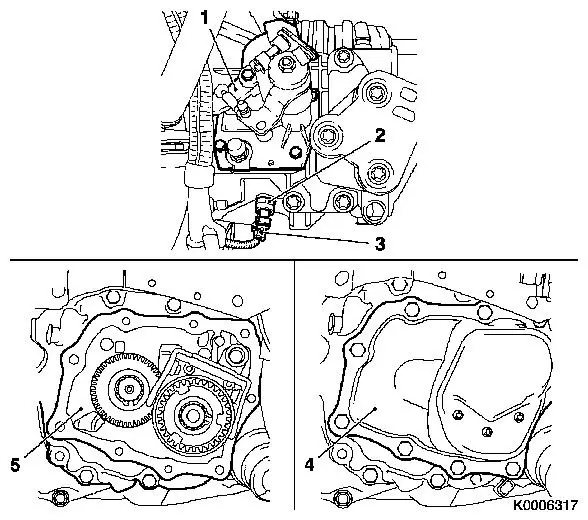
| 1. |
Remove shift mechanism cover (1)
| • |
see operation "Gearshift Cover, Remove and Install and/or Seal
(F13/F17/F17+/F18)"
|
|
| 2. |
Remove reversing lamp switch (2)
| • |
Disconnect reversing lamp (3) switch wiring harness plug
|
| • |
Unscrew reversing lamp switch
|
|
| 3. |
Remove end shield (4) cover
| • |
See operation "Gasket for End Shield Cover, Replace
(F13/F17/F17+/F18)".
|
|
| 4. |
Remove end shield (5)
| • |
See operation "Gasket for End Shield, Replace
(F13/F17/F17+/F18)".
|
|
|
|
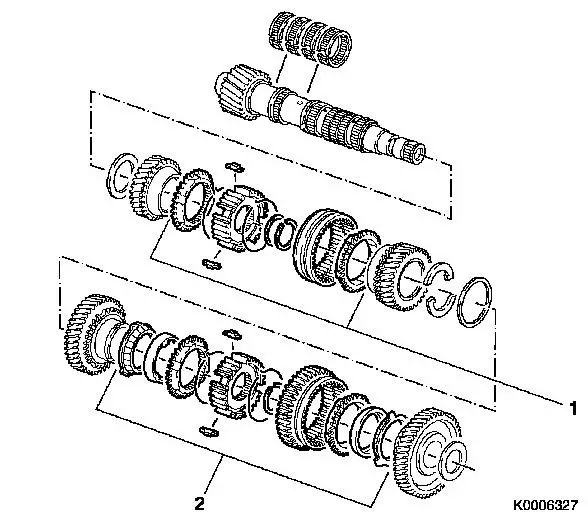
| 5. |
Remove main shaft
| • |
see operation "End Shield, Dismantle and Assemble (F17
new)"
|
|
| 6. |
Dismantle main shaft
| • |
see operation "Main Shaft, Dismantle and Assemble (F17 New)
|
|
| 7. |
Check synchromesh body assembly
Note: Synchro body
assembly for 5th gear is removed and installed within the scope of
the operation "End Shield, Dismantle and Assemble (F17 New)".
| • |
Check affected synchromesh body assembly and replace if
necessary
|
1
|
3rd/4th gear synchromesh body assembly
|
|
2
|
1st/2nd gear synchromesh body assembly
|
|
|
|
|
 Install
Important: Lubricate rotating
parts on their bearing, running, seating, and pressure surfaces
using transmission fluid. If a synchromesh body assembly has been
completely dismantled then the following method of procedure shall
be observed for assembly.
|
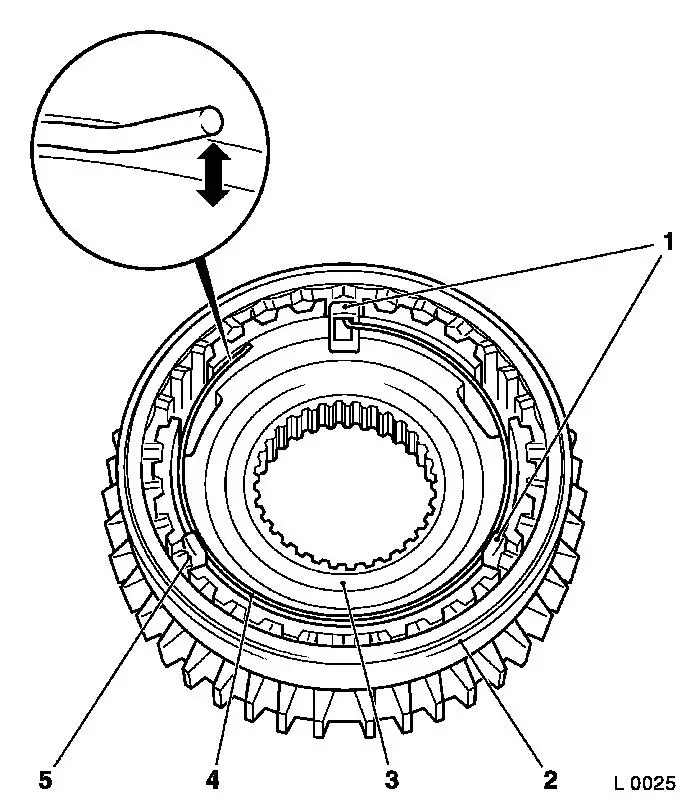
| 8. |
Assemble synchromesh body
| • |
Insert synchromesh body (3) into shifter collar (2).
|
| • |
Insert sliding blocks (1, 5)
Note: With open end to
synchromesh body. Insert synchroniser springs (4) on both sides.
Free end of synchromesh body lifts when in correct position
(arrow). If necessary, insert synchroniser spring offset by
180°. Offset end of synchroniser spring will engage in a slide
block.
|
|
| 9. |
Assemble main shaft
| • |
see operation "Main Shaft, Dismantle and Assemble (F17 New)
|
|
|
|
| 10. |
Install main shaft
| • |
see operation "End Shield, Dismantle and Assemble (F17
new)"
|
|
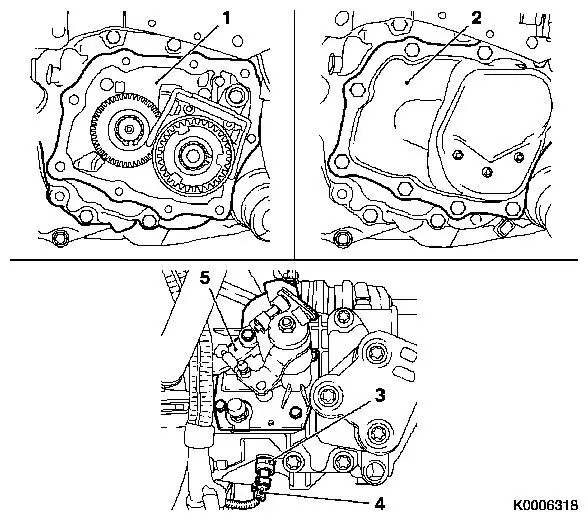
| 11. |
Install end shield (1)
Note: Note magnet.
| • |
See operation "Gasket for End Shield, Replace
(F13/F17/F17+/F18)".
|
|
| 12. |
Fit end shield (2) cover
| • |
See operation "Gasket for End Shield Cover, Replace
(F13/F17/F17+/F18)".
|
|
| 13. |
Fit gearshift cover (5)
| • |
see operation "Gearshift Cover, Remove, Install and/or Seal
(F17)"
|
|
| 14. |
Transmission Fluid Level, Check and Correct
| • |
see Operation "Check and Correct Transmission Fluid Level
(F13/F17/F17+/F18)"
|
|
| 15. |
Fit reversing lamp switch (3)
| • |
insert with new seal ring
|
| • |
Tighten reversing lamp switch
| – |
Tightening torque 20 Nm
|
|
| • |
Connect wiring harness plug (4)
|
|
|
|
| 16. |
Check gearshift
| • |
Check ease of gear shifting with vehicle standing, engine
running and clutch disengaged.
|
|
|
