|
Replace Front Complete
 Remove Remove
Important: Disconnect battery and
wait 1 minute for the capacitor to discharge.
|
| 1. |
Disconnect the battery
|
| 3. |
Detach radiator grille
|
| 4. |
Remove front panelling
|
| 6. |
Detach impact absorber
|
| 7. |
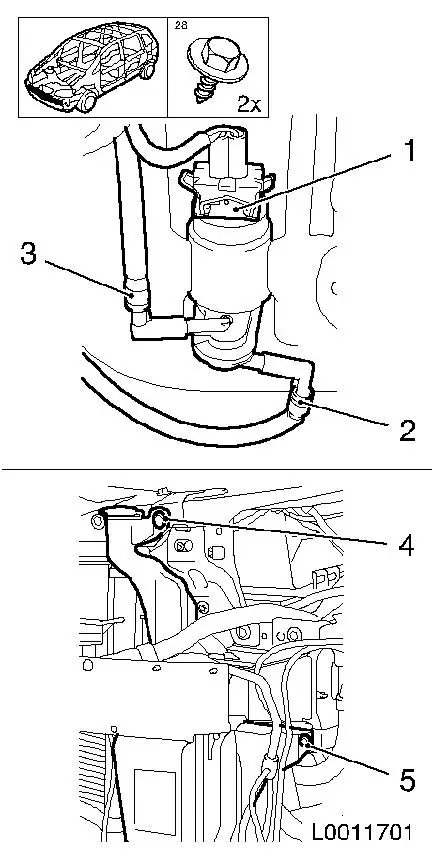
Remove washing water container
| • |
Disconnect windscreen washer pump wiring harness plug (1)
|
| • |
Detach windscreen wash system (2) from pump
|
| • |
Detach rear window wash system (3) from pump
|
| • |
Unclip 2x hose from guide
|
| • |
Unscrew 2x bolt (4) and (5)
|
|
|
|
| 8. |
For vehicles with high-pressure headlamp wash system:
disconnect pump wiring harness plug
|
| 9. |
Detach impact absorber
|
| 10. |
Detach right and left airbag sensors
| • |
Disconnect wiring harness plug.
|
|
|
|
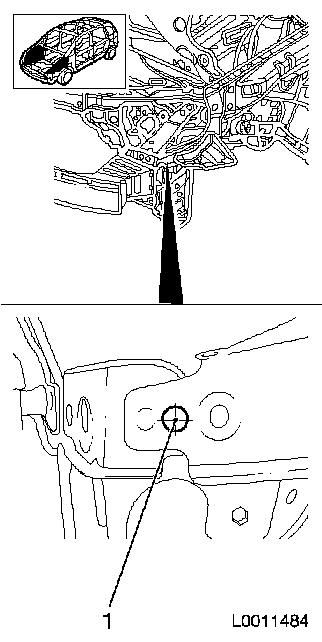
| 11. |
Detach right and left radiator brackets
|
|
|
| 12. |
Remove small components from top right front
| • |
Remove 2x bonnet buffer
|
|
| 13. |
Remove bonnet closure (lock mechanism) 
|
| 14. |
Detach air filter housing assembly
- Z 14 XEL, Z 14 XEP
- Z 16 XEP
- Z 18 XE
- Z 20 LEL
- Z 17 DTL, Z 17 DTH
|
| 15. |
Slacken resonator
| • |
Pull tube from centre top front guide
|
|
| 16. |
Remove top front
| • |
Unscrew 6x bolt (1) and (2) from centre top front
|
| • |
Drill out 2x spot weld (I) and (II) at right top front
|
| • |
Unscrew 4 bolts (3) and (4) at right and left top front
|
|
|
|
 Install
| 17. |
Install top front right and left
Note: During production
the top front is spot welded to the front frame longitudinal member
and the wheel housing. These welds are not included in service
repairs.
|
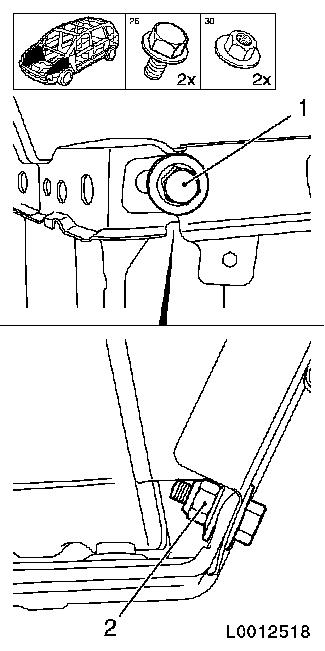
| 18. |
Fasten radiator bracket
|
| 19. |
Place resonator on radiator
|
| 20. |
Attach centre top front
|
| 21. |
Adjust top front
Note: Observe body
dimension chart.
|
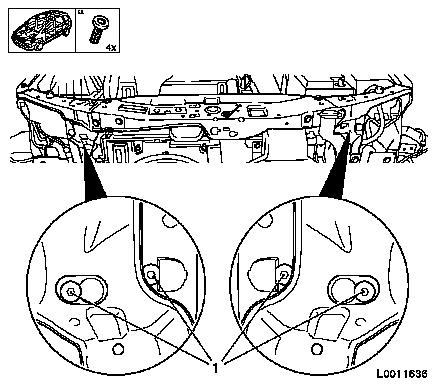
| 22. |
Drill holes (1) at right and left side top front
Note: Drill each hole
through the wheel housing, side front and side member closure
plate. Deburr and prime the holes.
|
|
|
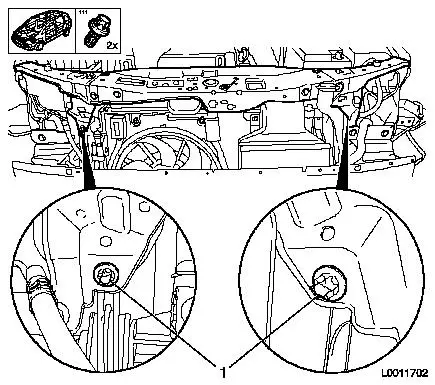
| 23. |
Insert bolt (1) 90 568 791 into side top front on right and
left and screw on nut (2) 90 538 128
|
|
|
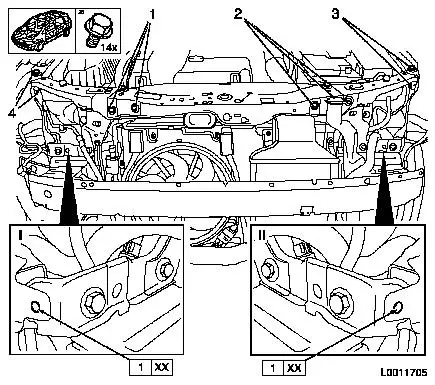
| 24. |
Tighten top front
| • |
Tighten 4x bolt for upper front on left and right of body 20 Nm
|
| • |
Tighten 2x bolt with 2x nut on upper front to the left and
right sides 20 Nm
|
| • |
Tighten 6x bolt upper front centre 20
Nm
|
|
| 25. |
Seal cavity
Note: Observe corrosion
protection measures for protective wax. Apply cavity sealing /
protective wax to the mounting surfaces and connecting flanges.
|
| 26. |
Fasten resonator
| • |
Slide tube into top front centre guide
|
|
| 27. |
Install air filter housing assembly
- Z 14 XEL, Z 14 XEP
- Z 16 XEP
- Z 18 XE
- Z 20 LEL
- Z 17 DTL, Z 17 DTH
|
| 28. |
Install bonnet closure (lock mechanism)
|
| 29. |
Install top front right and left small components
| • |
Install 2x bonnet buffer
|
| • |
Install 2x headlamp nut
|
|
| 30. |
Install right and left airbag sensors
| • |
Connect wiring harness plug
|
|
| 31. |
Attach impact absorber
|
| 32. |
Install wash water container
| • |
Clip 2x hose into guide
|
| • |
Attach rear window wash system hose to pump
|
| • |
Attach front window wash system hose to pump
|
| • |
Connect windscreen washer pump wiring harness plug
|
|
| 33. |
For vehicles with high-pressure headlamp wash system: connect
pump wiring harness plug
|
| 34. |
Attach impact absorber
|
| 36. |
Attach front panelling
|
| 37. |
Install radiator grille
Note: For radiator
grilles up to MY 07.5, speed nuts must be used on the front at the
top and the radiator grille must be fastened with 4x bolts instead
of 4x body-bound rivets.
|
| 40. |
Program volatile memory
|
|
