|
Front member (impact absorber) bracket, remove and
install
 Remove Remove
| 1. |
Remove front panelling
|
| 3. |
Detach impact absorber
|
| 4. |
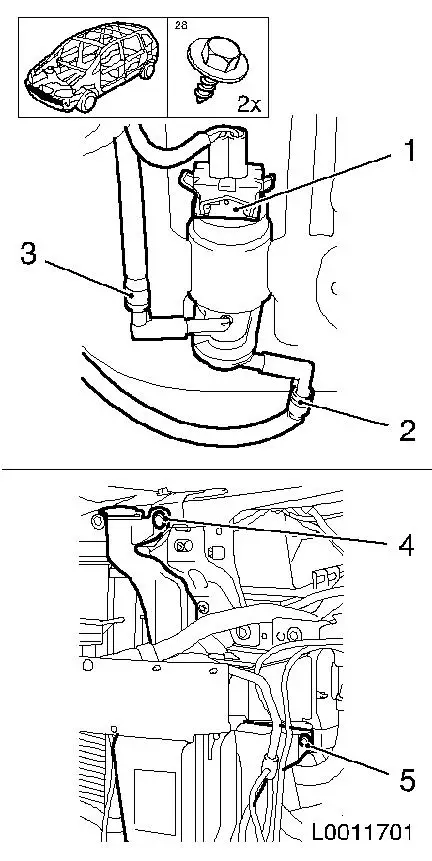
Remove washing water container
| • |
Disconnect windscreen washer pump wiring harness plug (1)
|
| • |
Detach windscreen wash system (2) from pump
|
| • |
Detach rear window wash system (3) from pump
|
| • |
Unclip 2x hose from guide
|
| • |
Unscrew 2x bolt (4) and (5)
|
|
|
|
| 5. |
For vehicles with high-pressure headlamp wash system:
disconnect pump wiring harness plug
|
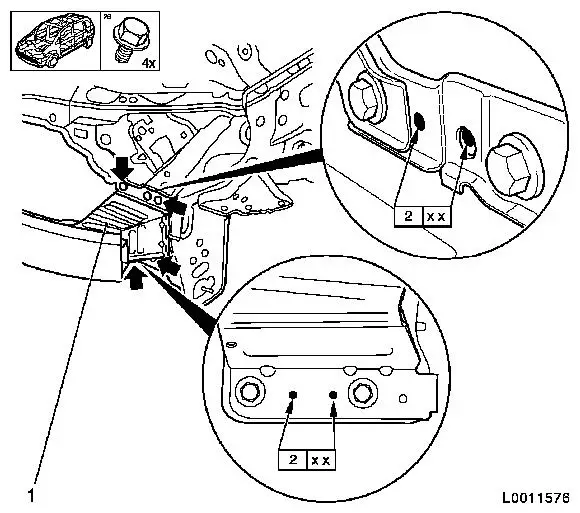
| 6. |
Detach impact absorber (1)
Note: Depending on the
degree of damage, one or both impact absorbers must be replaced.
Look out for twisted screwing points and bent attachment surfaces
on the front member.
Note: During
production, impact absorbers are spot-welded to the side member
closure plate. These welds are not replaced during service.
| • |
Drill out 4x spot weld (I) and (II)
|
| • |
Unscrew 4x bolt (arrows)
|
|
|
|
 Install
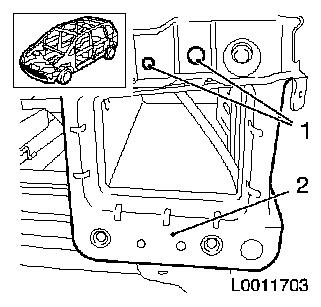
| 7. |
Prime connecting flange side member (2) and drilled holes (1)
in top front
|
|
|
Important: When replacing the
impact absorber, the new parts do not require painting in the
service department.
|
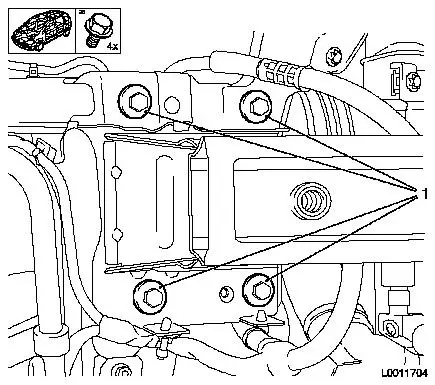
| 8. |
Attach impact absorber
| • |
Tighten 4x bolt (1) 20 Nm
|
| • |
Mark the heads of the bolts with paint
|
|
|
|
| 9. |
Apply cavity sealing / protective wax to the mounting surfaces
and connecting flanges
Note: Observe
protective wax corrosion protection measures.
|
| 10. |
Attach wiring harness to impact absorber
|
| 11. |
Install wash water container
| • |
Clip 2x hose into guide
|
| • |
Attach rear window wash system hose to pump
|
| • |
Attach front window wash system hose to pump
|
| • |
Connect windscreen washer pump wiring harness plug
|
|
| 12. |
For vehicles with high-pressure headlamp wash system: connect
pump wiring harness plug
|
| 13. |
Attach impact absorber
|
| 15. |
Attach front panelling
|
|
