|
Remove and install rear window folding steelwork
cover - L67
 Remove Remove
| 1. |
Detach rear window panelling 
|
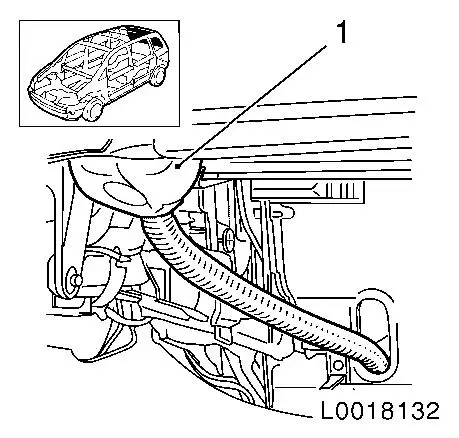
| 2. |
Detach water drain hose
| • |
Pull off 2x water drain hoses (1) in the area of load
compartment / rear window
Note: Water drain hose
is inserted with fast-setting adhesive.
|
|
|
|
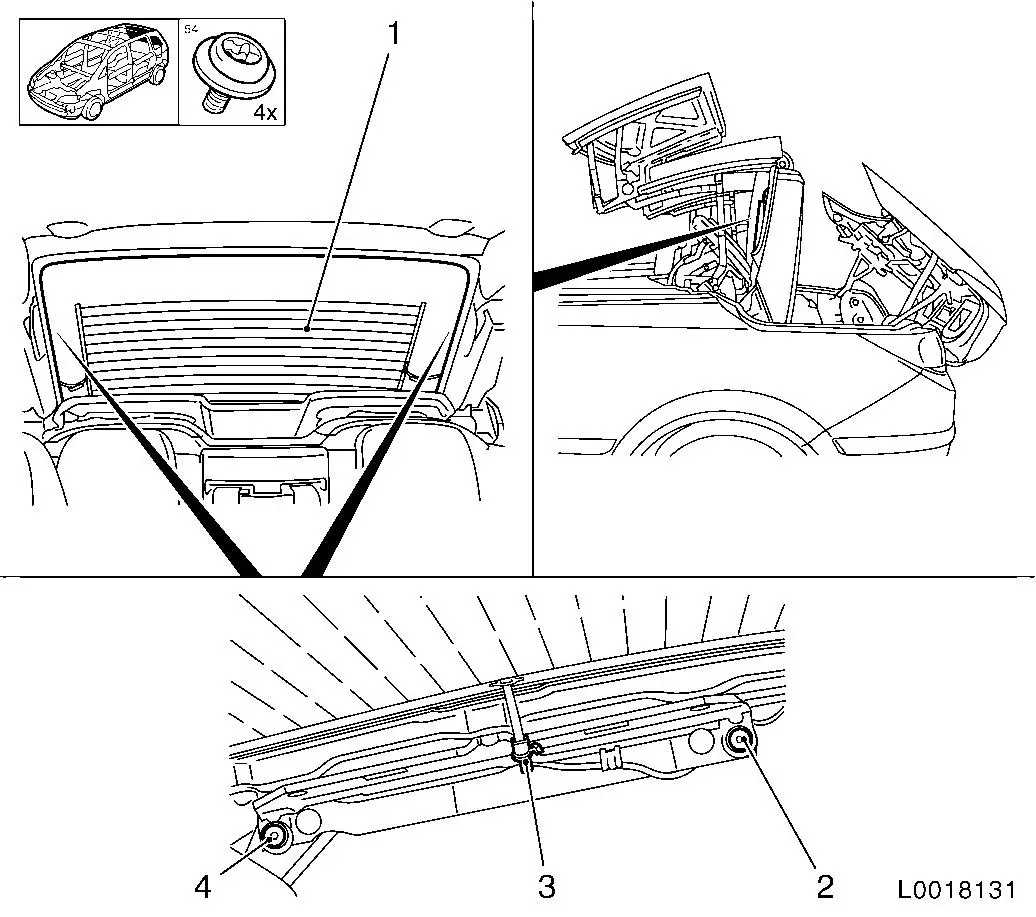
| 3. |
Loosen rear window (1)
Note: Mark installation
position.
| • |
Disconnect 2x wiring harness plugs (3) for heated rear
screen
|
| • |
Unscrew 2x bolts at bottom (4)
|
| • |
Loosen 2x top screws (2)
|
|
| 4. |
Remove rear window
Note: 2nd mechanic
required.
| • |
Remove rear window upwards
|
|
|
|
|
| 5. |
Detach rear window consoles (1) - both sides
Note: Mark attachment
position to rear window
| • |
Unscrew 3x screws (arrows) - left side
|
| • |
Unscrew 3x screws (arrows) - right side
|
|
|
|
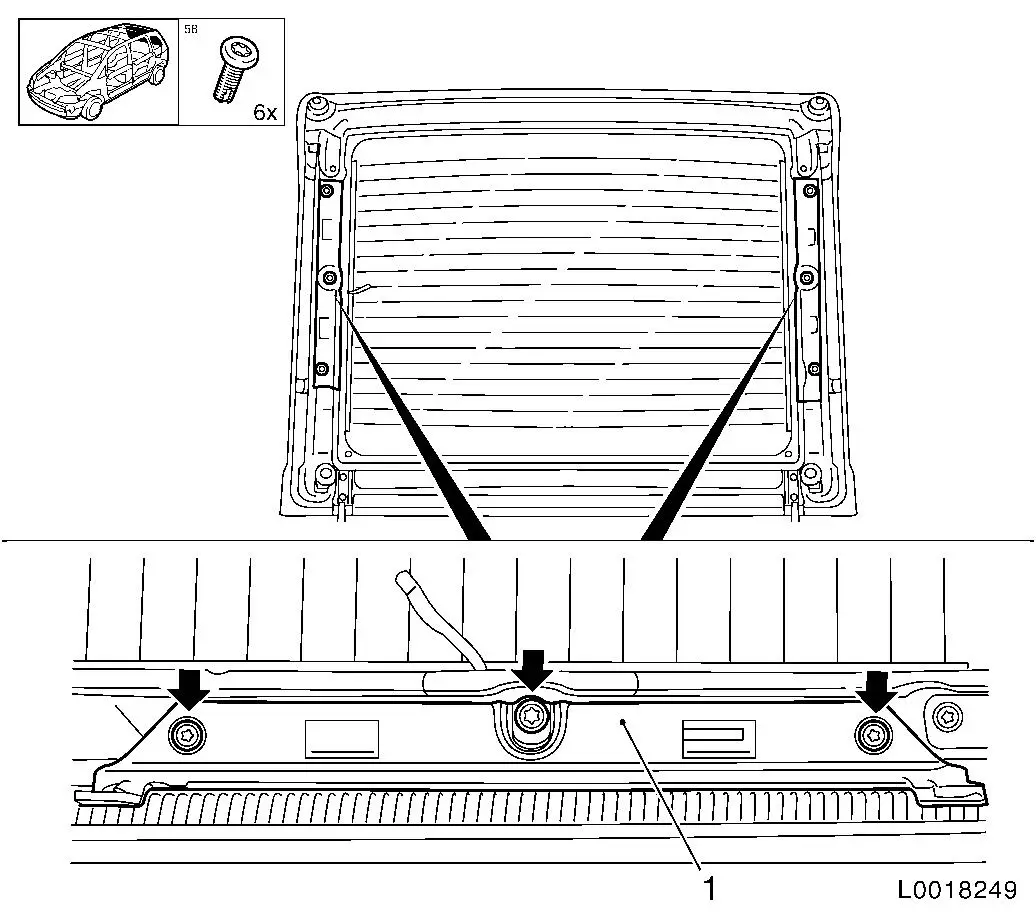
| 6. |
Remove parcel shelf brackets (1) - both sides
| • |
Unscrew screws (2) - both sides
|
| • |
Remove from guides - both sides
|
|
|
|
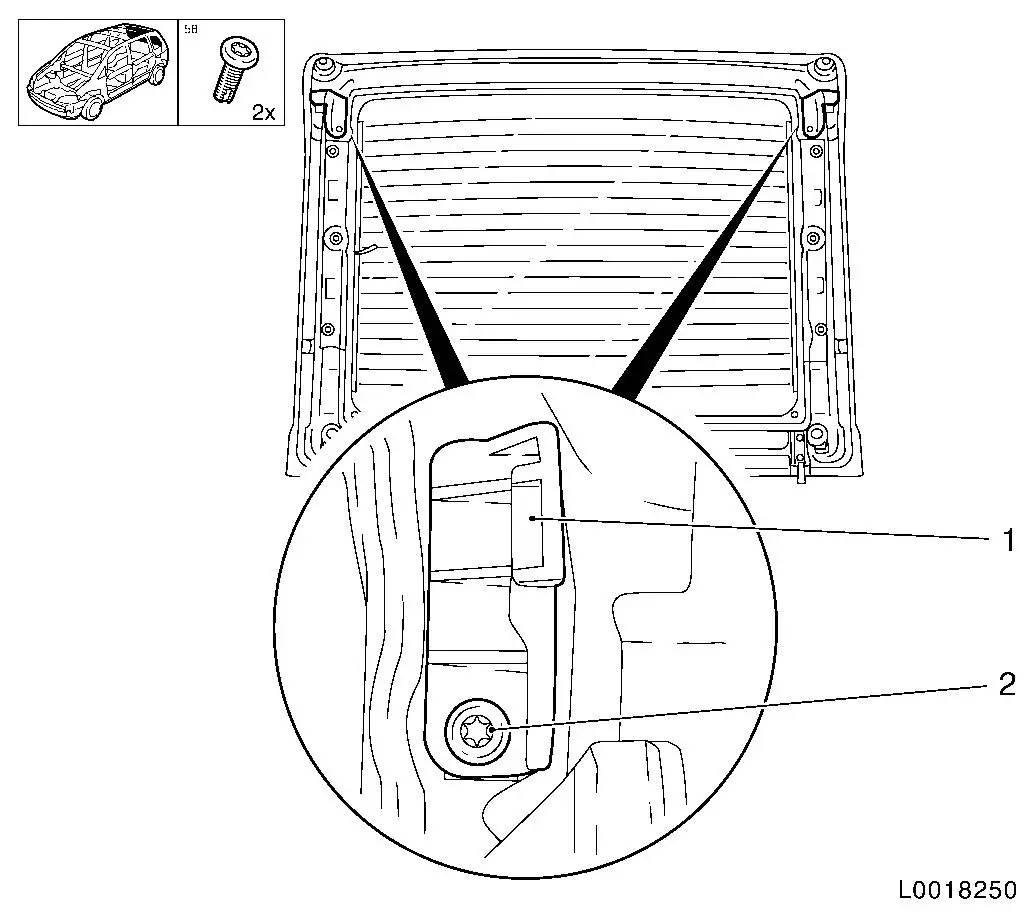
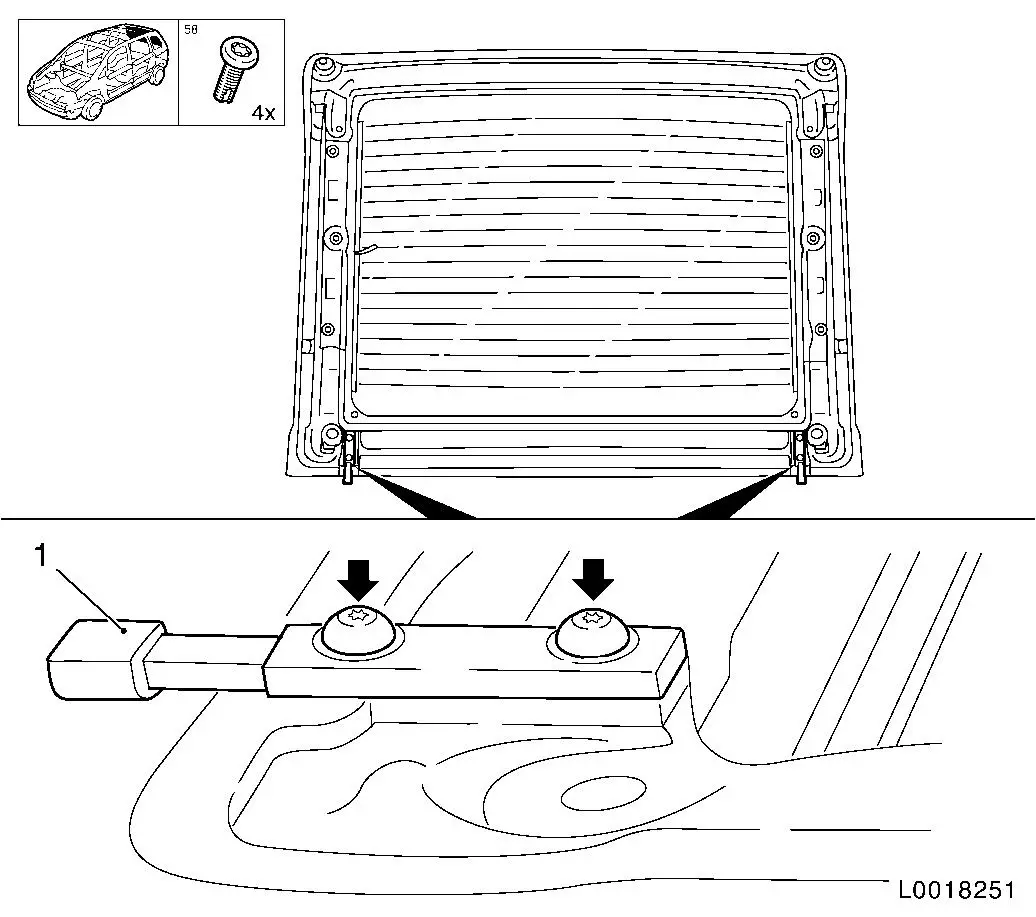
| 7. |
Detach rear window centering (1) - both sides
| • |
Unscrew 2x screws (arrows) - left side
|
|
|
 Install
| 8. |
Attach left rear window centering
| • |
Tighten 2x bolts 8 Nm
Note: Screws are
microencapsulated and must be replaced! Threads re-cut!
|
|
| 9. |
Attach right rear window centering
| • |
Tighten 2x bolts 8 Nm
Note: Screws are
microencapsulated and must be replaced! Threads re-cut!
|
|
| 10. |
Attach left parcel shelf bracket
| • |
Tighten bolt 13 Nm
Note: Screws are
microencapsulated and must be replaced! Threads re-cut!
|
|
| 11. |
Attach right parcel shelf bracket
| • |
Tighten bolt 13 Nm
Note: Screws are
microencapsulated and must be replaced! Threads re-cut!
|
|
| 12. |
Attach left rear rear window console
Note: Pay attention to
marks.
Note: Screws are
microencapsulated and must be replaced! Threads re-cut!
|
| 13. |
Attach right rear window console
Note: Pay attention to
marks.
Note: Screws are
microencapsulated and must be replaced! Threads re-cut!
|
| 14. |
Insert rear window
Note: 2nd mechanic
required.
| • |
Insert rear window from above
|
| • |
Screw in 2x bolts, top
Note: Screws are
microencapsulated and must be replaced! Threads re-cut!
|
|
| 15. |
Install rear window
Note: Pay attention to
marks
| • |
Tighten 4x bolts 9 Nm
Note: Screws are
microencapsulated and must be replaced! Threads re-cut!
|
| • |
Connect 2x wiring harness plug for heated rear screen
|
| • |
Insert 2x water drain hose and attach with fast-setting
adhesive
|
|
| 16. |
Attach rear window panelling
|
|
