|
Piston with Con-rod, Remove and Install
 Remove Remove
| 3. |
Raise vehicle by its full height
|
| 4. |
Place collecting basin underneath.
|
| 5. |
Drain engine oil
| • |
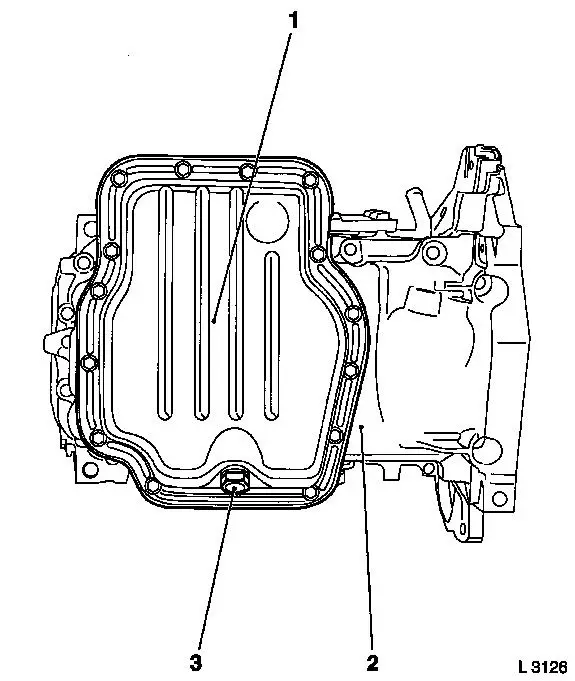
Unscrew oil drain bolt (3)
|
| • |
Tighten oil drain bolt 78.4 Nm
|
|
| 6. |
Detach lower part of oil pan (1) from upper part of oil pan (2)
with KM-J-37228
|
|
|
| 7. |
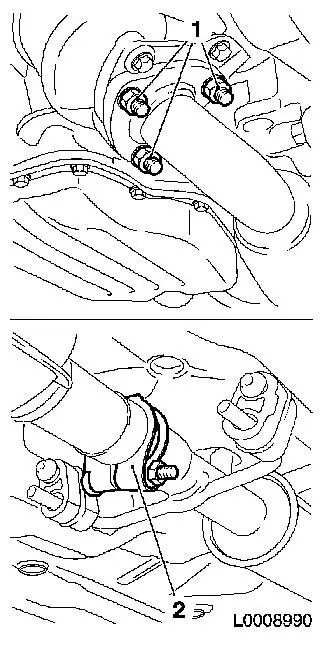
Remove front exhaust pipe
| • |
Detach from start-up catalytic converter
|
| • |
Detach from central silencer
|
|
|
|
| 8. |
Detach oil dipstick guide tube from upper part of oil pan
|
|
|
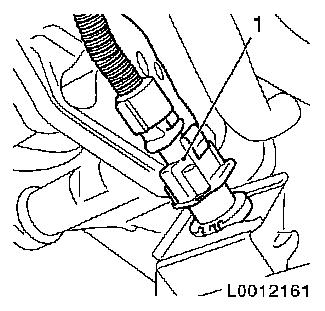
| 9. |
Disconnect engine oil level sensor wiring harness plug (1)
|
|
|
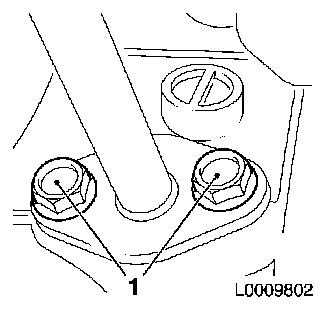
| 10. |
Detach upper part of oil pan from cylinder block
| • |
Unscrew bolt (2) and (3)
|
| • |
Separate upper part of oil pan from cylinder block with a broad
spatula
|
|
|
|
| 11. |
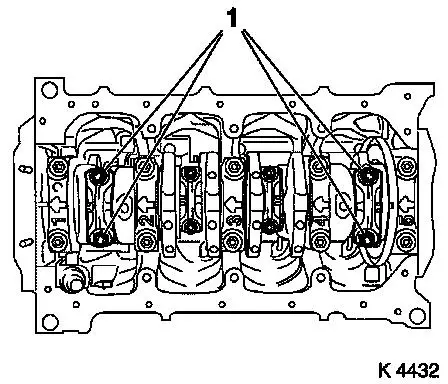
Remove con-rod bearing cap
| • |
Cylinder 2 and 3
| – |
Detach 4x screw connections (1)
|
|
| • |
Remove con-rod bearing cap
Note: Note
identification mark on con-rod bearing cap and con-rod. Apply
identification mark if not present
|
|
|

|
| 12. |
Turn crankshaft
| • |
Turn (180°) in direction of engine rotation
|
|
| 13. |
Remove con-rod bearing cap
| • |
Cylinder 1 and 4
| – |
Detach 4x screw connections (1)
|
|
| • |
Remove con-rod bearing cap
Note: Note
identification mark on con-rod bearing cap and con-rod. Apply
identification mark if not present
|
|
|
|
| 14. |
Lower vehicle by its full height
|
| 15. |
Take out 4x piston
| • |
Remove combustion residue
|
|
| 16. |
Remove con-rod bearing shells from con-rod and con-rod bearing
cap
Note: Mark con-rod
bearing shells and set aside in order
|
| 17. |
Visually check components
| • |
Crank drive, valve control, cylinder head, cylinder block,
exhaust manifold, turbocharger, valve drive, ribbed V-belt
drive
|
|
 Install
| 18. |
Install con-rod bearing shells
Note: Note marking
|
| 19. |
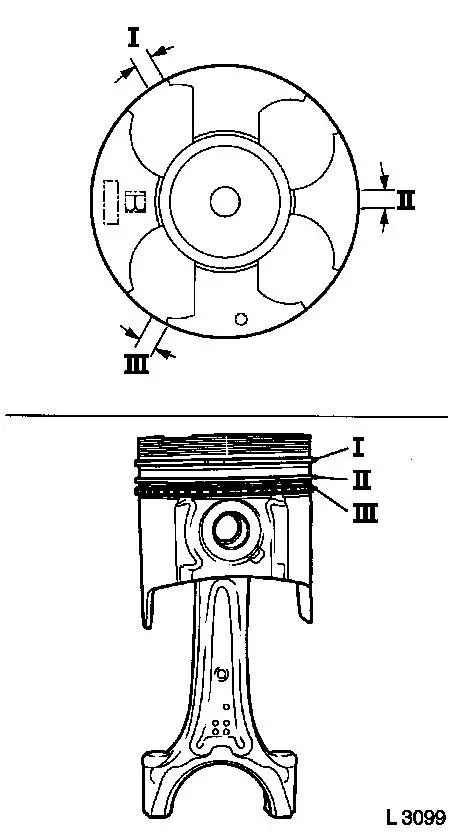
Adjust piston rings
| • |
Arrange joints of piston rings offset by 120°
| – |
I Rectangular compression ring (first compression ring)
|
| – |
II Tapered compression ring (second compression ring)
|
| – |
III bevelled cap ring (oil scraper ring)
|
|
|
|
|
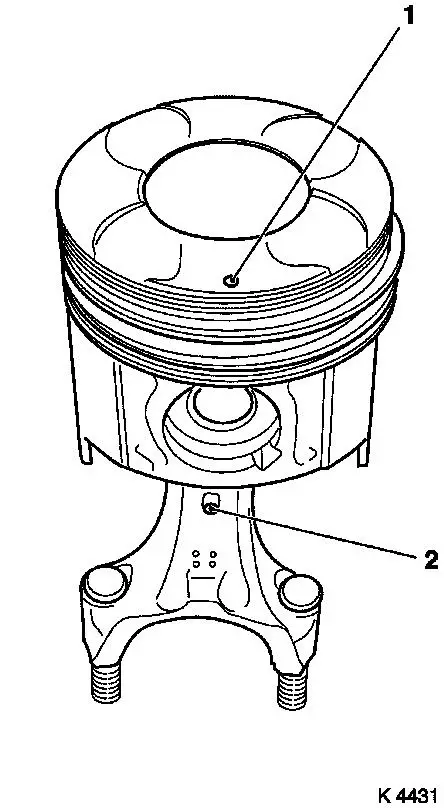
Important: Marking (1) on piston
head and marking (2) on con-rod point towards the engine timing
side
|
| 20. |
Install piston with con-rod in cylinder block
| • |
Force piston rings together with piston ring tensioning
belt
|
|
|
|
| 21. |
Raise vehicle by its full height
|
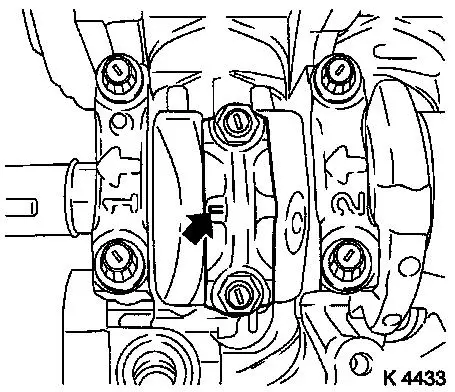
Important: Note cylinder sequence
marking on con-rod bearing cap and con-rod. Narrow bead (arrow)
points towards engine timing side
|
| 22. |
Install con-rod bearing cap
| • |
Tighten 2x new screwed joint 24.5 Nm +
100° + 15°
|
|
|
|
| 23. |
Turn crankshaft
| • |
Turn (180°) in direction of engine rotation
|
|
| 24. |
Lower vehicle by its full height
|
Important: Marking (1) on piston
head and marking (2) on con-rod point towards the engine timing
side
|
| 25. |
Install piston with con-rod in cylinder block
| • |
Force piston rings together with piston ring tensioning
belt
|
|
|
|
| 26. |
Raise vehicle by its full height
|
Important: Note cylinder sequence
marking on con-rod bearing cap and con-rod. Narrow bead (arrow)
points towards engine timing side
|
| 27. |
Install con-rod bearing cap
| • |
Attach 2x new screwed joint 24.5 Nm +
100° + 15°
|
|
|
|
| 28. |
Clean sealing surfaces.
|
| 29. |
Apply sealing compound
|
| 30. |
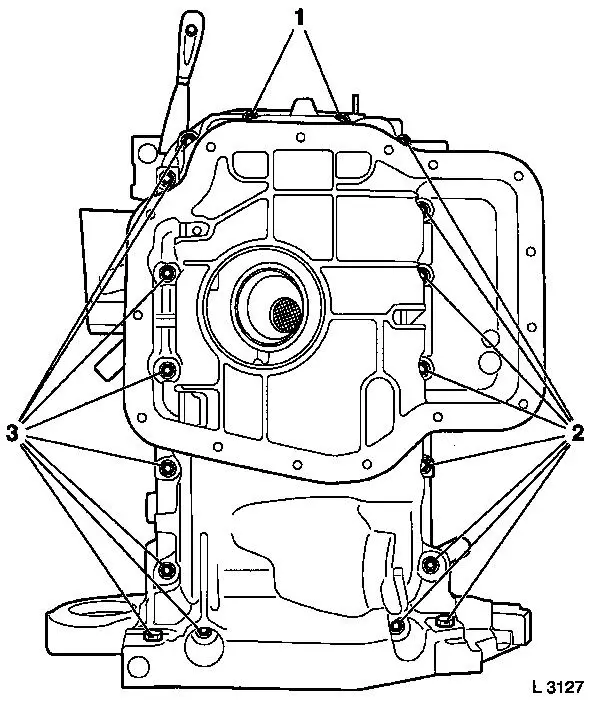
Install upper part of oil pan
| • |
Apply a bead of silicone sealant (grey) to the sealing surface
of the upper part of the oil pan
|
| • |
Tighten 18x bolt 9.8 Nm
|
|
| 31. |
Connect engine oil level wiring harness plug
|
| 32. |
Attach oil dipstick guide tube to upper part of oil pan
| • |
Tighten 2x bolts 9.8 Nm
|
|
| 33. |
Install front exhaust pipe
| • |
Attach to start-up catalytic converter
|
| • |
Attach to central silencer
|
|
| 34. |
Clean sealing surfaces.
|
| 35. |
Apply sealing compound
|
| 36. |
Remove lower part of oil pan
| • |
Apply a bead of silicone sealant (grey) to the sealing surfaces
of the lower part of the oil pan
|
| • |
Tighten 15x bolt 9.8 Nm
|
|
| 37. |
Lower vehicle by its full height
|
| 38. |
Install cylinder head
|
|
