|
All Pistons with Con-rod, Remove and Install
 Remove Remove
| 3. |
Raise vehicle by its full height
|
| 4. |
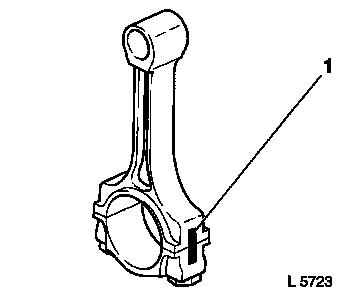
Mark con-rod bearing cap (1)
|
|
|
| 5. |
Loosen con-rod bearing cap
| • |
Remove con-rod bearing cap
|
|
|
|
| 6. |
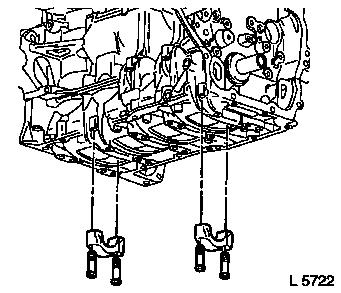
Push con-rod upwards
Note: Take care to
ensure that the con-rod does not damage the liner when being
removed. Rotate crankshaft if necessary
| • |
Push con-rod upwards until piston protrudes above cylinder
block
|
|
|
|
| 7. |
Lower vehicle by its full height
|
| 9. |
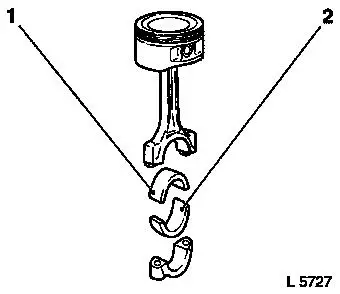
Remove con-rod bearing shells (1 and 2)
| • |
Identify con-rod bearing shells
Note: Observe the
correct sequence
|
|
| 10. |
Visually check components
|
|
|
 Install
| 11. |
Insert con-rod bearing shells (1 and 2)
| • |
In con-rod, con-rod bearing cap
|
|
|
|
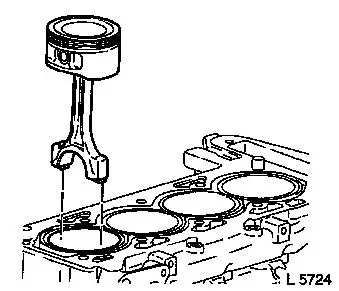
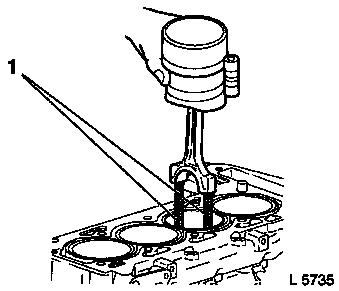
| 12. |
Insert piston cylinder 1
| • |
Screw in KM-J-41742 (1)
|
| • |
Adjust piston rings
| – |
Ring gap distribution 120°
|
| – |
Rotate upper oil scraper ring gap 25 - 50 mm left, and rotate
lower oil scraper ring gap 25 - 50 mm right facing the intermediate
ring gap
|
|
| • |
Push piston rings together with piston tightening strap
|
|
| 13. |
Insert piston cylinder 2
|
| 14. |
Insert piston cylinder 3
|
| 15. |
Insert piston cylinder 4
|
|
|
| 16. |
Raise vehicle by its full height
|
| 17. |
Install con-rod bearing cap
| • |
Insert 4x con-rod bearing cap
|
| • |
Tighten bolts 25 Nm + 100° +
25°
|
|
| 18. |
Lower vehicle by its full height
|
| 19. |
Install cylinder head
|
|
