|
Repair engine using a short block
 Remove Remove
| 2. |
Remove manual transmission from engine 
|
| 3. |
Place collecting basin underneath.
|
| 4. |
Drain engine oil
| • |
Tighten drain bolt 14 Nm
|
|
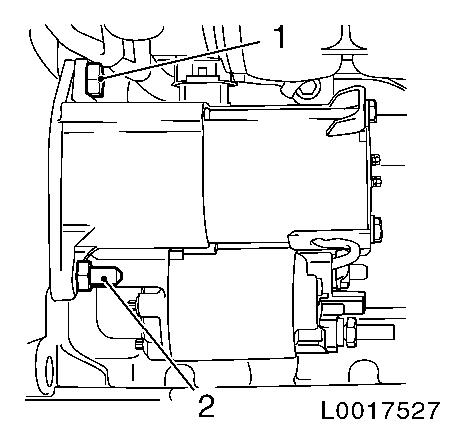
| 6. |
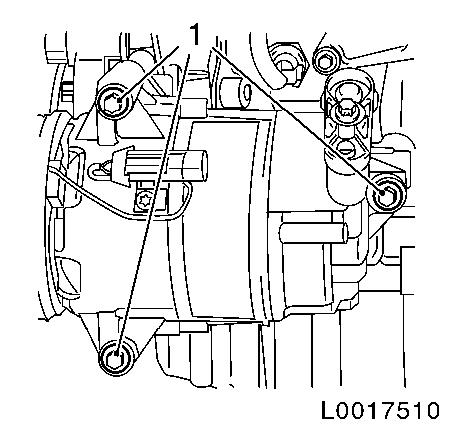
Remove right engine damping block support
|
| 8. |
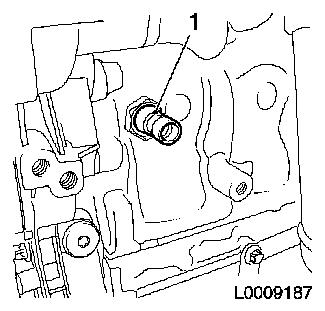
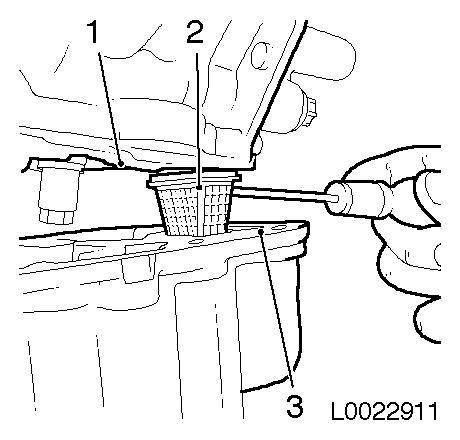
Remove oil pressure switch
| • |
Disconnect wiring harness connector.
|
| • |
Unscrew oil pressure switch
|
|
|
|
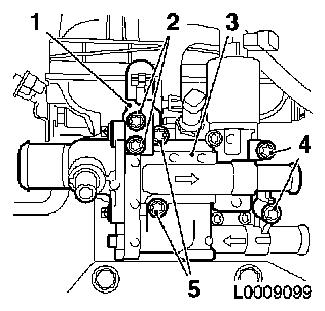
| 9. |
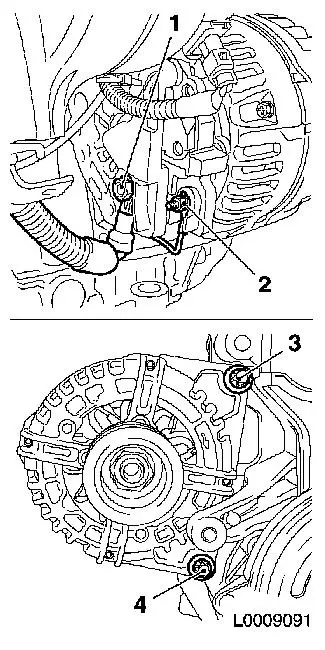
Detach alternator
| • |
Disconnect alternator from power supply
| – |
Unscrew 2x nuts (1) and (2)
|
|
| • |
Unscrew 2x bolts (3) and (4)
|
|
|
|
| 10. |
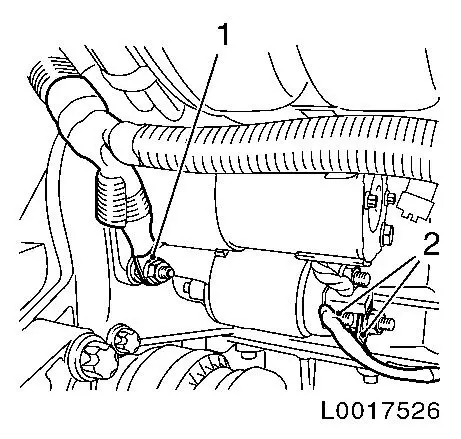
Detach earth cable (1) from starter
|
| 11. |
Detach 2x positive cable (2) starter
|
|
|
| 12. |
Remove starter
| • |
Unscrew 2x bolts (1) and (2)
|
|
|
|
| 13. |
Detach engine wiring harness
| • |
Disconnect 4x wiring harness plugs
|
| • |
Unclip wiring harness from brackets and expose
|
|
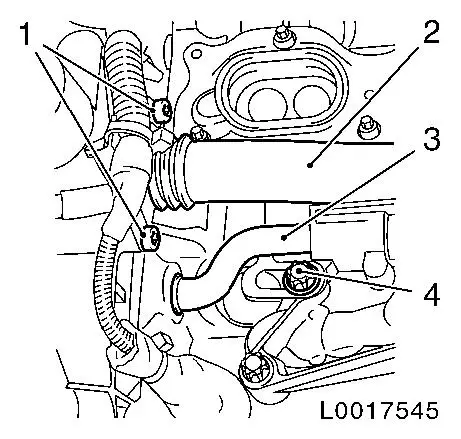
| 14. |
Detach coolant flange (3)
| • |
Unscrew 4x bolts (4) and (5)
|
|
|
|
| 15. |
Detach thrust plate and clutch disk
|
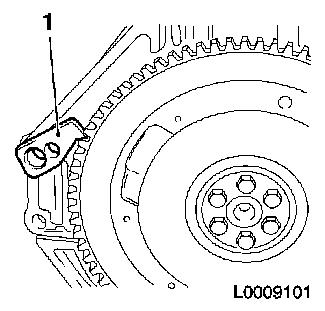
| 16. |
Remove flywheel
| • |
Lock flywheel via starter ring gear with KM-652 (1)
|
|
|
|
| 17. |
Release flywheel lock
|
| 18. |
Rotate engine on engine overhaul stands through 180°
|
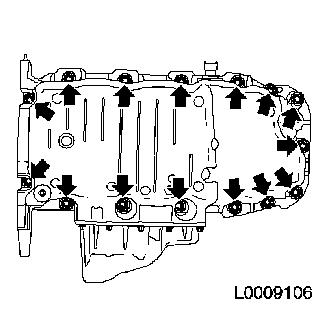
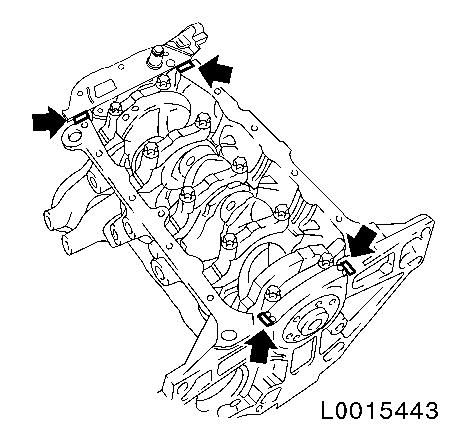
| 19. |
Remove oil pan
| • |
Unscrew 15x bolts (arrows)
|
|
|
|
| 20. |
Lever off oil pan evenly all the way round with suitable
tool
Note: To avoid damage
to the oil filter, ensure that the oil filter (1) remains in the
oil pan. If it remains attached to the cylinder head, press the oil
filter into the oil pan using a screwdriver.
|
|
|
| 21. |
Detach coolant pipe (2) from pump module
| • |
Push coolant pipe into oil pump housing
|
|
| 22. |
Detach coolant pipe (3) from pump module
| • |
Detach coolant pipe from oil filter housing
|
| • |
Push coolant pipe into oil filter housing
|
|
|
|
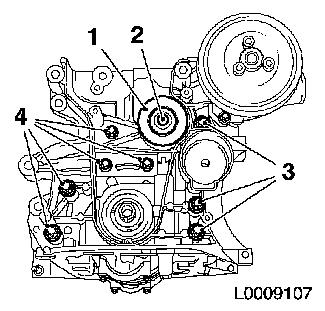
| 23. |
Remove toothed belt drive gear
|
| 24. |
Detach toothed belt guide roller (1)
|
| 25. |
Remove pump module
| • |
Unscrew 8x bolts (3) and (4)
Note: Note different
screw lengths
|
|
|
|
| 26. |
Remove heat exchanger
|
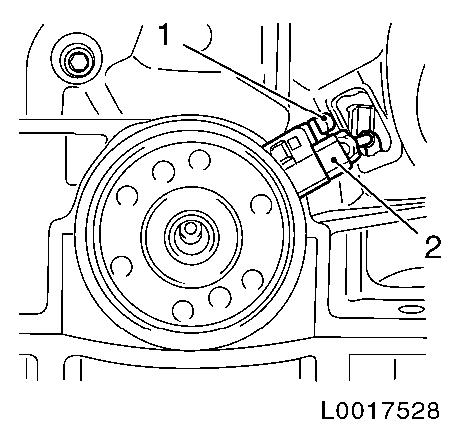
| 27. |
Detach crankshaft pulse pick-up (2) from pulse pick-up
bracket
|
|
|
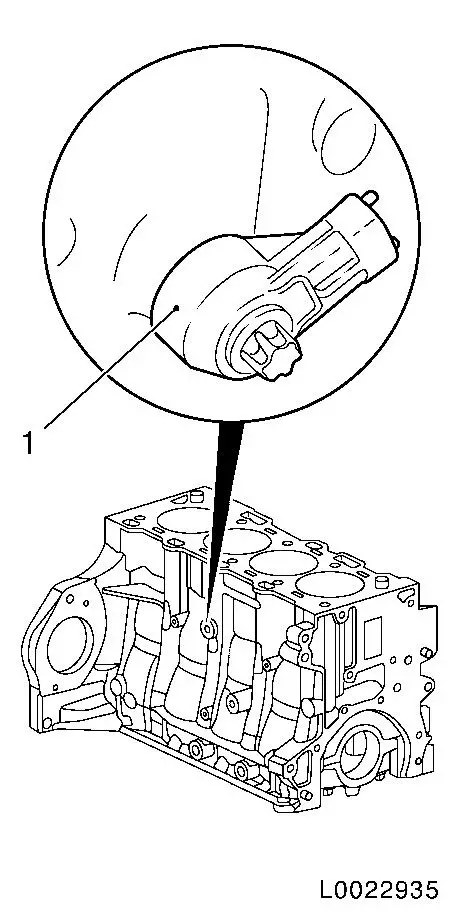
| 28. |
Detach knock sensor (1)
|
|
|
 Install
| 29. |
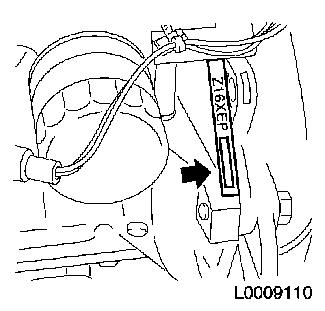
Emboss engine number
| • |
Onto flattened area on cylinder block (arrow) with numbers
punches
|
|
|
|
| 30. |
Attach knock sensor 20 Nm
|
| 31. |
Attach crankshaft pulse pick-up to pulse pick-up bracket
|
| 32. |
Install heat exchanger
|
| 33. |
Install pump module
| • |
Replace gasket
Note: Note different
screw lengths
|
|
| 34. |
Attach coolant pipe to coolant module
| • |
Draw coolant pipe out of oil filter housing
|
| • |
Attach coolant pipe to oil filter housing
|
|
| 35. |
Attach coolant pipe to coolant module
| • |
Draw coolant pipe out of oil pump housing
|
|
| 36. |
Insert toothed belt guide roller
|
| 37. |
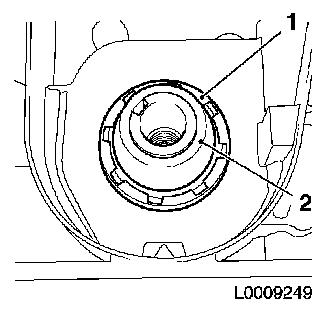
Insert front crankshaft seal ring (1)
| • |
Clean sealing surfaces.
|
| • |
Slide protective sleeve of KM-6351
(2) onto crankshaft journal
|
| • |
Slide seal ring over protective sleeve on the crank pin
|
|
|
|
| 38. |
Insert toothed belt drive gear
|
| 39. |
Clean sealing surfaces.
|
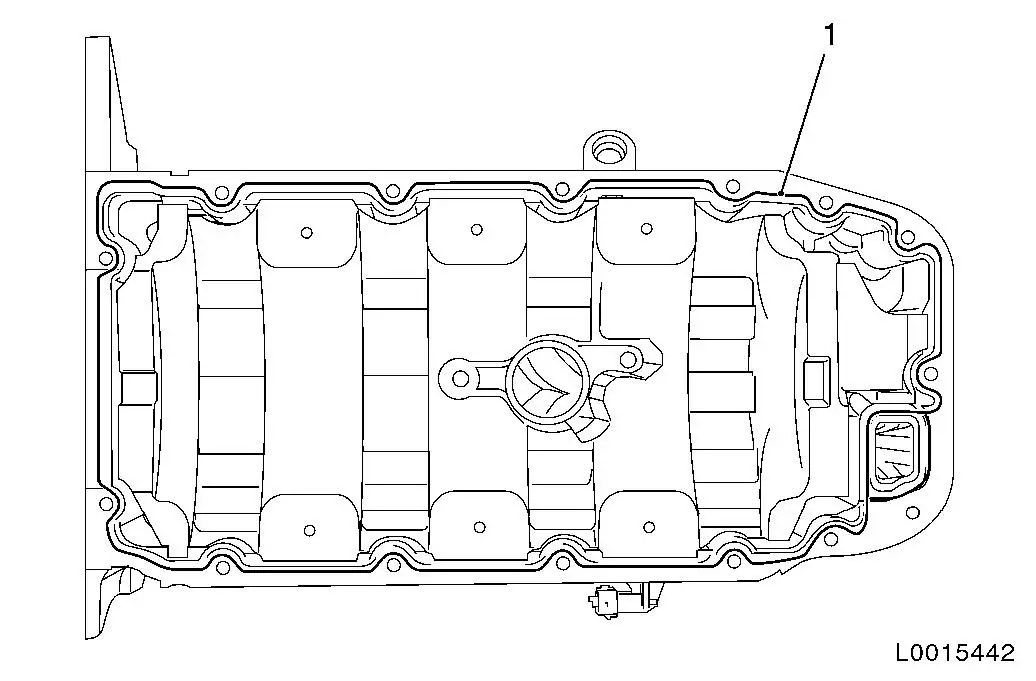
| 40. |
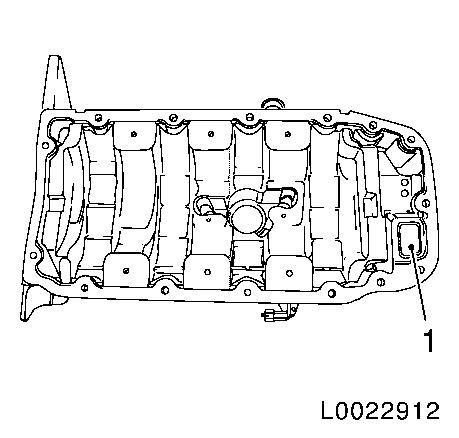
Check position of oil filter (1)
|
|
|
| 41. |
Apply an approx. 3.5 mm thick bead of oil pan sealant to the
joints (arrows)
|
|
|
|
| 42. |
Apply oil pan sealant to the oil pan
Note: The assembly time
including torque check must take no longer than 10 min
| • |
Apply an approx. 3.5 mm thick bead of oil pan sealant (1) as
illustrated
|
|
|
| 43. |
Install oil pan
| • |
Tighten 15x bolt on cylinder block and pump module 10 Nm
|
|
| 44. |
Rotate engine on engine overhaul stands through 180°
|
| 45. |
Fit flywheel
| • |
Tighten 6x bolt 35 Nm + 30° +
15°
| – |
Apply screw locking compound
|
|
|
| 46. |
Attach thrust plate and clutch disk
|
| 47. |
Fit coolant flange
| • |
Screw in 4x bolt evenly until the housing is in contact with
the cylinder head
|
Important: It is essential to
comply with the specified tightening sequence - risk of
fracture
|
| • |
Tighten 4x bolt (1), (2), (3) and (4) 8
Nm
|
|
|

|
| 48. |
Attach wiring harness bracket to coolant flange
|
| 49. |
Detach engine wiring harness
| • |
Connect 4x wiring harness plugs
|
| • |
Route wiring harness and clip into bracket
|
|
| 51. |
Attach wiring harness to starter
|
| 52. |
Attach earth cable to starter
|
| 54. |
Attach wiring harness to alternator
|
| 55. |
Attach right engine damping block support to engine block
Note: Do not tighten
bolts until the 3rd bolt of the engine damping block support has
been screwed into the cylinder head.
|
| 56. |
Install cylinder head
|
| 57. |
Attach manual transmission to engine
|
| 59. |
Top up engine oil.
| • |
Check engine oil level and top up if necessary
|
|
|