|
Replace rear toothed belt cover
 Remove Remove
| 3. |
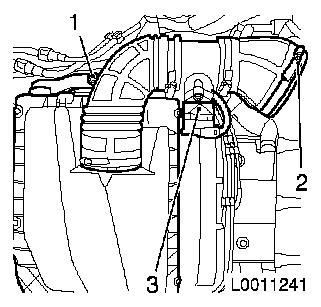
Remove air filter housing with mass air flow meter
| • |
Detach mass air flow meter wiring harness plug (3)
|
| • |
Detach air intake hose from air intake pipe
|
|
|
|
| 4. |
Remove toothed belt cover upper section
|
|
|
| 5. |
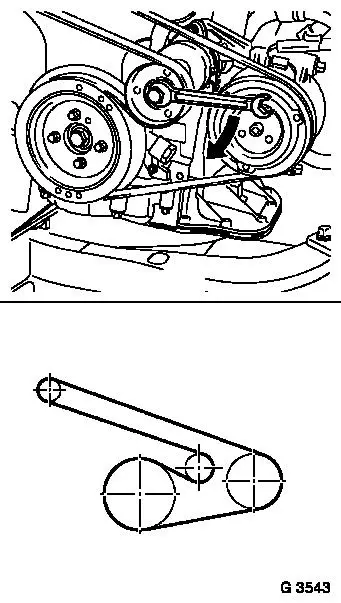
Remove ribbed V-belt
| • |
Mark direction of travel of ribbed V-belt.
|
| • |
Apply tension to ribbed V-belt tensioner in the direction of
the arrow with KM-913
|
| • |
Immobilise with KM-6130
|
|
|
|
| 6. |
Raise vehicle by its full height
|
| 7. |
Remove right-hand engine splash protection and lower engine
compartment cover
|
| 8. |
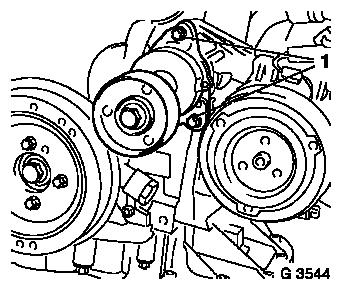
Remove ribbed V-belt tensioner
|
|
|
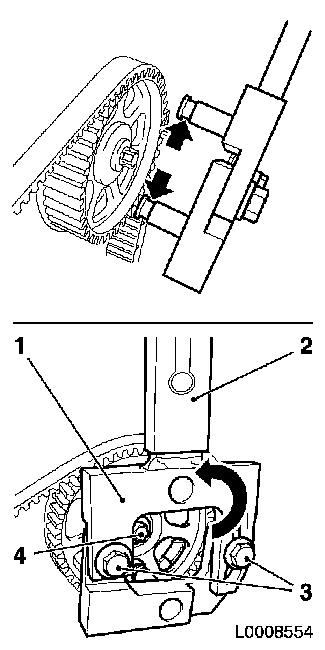
| 9. |
Remove torsional vibration damper
| • |
Unscrew 4x bolts
| – |
Counterhold at toothed belt drive gear fastening bolt
|
|
|
| 10. |
Remove lower part of toothed belt cover
| • |
Detach lower section of toothed belt cover from rear toothed
belt cover
|
|
|
|
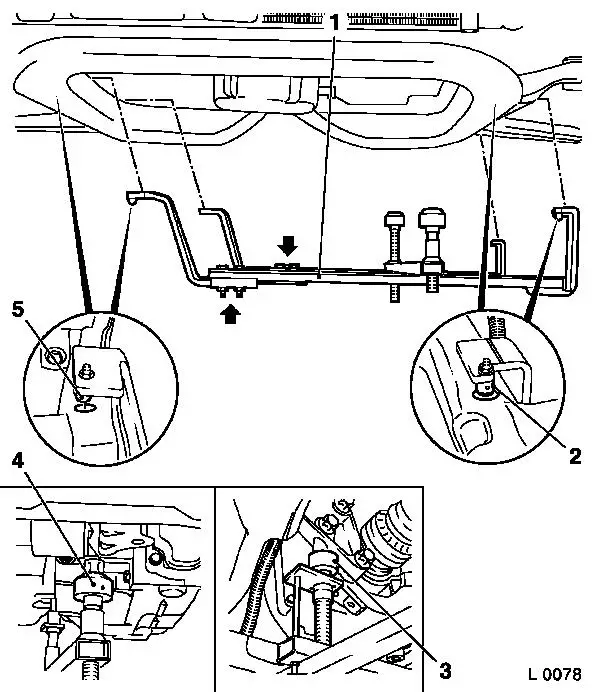
| 11. |
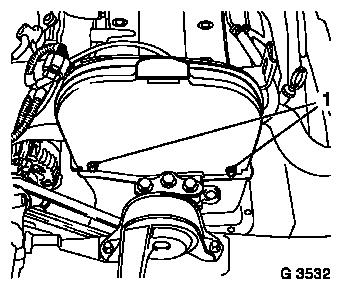
Attach KM-6173 (3) to front axle
body
| • |
Turn support bearing (2) upwards until the journal sits flush
in the mounting (1) on the cylinder block, then secure it.
|
|
|
|
|
| 12. |
Attach KM-6001-A (1)
Note: Attaching KM-6001-A guarantees perfect alignment of the
drive unit with the front axle body
|
| 13. |
Slacken adjusting rail bolts (arrows) on KM-6001-A .
|
| 14. |
Insert KM-6001-A as shown
Note: The journals (2)
and (5) must sit in the guide holes of the front axle body
|
| 15. |
Tighten adjusting rail bolts.
|
| 16. |
Screw up front support bearing (4) and rear support bearing (3)
until they rest against front engine damping block guide journals
and rear engine damping block bracket
Note: Guide journals
must rest in support bearings without play
|
|
| 17. |
Lower vehicle completely
|
| 18. |
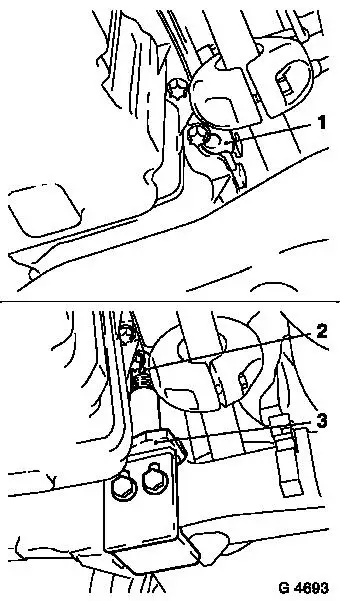
Detach right engine damping block (1)
| • |
Detach from side member
|
| • |
Detach from engine damping block support
|
|
|
|
| 19. |
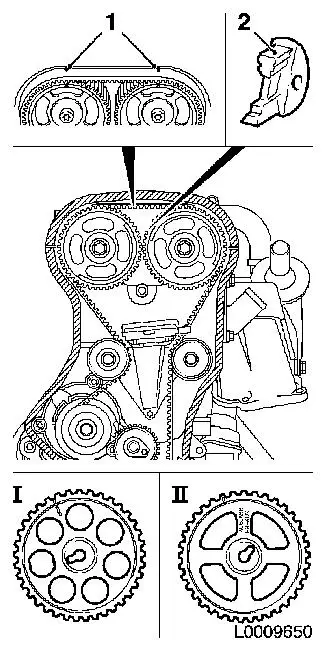
Turn engine to "Cylinder 1 TDC" (marking 3)
| • |
Move crankshaft in direction of engine rotation to "cylinder 1
TDC" (mark 3)
|
Important: Turn crankshaft slowly
and smoothly
|
| • |
Rotate at toothed belt drive gear bolt
Note: Notches on
camshaft sprockets must align with marks (1) on cylinder head
cover
|
|
| 20. |
Lock camshafts with KM-853 (2)
|
| 21. |
Detach toothed belt
| • |
Mark toothed belt direction of rotation
|
| • |
Undo toothed belt tension roller bolt
|
| • |
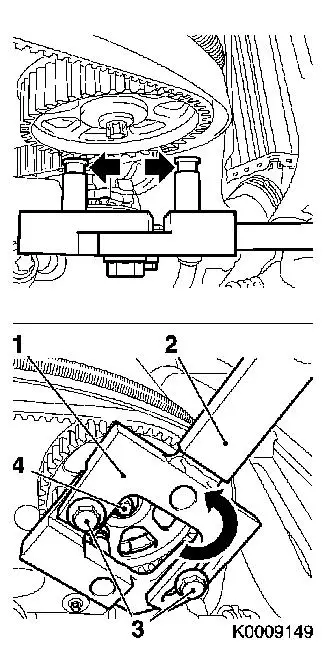
Rotate eccentric adjuster in direction of arrow (clockwise)
until pointer (4) is just before left stop
|
|
|
|
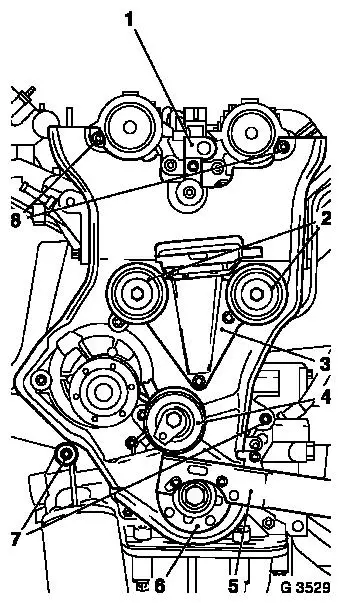
| 23. |
Detach exhaust-side camshaft sprocket
| • |
Attach KM-6347 (1) and KM-956-1 (2) to camshaft sprocket on exhaust side
| – |
Release fixing bolts (3) from KM-6347
(1)
|
| – |
Insert KM-6347 in camshaft
sprocket
Note: Grooves in KM-6347 (arrows) must engage in camshaft
sprocket.
|
| – |
Turn KM-6347 in direction of arrow
and tighten fixing bolts
|
|
| • |
Slacken bolt (4) of camshaft sprocket
| – |
Hold using KM-6347
Note: 2 mechanics
required
|
|
| • |
Remove KM-6347
| – |
Slacken fixing bolts of KM-6347
|
|
| • |
Unscrew camshaft sprocket bolt (4)
| – |
Remove camshaft timing gear
|
|
|
|
|
| 24. |
Detach camshaft sprocket on intake side
Note: Repeat the
exhaust side camshaft procedure for the intake side.
|
| 25. |
Detach cover from cylinder head cover
| • |
Disconnect wiring harness plug from ignition module
|
|
| 26. |
Remove camshaft sensor (1)
| • |
Disconnect camshaft sensor wiring harness plug
|
|
| 27. |
Remove 2x toothed belt guide roller (2)
|
| 28. |
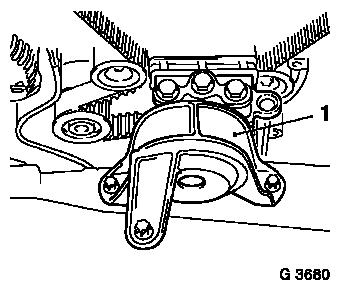
Remove engine damping block support (3)
|
| 29. |
Remove toothed belt tension roller (4)
|
| 30. |
Release rear toothed belt cover from top of cylinder head
| • |
Unscrew 2x bolt (8) from cylinder head
|
|
| 31. |
Raise vehicle by its full height
|
| 32. |
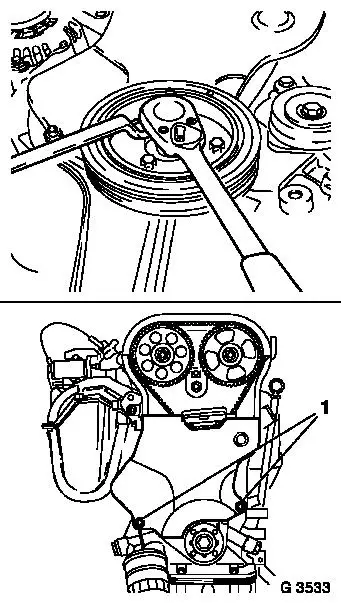
Remove toothed belt drive gear (6)
| • |
Unscrew bolt
| – |
Counterhold with KM-662-C (5)
|
|
|
| 33. |
Remove rear toothed belt cover
| • |
Detach 2x bolt (7) from oil pump
|
|
|
|
 Install
| 34. |
Attach rear toothed belt cover to oil pump
|
| 35. |
Install toothed belt drive gear
Note: Pay attention to
condition of spring washer
| • |
Tighten new bolt 130 Nm + 45°
± 5°
| – |
Counterhold with KM-662-C
|
|
|
| 36. |
Lower vehicle completely
|
| 37. |
Fasten rear toothed belt cover to top of cylinder head
| • |
Tighten 2x bolt on cylinder head 8
Nm
|
|
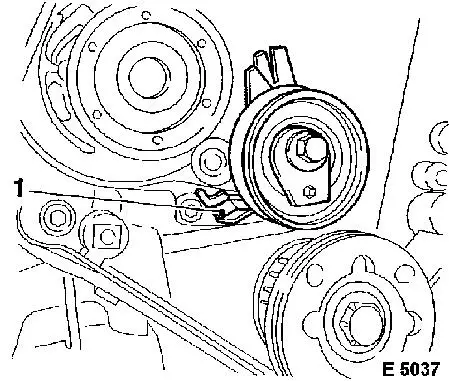
| 38. |
Install toothed belt tension roller
| • |
Tighten bolt
Note: Ensure that
detent lever (1) engages in oil pump guide web - tightening to
torque does not take place until toothed belt tension has been
adjusted
|
|
|
|
| 39. |
Attach engine damping block support to cylinder block
|
| 40. |
Attach intake side toothed belt guide roller to cylinder
block
|
| 41. |
Attach exhaust side guide roller toothed belt to engine damping
block support
|
| 42. |
Attach camshaft sensor to cylinder head
| • |
Fix wiring harness plug
|
|
| 43. |
Replace cover on cylinder head cover
| • |
Connect ignition module wiring harness plug
|
|
| 44. |
Attach exhaust-side camshaft sprocket
| • |
Install camshaft sprocket with timing marks on front
|
| • |
Screw in new camshaft sprocket bolt (4)
Note: Do not
tighten
| – |
Attach KM-6347 (1) in conjunction
with KM-956-1 (2) to camshaft
sprocket
|
| – |
Release fixing bolts (3) from KM-6347
|
| – |
Insert KM-6347 in the camshaft
sprocket - ensure it is correctly seated
Note: The grooves of
KM-6347 (arrows) must engage with
camshaft timing gear
|
| – |
Turn KM-6347 in the direction of the
arrow
|
|
|
|
|
| 45. |
Tighten camshaft on exhaust side 50 Nm
+ 60° + 15°
| • |
Hold using KM-6347
Note: 2 mechanics
required
|
|
| 47. |
Attach intake side camshaft sprocket
Note: Use same
procedure as for exhaust side
|
| 48. |
Tighten camshaft on intake side 50 Nm +
60° + 15°
| • |
Hold using KM-6347
Note: 2 mechanics
required
|
|
| 50. |
Turn camshaft sprockets to "Cylinder 1 TDC"
| • |
Set camshaft sprockets to marking
Note: Mark (1) on
cylinder head cover aligns with notches on camshaft sprockets
- Intake camshaft sprocket
- Exhaust camshaft sprocket
|
|
| 51. |
Lock camshaft sprockets in position with KM-853 (2)
|
| 52. |
Detach KM-6347 from camshaft
sprockets with KM-956-1
|
|
|
| 53. |
Set crankshaft to "Cylinder 1 TDC" (use shorter route)
|
| 54. |
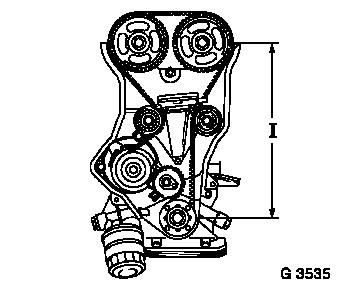
Install toothed belt
| • |
Check toothed belt for wear – replace if necessary.
|
| • |
Pay attention to toothed belt direction of movement. Fit
toothed belt
Note: Ensure that
tension side (I) is taut
Note: Observe timing
marks!
|
|
|
|
| 55. |
Adjust toothed belt tension 
|
| 57. |
Fit engine damping block to longitudinal beam
|
| 58. |
Attach engine damping block bracket to engine damping block
support
|
| 59. |
Raise vehicle by its full height
|
| 60. |
Remove mounts KM-6001-A and KM-6173 .
|
| 61. |
Attach bottom part of toothed belt cover to rear toothed belt
cover
|
| 62. |
Attach torsional vibration damper to toothed belt drive
gear
| • |
Tighten 4x bolt 20 Nm
| – |
Counterhold at toothed belt drive gear fastening bolt
|
|
|
| 63. |
Install ribbed V-belt tensioner
| • |
Screw in 2x bolts
| – |
Tighten compressor support bolt 25
Nm
|
|
|
| 64. |
Install right-hand engine splash protection and lower engine
compartment cover
|
| 65. |
Lower vehicle by its full height
|
| 66. |
Tighten ribbed V-belt tensioner at top
|
| 67. |
Position ribbed V-belt
| • |
Ensure running direction and installation position of ribbed
V-belt is correct
|
|
| 68. |
Tension ribbed V-belt tensioner (clockwise) and remove
detent
|
| 69. |
Install front toothed belt cover (top)
| • |
Clip in to rear toothed belt cover
|
|
| 70. |
Install air cleaner housing with mass air flow meter
| • |
Insert air cleaner housing
|
| • |
Attach air intake hose to air intake pipe
|
| • |
Connect mass air flow meter wiring harness plug
|
|
| 72. |
Program volatile memories
|
|
