|
Replace oil pump seal ring - replace front
crankshaft seal ring
 Remove Remove
| 1. |
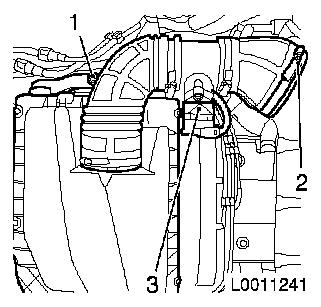
Remove air filter housing with mass air flow meter
| • |
Detach mass air flow meter wiring harness plug (3)
|
| • |
Detach air intake hose from air intake pipe
|
|
|
|
| 2. |
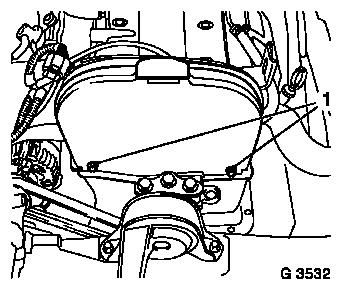
Remove fastening bolts (1) and remove top front toothed belt
cover from rear toothed belt cover
|
|
|
| 3. |
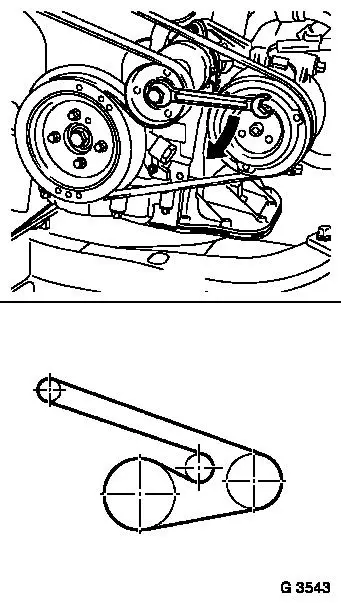
Mark direction of travel of ribbed V-belt.
|
| 4. |
Tension ribbed V-belt tensioner in direction of arrow
|
|
|
| 6. |
Remove lower engine splash guard
|
| 7. |
Tension ribbed V-belt tensioner (clockwise)
| • |
Lock using suitable drift
|
|
| 8. |
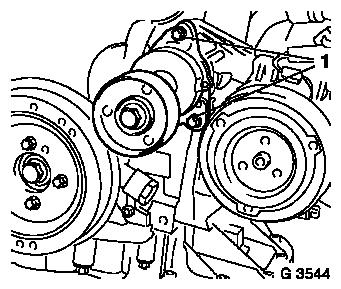
Undo fastening screws (1) and remove ribbed V-belt
tensioner
| • |
Remove from compressor support
|
|
|
|
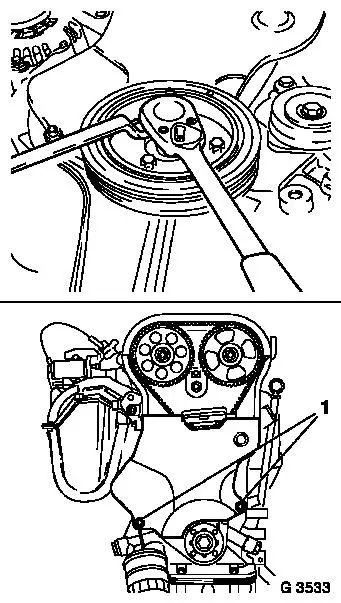
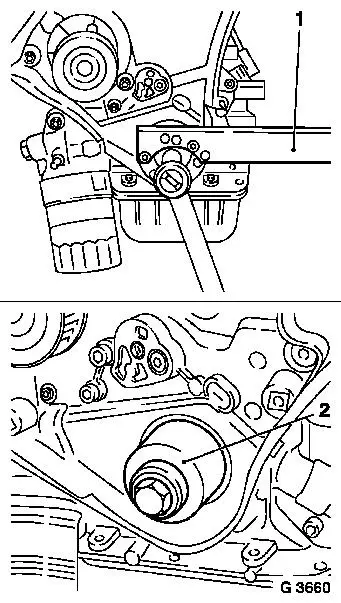
| 9. |
Remove torsional vibration damper
| • |
Counterhold at toothed belt drive gear fastening bolt
|
|
| 10. |
Remove fastening bolts (1)
| • |
Detach lower section of toothed belt cover from rear toothed
belt cover
|
|
|
|
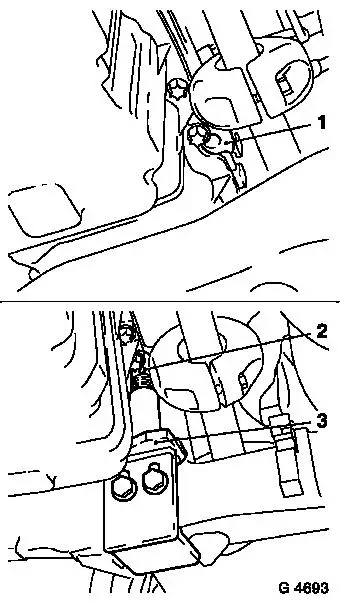
| 11. |
Attach KM-6173 (3) to front axle
body
| • |
Raise support bearing (2) until journal sits flush in mount (1)
on cylinder block
|
|
|
|
| 12. |
Slacken fastening bolts (arrows) for adjusting rails at KM-6001-A (1).
|
| 13. |
Insert KM-6001-A as shown
Note: The journals (2)
and (5) must sit in the guide holes of the front axle body
|
| 14. |
Tighten fastening bolts for adjustment rails.
|
| 15. |
Screw up front support bearing (4) and rear support bearing (3)
until they rest against front engine damping block guide journals
and rear engine damping block bracket
Note: Guide journals
must rest in support bearings without play
|
|

|
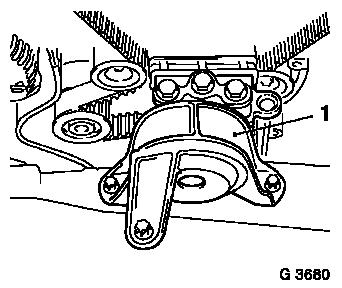
| 16. |
Detach engine damping block (1)
| • |
from side member and engine damping block support
|
|
|
|
| 17. |
Move crankshaft to "Cylinder no.1 ignition TDC" in direction of
engine rotation (mark 3)
Important: Turn crankshaft slowly
and smoothly
|
| • |
Rotate at toothed belt drive gear fastening bolt
Note: Notches on
camshaft sprockets must align with marks (1) on cylinder head
cover
|
|
| 18. |
Lock camshafts with KM-853 (2)
|
| 19. |
Undo toothed belt tension roller fastening bolt
|
| 20. |
Rotate eccentric adjuster in direction of arrow (clockwise)
until pointer (4) is just before left stop
|
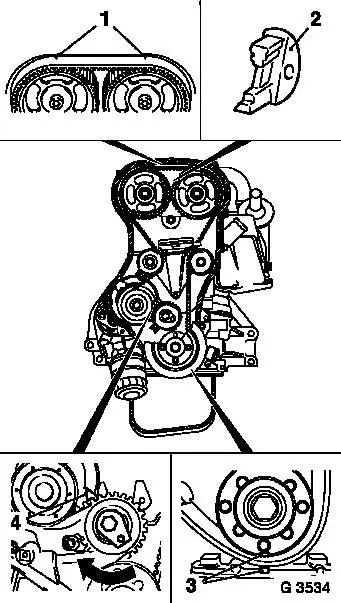
| 21. |
Mark toothed belt direction of rotation
|
|
|
| 23. |
Remove toothed belt drivewheel
Note: Counterhold with
KM-662-C (1)
|
| 24. |
Edge out crankshaft seal ring with suitable tool
Note: Do not damage
sealing surfaces
|
|
|
 Install
| 25. |
Push seal ring into oil pump with KM-693-A (2)
| • |
Use bolt and washer from toothed belt drive gear
|
|
| 26. |
Attach toothed belt drive gear with new bolt to crankshaft
130 Nm + 45° ± 5°
| • |
Counterhold with KM-662-C
|
|
| 27. |
Check toothed belt for wear – replace if necessary.
|
| 28. |
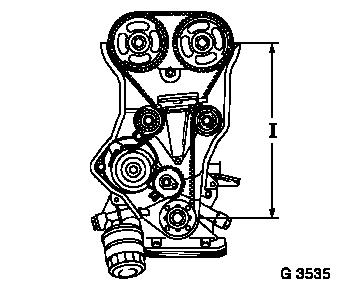
Pay attention to toothed belt direction of movement. Fit
toothed belt
Note: Ensure that
tension side (I) is taut
Note: Observe timing
marks!
|
| 29. |
Adjust toothed belt tension 
|
| 30. |
Attach engine damping block to side member 35 Nm
|
| 31. |
Attach engine damping block bracket to engine damping block
support 55 Nm
|
| 32. |
Remove mounts KM-6001-A and KM-6173 .
|
|
|
| 33. |
Attach lower section of toothed belt cover to rear toothed belt
cover 6 Nm
|
| 34. |
Attach torsional vibration damper to toothed belt drive gear
20 Nm
| • |
Counterhold at toothed belt drive gear fastening bolt
|
|
| 35. |
Attach ribbed V-belt tensioner to compressor support 25 Nm
|
| 36. |
Tension ribbed V-belt tensioner (clockwise) and remove
detent
|
| 37. |
Install lower engine splash guard
|
| 38. |
Position ribbed V-belt
| • |
Ensure running direction and installation position of ribbed
V-belt is correct
|
|
| 39. |
Tension ribbed V-belt using ribbed V-belt tensioner
|
| 40. |
Attach top front toothed belt cover to rear toothed belt cover
6Nm
|
| 41. |
Install air cleaner housing with mass air flow meter
| • |
Insert air cleaner housing
|
| • |
Attach air intake hose to air intake pipe
|
| • |
Connect mass air flow meter wiring harness plug
|
|
|
