|
Crankshaft Seal Ring (Rear), Replace
 Remove Remove
| 1. |
For vehicles with manual transmission:
|
| 2. |
For vehicles with automatic transmission:
|
Important: Do not allow encoder
to come into contact with external magnetic fields - do not bring
into contact with metal swarf - do not damage rubberised encoder
track mechanically - do not drop
|
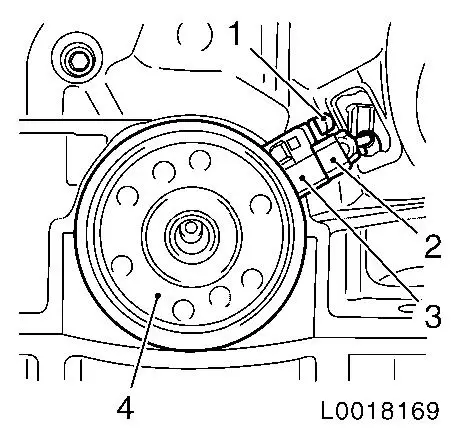
| 3. |
Draw encoder (1) out of crankshaft
|
| 4. |
Detach crankshaft pulse pick-up (2) from pulse pick-up
bracket
|
| 5. |
Draw out plastic ring on pulse pick-up bracket (3)
|
|
|
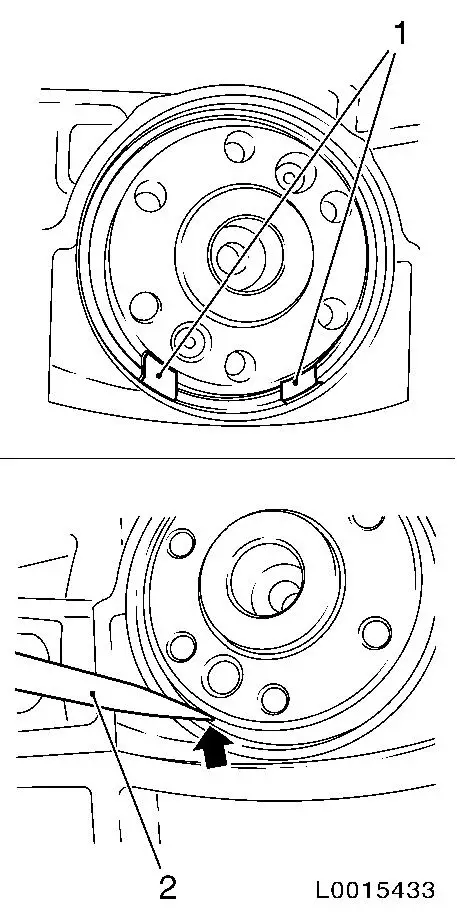
Important: Only make a hole at
the areas (1) at the 5 o'clock and 7 o'clock positions as these are
the only areas where there is a cavity behind the seal ring
|
| 6. |
Use a suitable tool, such as a pricker (2), to make a hole in
the seal ring
Important: The diameter of the
hole must not exceed 2 mm. Otherwise, the the bolt of KM-6624 will not be able to grip
|
| • |
Position the pricker at the outer edge of the seal ring
|
|
|
|
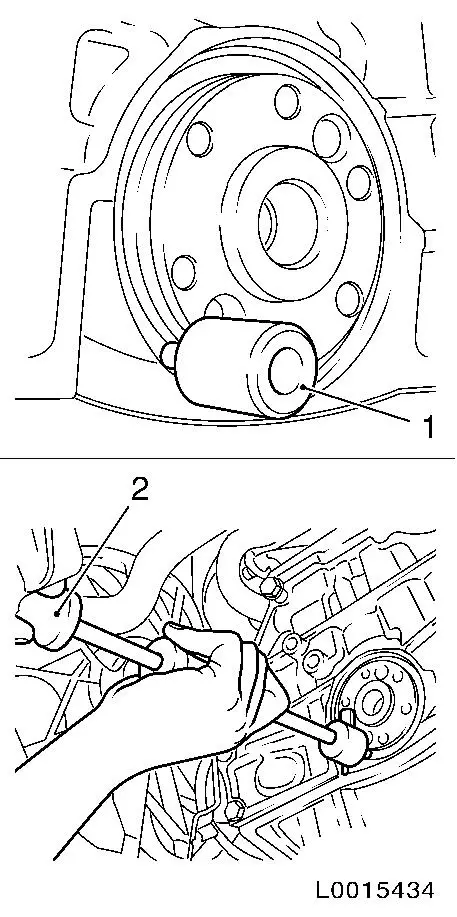
| 7. |
Remove the seal ring
| • |
Attach KM-6624 (1) to the seal
ring
|
| • |
Attach KM-328-B to KM-6624
|
| • |
Tap out seal ring with KM-328-B (2)
together with KM-6624
|
|
|
|
 Install
| 8. |
Position new seal ring
| • |
Position seal ring in such a way that the pulse pick-up bracket
is over the corresponding cut-out on the cylinder block
|
| • |
Slide the seal ring over the crankshaft. Push on until it is
flush and sits evenly in the cylinder block
Note: Do not press in
the seal ring all the way
|
|
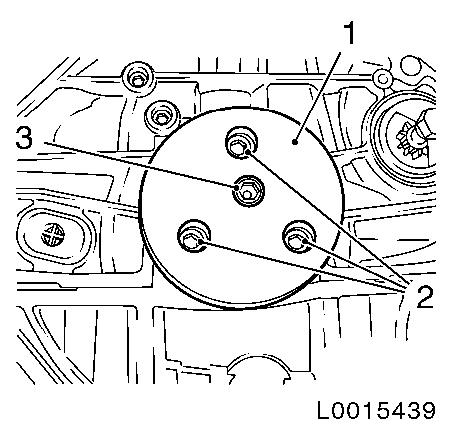
| 9. |
Install seal ring with KM-6623
(1)
| • |
Press seal ring all the way in
|
|
|
|
| 11. |
Attach crankshaft pulse pick-up to pulse pick-up bracket
|
| 12. |
Place encoder on crankshaft
|
| 13. |
For vehicles with automatic transmission:
|
| 14. |
For vehicles with manual transmission: 
|
|
