|
Metering Unit, Replace
Important: For the
entire operation, it is essential to work in a clean
environment.
- Dirt in the area of the metering unit must be avoided.
- Even minute dirt particles invisible to the naked eye can cause
major problems with engine performance.
- Particles as small as 0.3 mm can be critical!
- Do not wear gloves.
- Do not fit any metering unit that has been dropped.
- Disconnect battery after fault tracing. Before using the
metering unit, wait a few minutes to avoid the system working
autonomously.
 Remove Remove
| 3. |
Raise vehicle by its full height
|
| 4. |
Unclip wiring harness (3) from bracket
|
| 5. |
Separate wiring harness plug for metering unit
| • |
Unclip wiring harness plug (4)
|
|
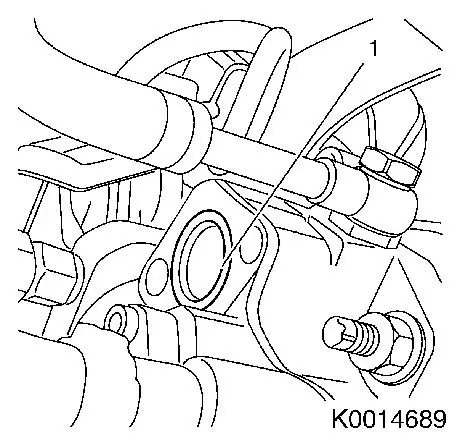
| 6. |
Remove metering unit (2)
|
| 8. |
Remove seal ring
| • |
Remove seal ring (1) from high pressure pump
|
|
|
|
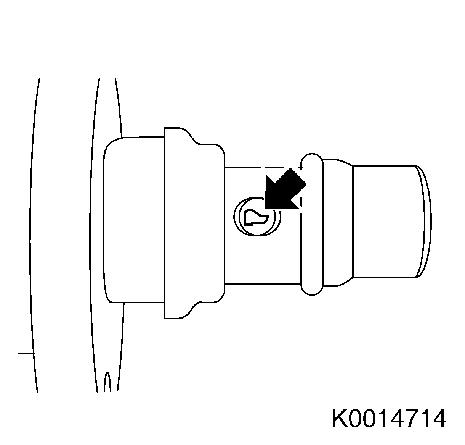
| 10. |
Check 2x fuel supply bores (arrow) for dirt
|
|
|
 Install
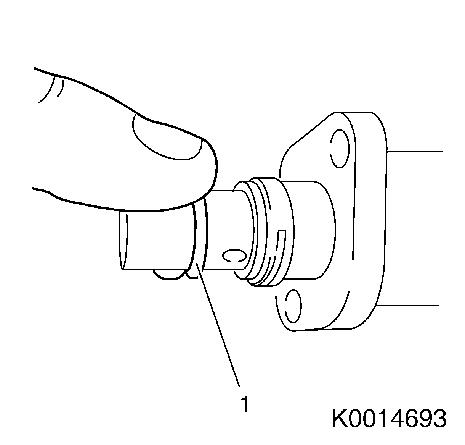
| 11. |
Insert new seal ring
| • |
Coat new seal ring (1) with engine oil and fit in high pressure
pump
|
|
|
|
| 12. |
Metering Unit, insert
| • |
Apply new engine oil to the O-ring (1) of the metering unit
|
|
|
|
| 14. |
Connect wiring harness plug for metering unit
|
| 15. |
Clip wiring harness into bracket
|
| 16. |
Lower vehicle by its full height
|
| 17. |
Connect battery
| • |
Attach negative connection to ground terminal
|
|
| 18. |
Programme transient memory
|
| 19. |
Reset learned values of high pressure pump with Tech 2
| • |
Confirm "Replace pump" with "Yes"
|
|
| 20. |
Carry out seal test on metering unit
| • |
Carry out fuel leak test
|
|
| 21. |
Visual inspection
| • |
Check metering unit for fuel leak
|
|
|
