|
Replace xenon lamp - left side
Warning: High
voltage! Do not touch components in the xenon dipped beam when the
dipped beam is switched on. Ignition and light switch OFF.
 Remove Remove
| 1. |
Remove front panelling
|
| 2. |
Withdraw headlamp fuse
|
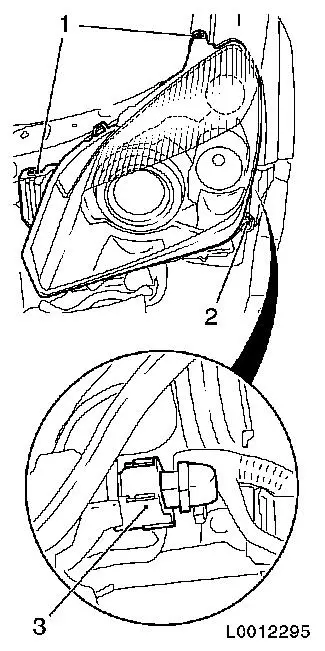
| 3. |
Remove headlamp - left side
| • |
Unscrew 3x screws (1) and (2)
|
| • |
Remove front panelling connector
|
| • |
Remove headlamps
| – |
Release wiring harness plug (3) and disconnect
|
|
|
|
|
| 4. |
Remove xenon lamp cover
|
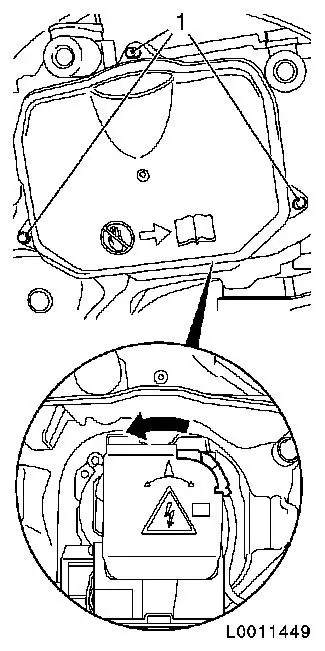
| 5. |
Remove xenon lamp igniter
| • |
To unlock, turn in direction of arrow
| – |
Disconnect wiring harness plug
|
|
|
|
|
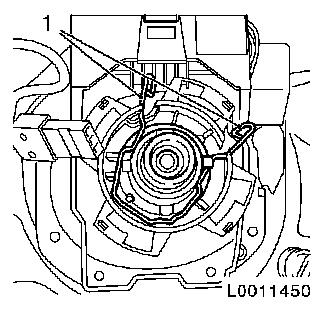
| 6. |
Remove xenon lamp
| • |
Compress fixing bracket (1) to release
|
|
|
|
 Install
| 7. |
Fit rear lamp
Note: Ensure correct
installation position
|
| 8. |
Attach xenon lamp igniter
Note: The arrow on the
sticker (igniter) must be at the top on installation.
| • |
To lock, turn opposite the direction of the arrow
| – |
Connect wiring harness plug
|
|
|
| 9. |
Install xenon lamp cover
|
| 10. |
Install headlamp - left side
| • |
Insert front panelling connector
|
| • |
Insert headlamp
| – |
Connect wiring harness plug
|
|
|
| 11. |
Attach front panelling
|
|
