
Body Hinge Pillar Outer Panel Sectioning (Collision Repair)
- Make
- Vauxhall
- Model
- Astra J
- Section
- Collision Repair › Repair Instructions › Body Hinge Pillar Outer Panel Sectioning
Body RepairBody Hinge Pillar Outer Panel Sectioning
Body Hinge Pillar Outer Panel Sectioning (5-Door Hatchback 68 and Wagon 35)Note: According to different corrosion warranties, only the regional mandatory joining methods are allowed. Removal Procedure
|
| Warning: Refer to
Approved Equipment for Collision Repair
Warning . |
| Warning: Refer to
Collision Sectioning Warning . |
| Warning: Refer to
Glass and Sheet Metal Handling
Warning . |
| 1. | Disable the SIR System. Refer to SIR Disabling and Enabling . |
| 2. | Disconnect the negative battery cable. Refer to Battery Negative Cable Disconnection and Connection . |
| 3. | Remove all related panels and components. |
| 4. | Visually inspect the damage. Repair as much of the damage as possible. |
| 5. | Remove the sealers and anti-corrosion materials from the repair area, as necessary. |
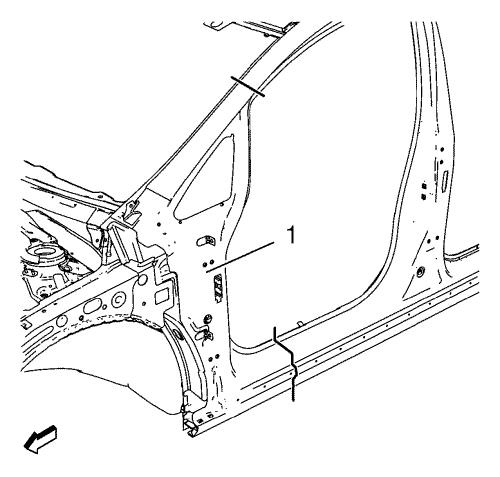
| 6. | Create cut lines on the body hinge pillar outer panel (1). |
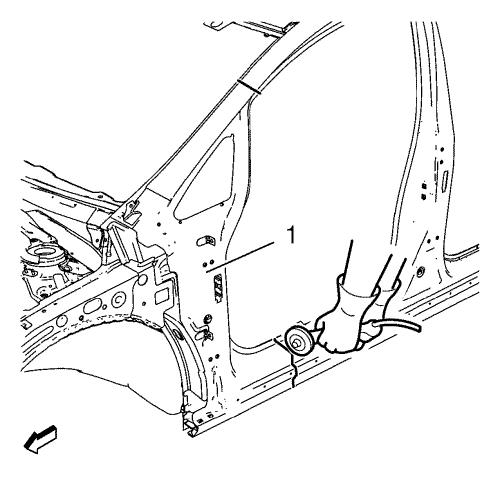
Note: Do not damage any inner panels or reinforcements. |
| 7. | Cut the body hinge pillar outer panel (1) where sectioning is to be performed. |
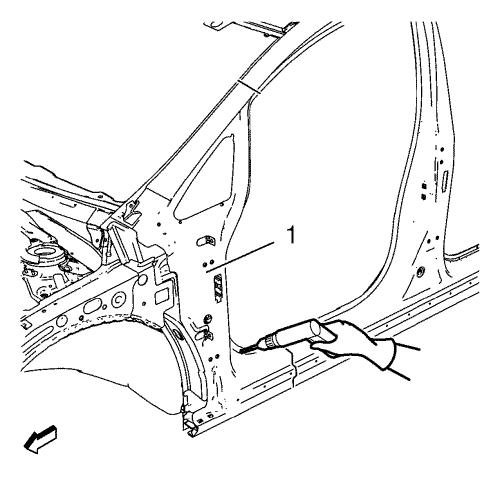
| 8. | Locate and mark all the necessary factory welds of the body hinge pillar outer panel (1). |
| 9. | Drill all factory welds. Note the number and location of welds for installation of the service assembly. |
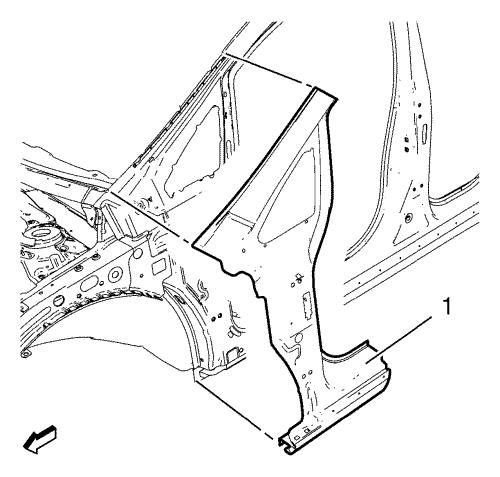
| 10. | Remove the damaged body hinge pillar outer panel (1). |
Installation Procedure
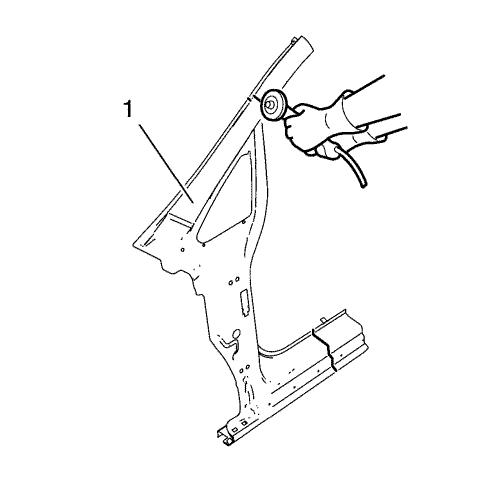
| 1. | Cut the body hinge pillar outer panel (1) in corresponding locations to fit the remaining original panel. The sectioning joint should be trimmed to allow a gap of one-and-one-half-times the metal thickness at the sectioning joint. |
| 2. | Prepare all mating surfaces as necessary. |
| 3. | Align the body hinge pillar outer panel (1). |
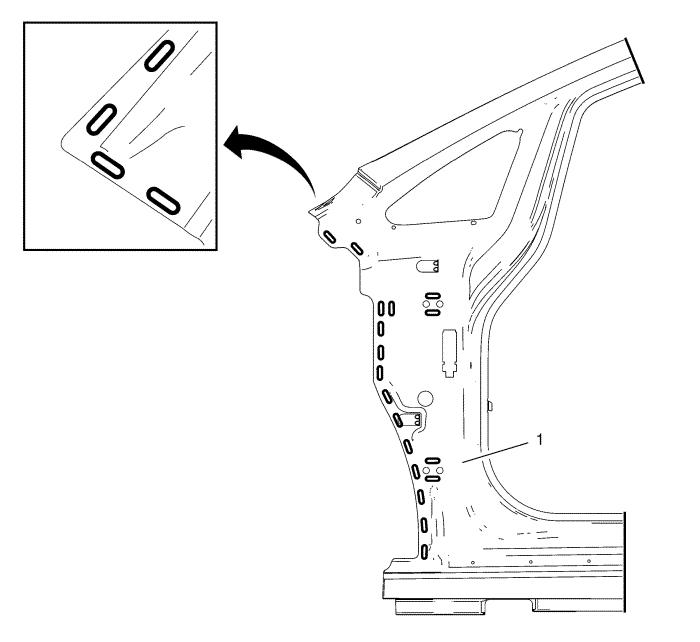
| 4. | Create 21 x 5 x 18 mm slots for MIG-brazing on the body hinge outer pillar panel (1) in locations where the spotwelder is not applicable. |
| 5. | Clean and prepare the attaching surfaces for brazing. |
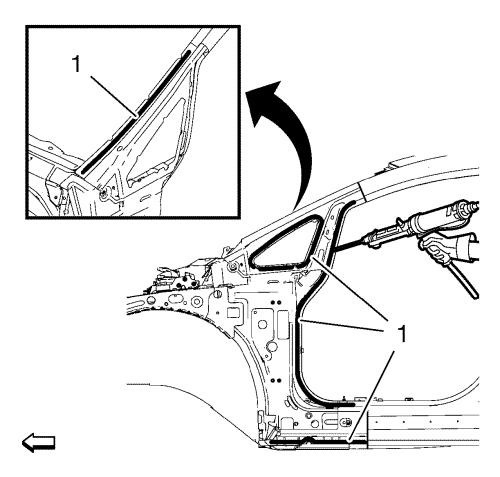
Note: In MIG-brazing areas 50 mm (2 in) must be kept clear of structural adhesive. |
| 6. | Apply structural adhesive (1) to all attaching surfaces. |
| 7. | Position the body hinge pillar outer panel (1) on the vehicle. |
| 8. | Verify the fit of the body hinge pillar outer panel. |
| 9. | Clamp the body hinge pillar outer panel into position. |
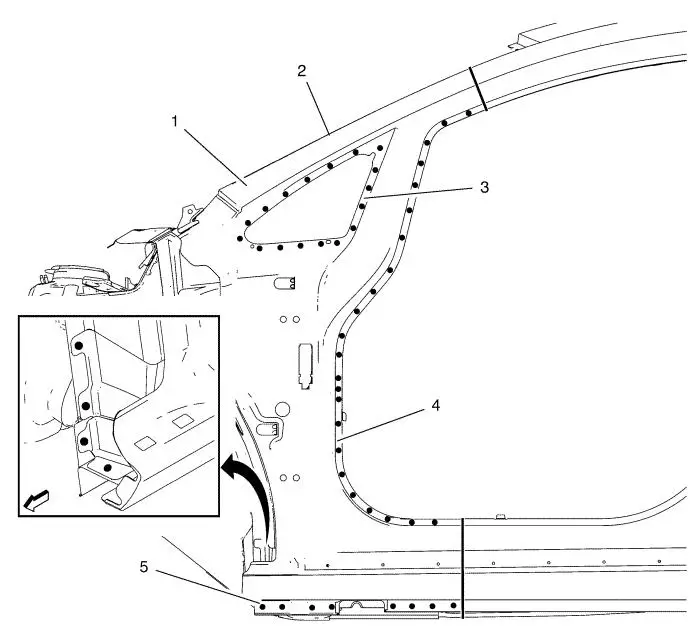
| 10. | Spot weld the body hinge pillar outer panel (1) accordingly. |
| • | Flange windshield opening (2) - 12 spot welds |
| • | Flange body side front window (3) - 17 spot welds |
| • | Flange front side door opening (4) - 24 spot welds |
| • | Flange rocker panel (5) - 12 spot welds |
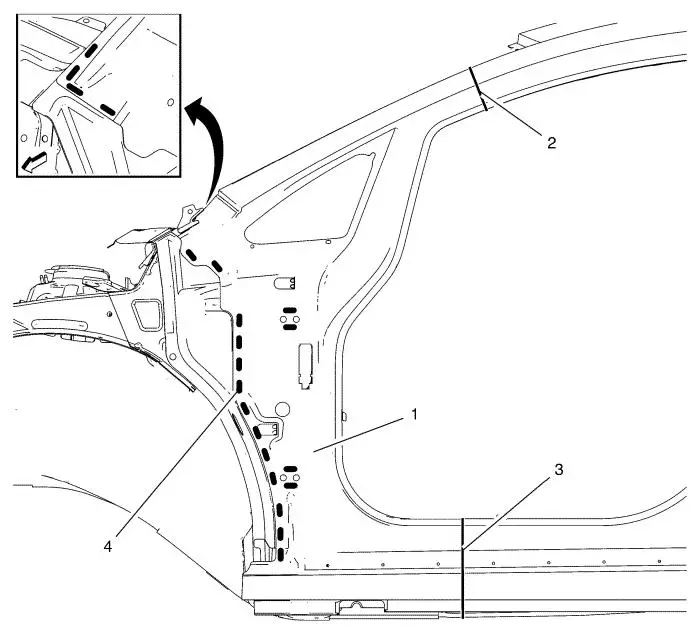
| 11. | Braze the body hinge pillar outer panel (1) accordingly. |
| • | Body hinge pillar / body side outer upper panel (2) - 195 mm |
| • | Body hinge pillar / rocker panel (3) - 350 mm |
| • | Body hinge pillar (4) - 21.5 x 18 mm slot brazes |
| 12. | To create a solid braze with minimum heat distortion, make 25 mm (1 in) stitch brazes along the seam with 25 mm (1 in) gaps between them. Then go back and complete the stitch braze. |
| 13. | Apply the sealers and anti-corrosion materials to the repair area, as necessary. |
| 14. | Paint the repaired area. |
| 15. | Install all related panels and components. |
| 16. | Connect the negative battery cable. Refer to Battery Negative Cable Disconnection and Connection . |
| 17. | Enable the SIR system. Refer to SIR Disabling and Enabling . |
Parts & tools for this job For Vauxhall Astra
- TOOLTrim removal tool kitSearch: trim removal tool kit
- PARTTouch-up paintSearch: Vauxhall touch up paint
- PARTPanel clip assortmentSearch: Vauxhall panel clips assortment
Links open Amazon search results in a new tab. As an Amazon Associate I earn from qualifying purchases.