Radiator Replacement (LDE, LDD with MT)
Removal Procedure
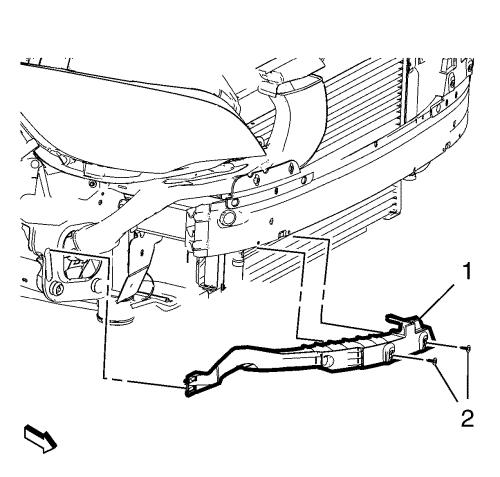
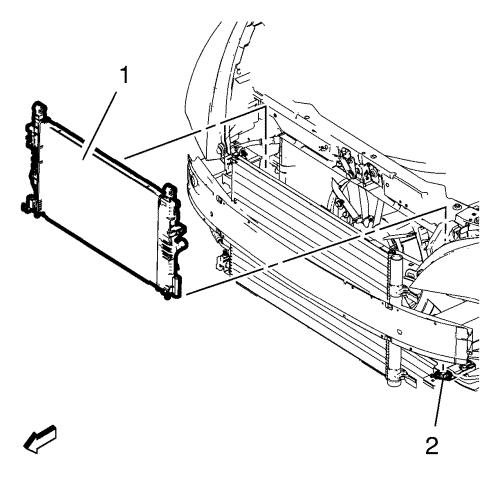
| 4. |
Remove the 2 right front
bumper fascia support bolts (2). |
| 5. |
Remove the right front bumper
fascia support (1). |
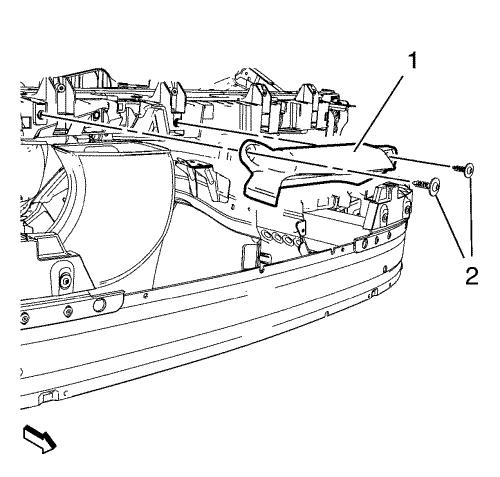
| 6. |
Remove the 2 front intake air
duct splash shield bolts (2). |
| 7. |
Remove the front intake air
duct splash shield (1). |
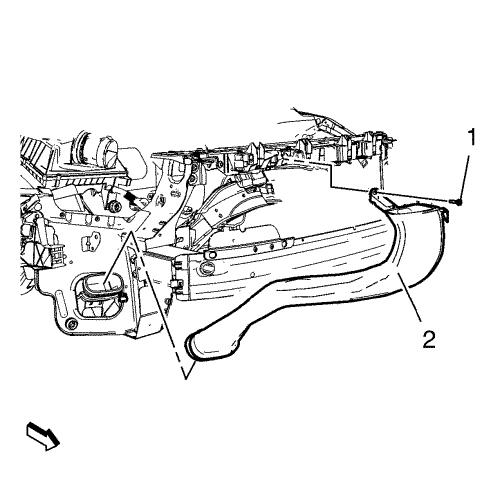
| 8. |
Remove the front intake air
duct bolt (1). |
| 9. |
Remove the front intake air
duct (2). |
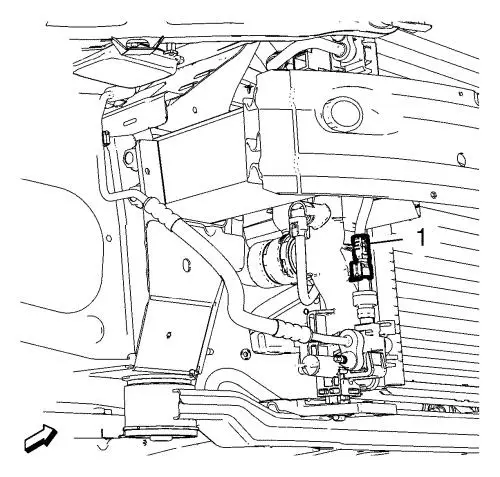
| 11. |
Disconnect and unclip the A/C
pressure sensor wiring harness (1). |
| 12. |
Remove the 2 protector fenders
(2) from the charge air cooler (1). |
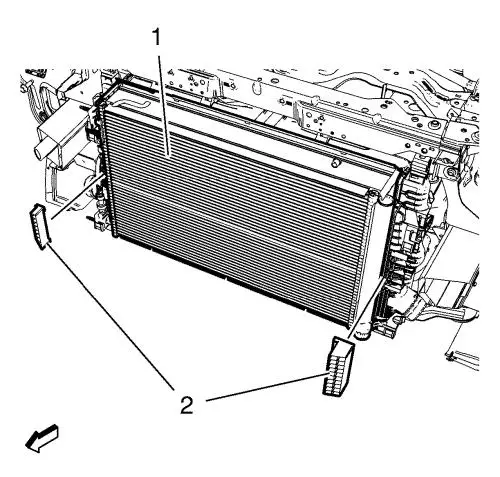
| 14. |
Unclip the engine coolant fan
shroud from the radiator. |

| 15. |
Remove the 2 radiator upper
bracket bolts (1) and the 2 radiator upper brackets (2).
|
| 16. |
Remove the radiator (1) from
the 2 lower brackets (2). |
| 17. |
Use care and rotate the
radiator in order to gain more access for the removal. |
| 18. |
Use care and lift the radiator
up and away from the vehicle. |
Installation Procedure
|
Note: Handle the
radiator with care.
|
| 1. |
Use care and install the
radiator (1). |
| 2. |
Use care and rotate the
radiator in order to get more access for the installation.
|
| 3. |
Install the radiator (1) to
the 2 lower brackets (2). |
| 4. |
Install the 2 radiator upper
brackets (2). |
| 5. |
Install the 2 radiator upper
bracket bolts (1) and tighten to 22 N·m (16 lb
ft) . |
| 6. |
Clip the engine coolant fan
shroud to the radiator. |
| 8. |
Install the 2 protector
fenders (2) to the charge air cooler (1). |
| 9. |
Connect and clip in the A/C
pressure sensor wiring harness (1). |
| 11. |
Install the front intake air
duct (2). |
| 12. |
Install the front intake air
duct bolt (1) and tighten. |
| 13. |
Install the front intake air
duct splash shield (1). |
| 14. |
Install the 2 front intake air
duct splash shield bolts (2) and tighten. |
| 15. |
Install the right front bumper
fascia support (1). |
| 16. |
Install the 2 right front
bumper fascia support bolts (2) and tighten. |
|
