|
Door and Tailgate Outer Panelling, Replace
Example - replace door outer panelling
 Remove Remove
|
| 1. |
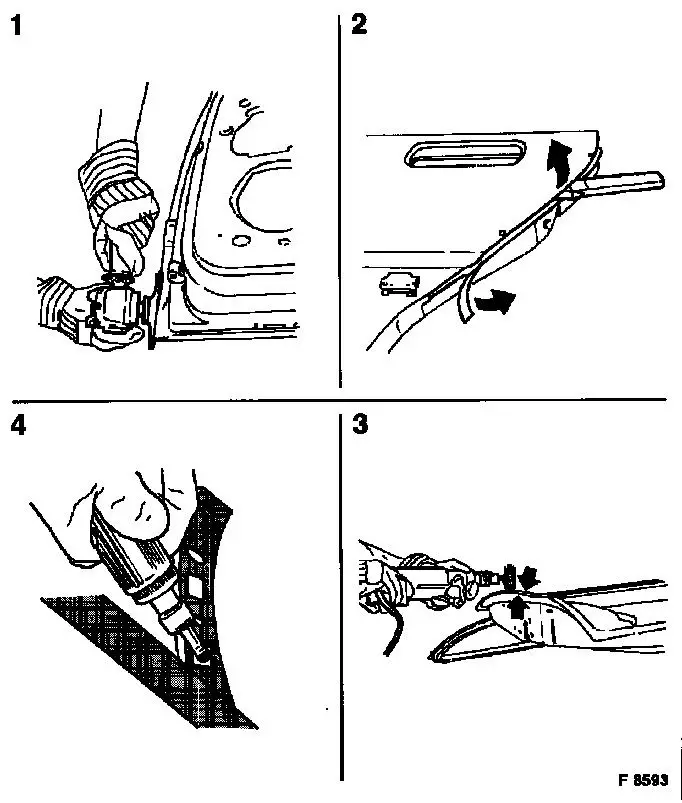
Detach door
| • |
Remove sealing compound
|
| • |
Drill off welding points
|
| • |
Grind flanged edges (1) all around
|
| • |
Detach door outer panelling (2) from frame and remove remaining
flange.
|
| • |
Remove residual adhesive (3) on frame. Grind down adhesive
flange to bare metal.
|
| • |
Grind adhesive flanges (4) of the new component to bright
metal
Note: Only grind to
bright metal in the area of the spot welds, the new flanged seam
adhesive bonds to the new part primer
|
|
|
 Install
|
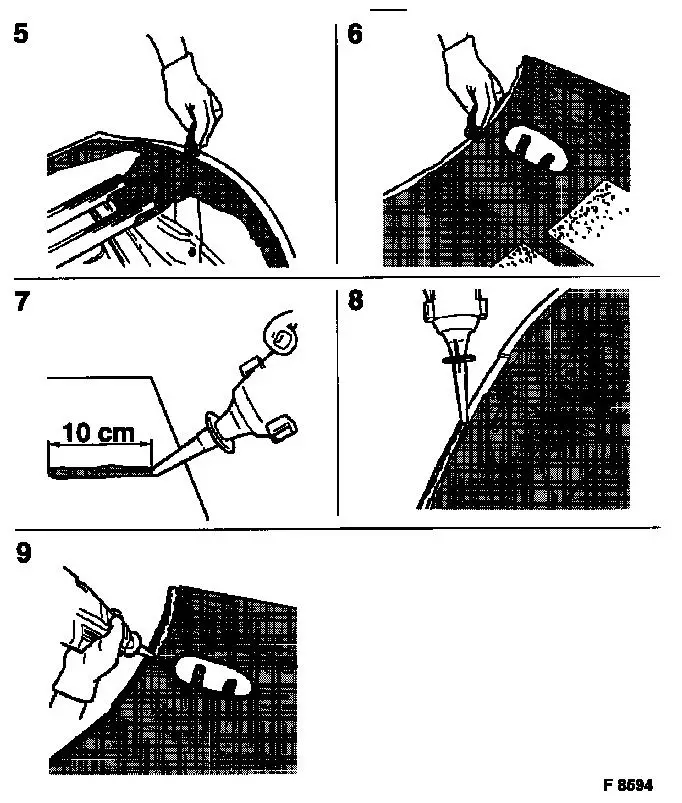
| 2. |
Restraighten panel frame
Note: If necessary
|
| 3. |
Fit new part to frame and the cut sections.
|
| 4. |
Apply activator from the adhesive kit
| • |
To joint flanges, door frame, both sides (5)
|
| • |
To outer panelling of door, on one side (6)
|
|
| 5. |
Apply bead of adhesive ( 4 mm
diameter)
Note: Insert adhesive
cartridges from adhesive kit in BETAGUN 2000; apply 10 cm test bead
(e.g. to cardboard) (7).
| • |
To joint flange, door frame (8)
|
| • |
To outer panelling of door (9)
|
|
|
|
| 6. |
Align and fix door outer panelling on frame (10)
|
| 7. |
Bend over flanged edges of door outer panelling
Note: (Body hammer and
finishing hammer), support simultaneously with dolly or block
(11).
|
| 8. |
Apply adhesive as seam seal and corrosion protection
| • |
Apply adhesive to all bright-ground areas with a spatula or
flat paintbrush
|
| • |
Remove surplus adhesive
Note: Additional
sealing compound is not necessary
|
|
| 9. |
Spot weld outer panel of door (12)
Note: Work with a
copper plate to avoid marks in the outer panelling of the door
Note: Gas-shielded
welding is used in the area of the separation points as before. The
adhesive in the area of the separation point must be protected from
burning with heat barrier paste
| • |
Check visible area of surface and re-finish if necessary
|
|
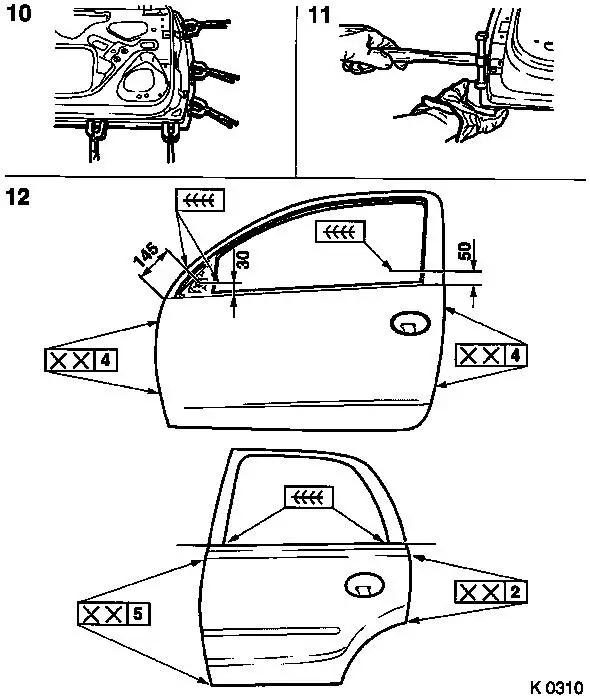
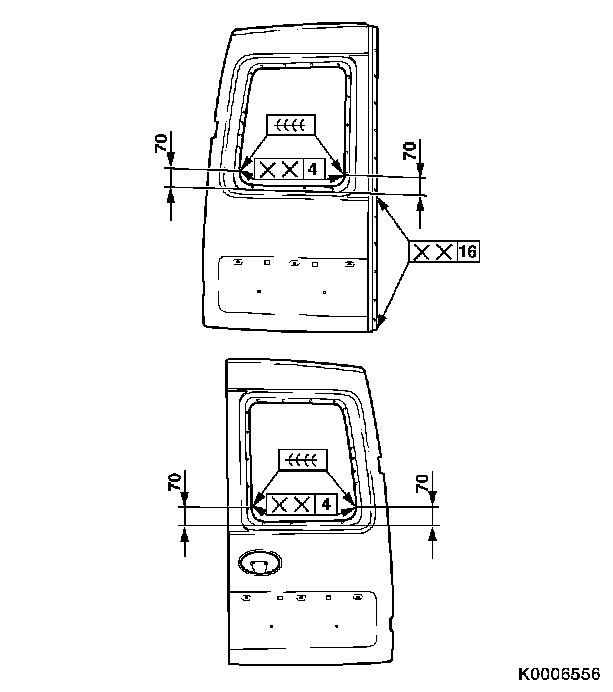
| 12. |
Attach door (12)
Note: Front door for
model F08 & W5L, rear door for model F68
Note: All dimensions
shown in mm!
|
|
|
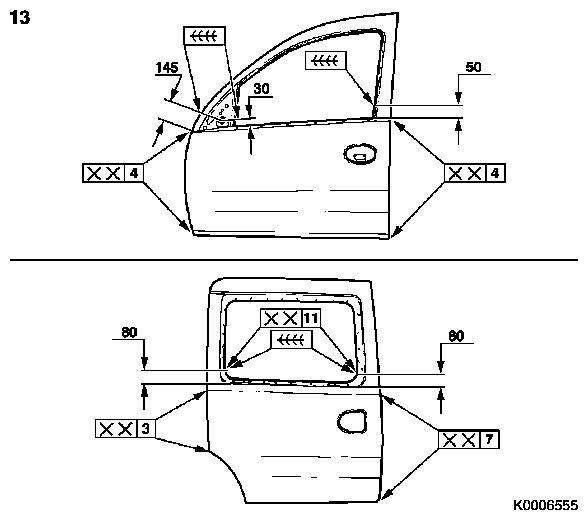
| 13. |
Attach door (13)
Note: Front door and
rear door for model F06, F25
Note: All dimensions
shown in mm!
|
|
|
| 14. |
Attach rear door
Note: Rear doors left,
right for model F06, F25
Note: All dimensions
shown in mm!
|
|
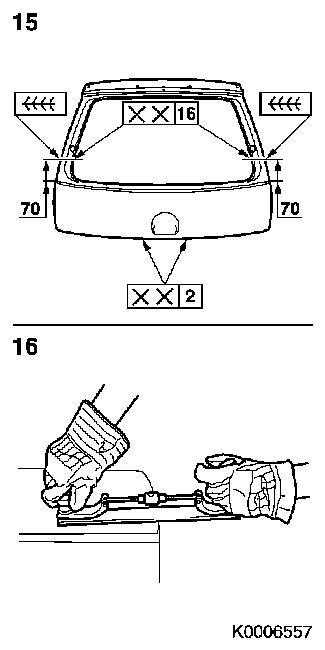
| 15. |
Attach tailgate
Note: Tailgate for
model F08, F68, F08 & W5L
Note: All dimensions
shown in mm!
| • |
Check visible area of surface and re-finish if necessary
(16)
|
|
|
|
|
