|
Rear Quarter Window, Remove and Install or Replace
F08 (BO-46974)
 Remove Remove
| 1. |
Cut out rear quarter window
Note: The following
document describes the procedure for removing the rear quarter
window using glass removal system BO-46974 . As a supplement to the existing video VT
54, individual steps will be shown for removing the rear quarter
window without destroying it.
|
Warning: Before starting work, put
on the gloves and protective goggles contained in tool kit BO-46974 to prevent injuries to the eyes and
hands.
|
| 2. |
Cut out rear quarter window
Note: Position the
vehicle on level ground and move the front wheels to the
straight-ahead position
|
| 3. |
Detach rear seatbelt deflection roller
|
| 4. |
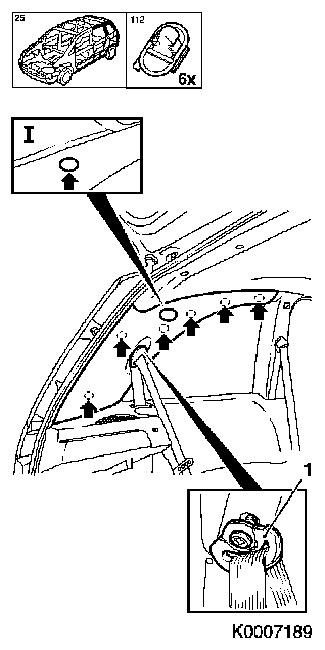
Detach C-pillar inner panelling
Note: On vehicles with
curtain airbags, the upper C-pillar inner panelling is additionally
fastened by means of a panel (I)
|
|
|
| 5. |
Detach front seatbelt deflection roller
|
| 6. |
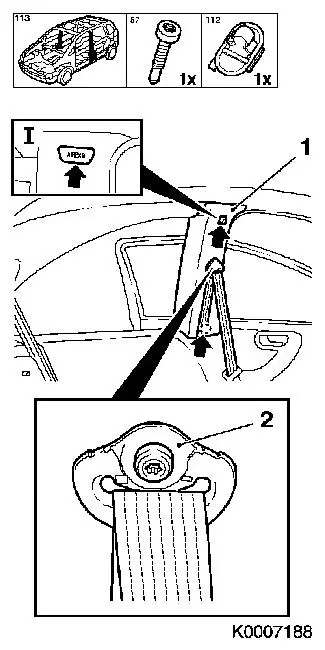
Detach upper B-pillar panelling
Note: On vehicles with
curtain airbags, the upper B-pillar inner panelling (1) is
additionally fastened by means of a panel (I)
| • |
Unscrew 2x bolts for the front side panelling
|
| • |
On vehicles without curtain airbags, unclip the clothes
hook
|
|
|
|
| 7. |
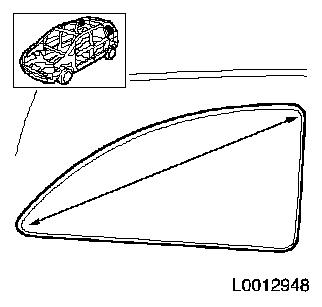
Measure the diagonal of the windscreen, cut wire to length
| • |
Cut off cutting wire to four times the required length, 3300 mm
|
|
|
|
| 8. |
Insert the cutting wire
| • |
Mask off insertion point with fabric tape (1)
|
|
| 9. |
Lay the cutting wire all the way round
| • |
Secure in place with fabric tape
|
|
| 10. |
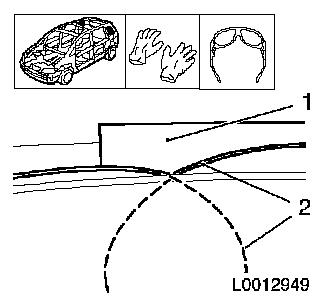
Insert the second end of the wire through the adhesive bed
Note: Cutting wire (2)
must overlap when pulled through the adhesive bed
|
|
|
| 11. |
Fix the rear quarter window in place
|
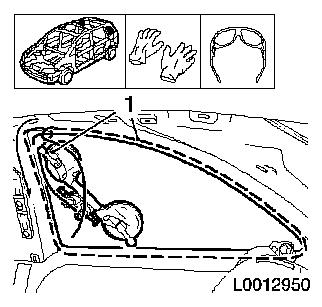
| 12. |
Position the cutter
| • |
Position the winch with the 2 winding heads at the front
|
| • |
Thread the cutting wire
|
| • |
Attach cutting wire (1) to winch
|
| • |
Insert transfer ratchet and pre-tension cutting wire
Note: Check that the
cutting wire is laid correctly at the winch deflection roller
|
|
| 13. |
Cut out the rear quarter window
Note: Use a lubricant
on the deflection roller, more pulling force is required to cut in
the rear quarter window corner area.
| • |
Cut out the rear quarter window using the winch and the two
winding heads until the cutting wire is level with the winding
head
|
| • |
Arrow shows the path taken by the cutting wire
|
|
|
|
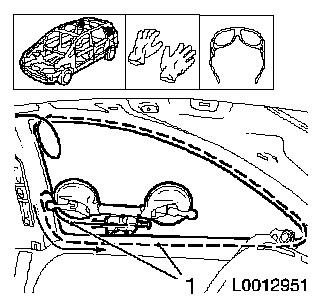
| 14. |
Position the cutter
| • |
Position the winch with the 2 winding heads in the lower front
area
|
| • |
Insert transfer ratchet and pre-tension cutting wire (1)
Note: Check that the
cutting wire is laid correctly at the winch deflection roller
|
|
| 15. |
Cut out the rear quarter window
Note: Use a lubricant
on the deflection roller, more pulling force is required to cut in
the rear quarter window corner area
| • |
Cut out the rear quarter window using the winch and the two
winding heads until the cutting wire is level with the winding
head
|
| • |
Arrow shows the path taken by the cutting wire
|
|
|
|
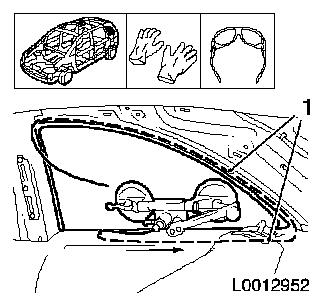
| 16. |
Position the cutter
| • |
Position the winch with the 2 winding heads at the back and at
the bottom
|
| • |
Insert transfer ratchet and pre-tension cutting wire (1)
Note: Check that the
cutting wire is laid correctly at the winch deflection roller
|
|
| 17. |
Cut out the rear quarter window
| • |
Cut out the rear quarter window using the winch and the two
winding heads until the cutting wire is level with the winding
head
|
| • |
Arrow shows the path taken by the cutting wire
|
|
|
|
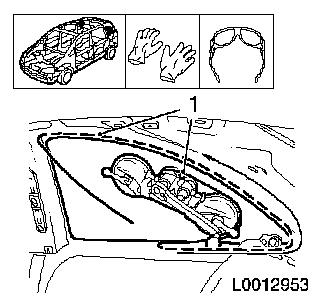
| 18. |
Position the cutter
| • |
Position the winch with the 2 winding heads at the back and at
the top
|
| • |
Thread the second end of the wire into the winding head
|
| • |
Insert transfer ratchet and pre-tension cutting wire (1)
Note: Check that the
cutting wire is laid correctly at the winch deflection roller
|
|
| 19. |
Cut out the rear quarter window
Note: Use a lubricant
on the deflection roller, more pulling force is required to cut in
the rear quarter window corner area
| • |
Cut out the rear quarter window using the winch and the two
winding heads until the cutting wire is level with the winding
head
|
| • |
Arrow shows the path taken by the cutting wire
|
|
|
|
| 20. |
Position the cutter
| • |
Position the winch with the 2 winding heads in the upper front
area, so that the cutting wire intersects itself
|
| • |
Tension the second end of the wire in the winding head
|
| • |
Insert transfer ratchet and pre-tension cutting wire (1)
Note: Check that the
cutting wire is laid correctly at the winch deflection roller
|
|
| 21. |
Cut out the rear quarter window
| • |
Cut out the rear quarter window using the winch and the two
winding heads until the cutting wire has cut through all the
adhesive bead
|
|
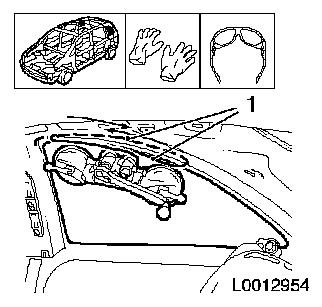
|
|
| 23. |
Remove the rear quarter window
|
| 24. |
Remove glass splinters
|
 Install
| 25. |
Cut the adhesive bead off the rear quarter window
| • |
Using the tool supplied (1), remove the adhesive bead down to a
thickness of approx. 1 mm
|
|
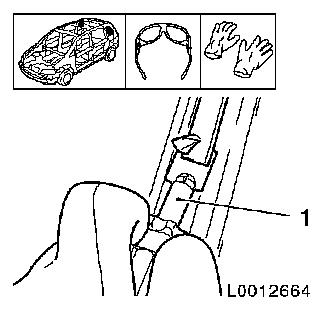
| 26. |
Cut the adhesive bead off the rear quarter panel
| • |
Using the tool supplied (1), remove the adhesive bead down to a
thickness of approx. 1 mm
|
|
|
|
| 27. |
Repair any paint damage
|
| 28. |
Apply primer
Note: Only with new
glass pane
|
| 29. |
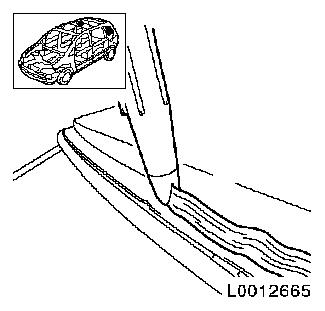
Apply adhesive bead
| • |
Cut into the tip of the cartridge in such a way that a bead of
adhesive approx. 13 mm thick is
produced
|
|
|
|
| 30. |
Insert rear quarter window
| • |
Insert windscreen with MKM-641
|
| • |
Secure the glass pane in place with fabric tape
|
|
| 31. |
Observe lay-over time
|
| 32. |
Attach the upper B-pillar panelling
| • |
Insert the B-pillar panelling
Note: On vehicles with
curtain airbags, the upper B-pillar inner panelling is additionally
fastened by means of a panel
|
| • |
Tighten 2x bolts for the front side panelling
|
| • |
On vehicles without curtain airbags, tighten the bolt, clip in
the clothes hook
|
|
| 33. |
Attach front seatbelt deflection roller
|
| 34. |
Attach C-pillar inner panelling
| • |
Fit 6x clips
Note: On vehicles with
curtain airbags, the upper C-pillar inner panelling is additionally
fastened by means of a panel
|
|
| 35. |
Attach rear seatbelt deflection roller
|
|