|
Brake Linings – Rear Wheel Brake, Remove and
Install
 Remove Remove
| 1. |
Remove rear wheels
| • |
Mark position in relation to wheel hub
|
| • |
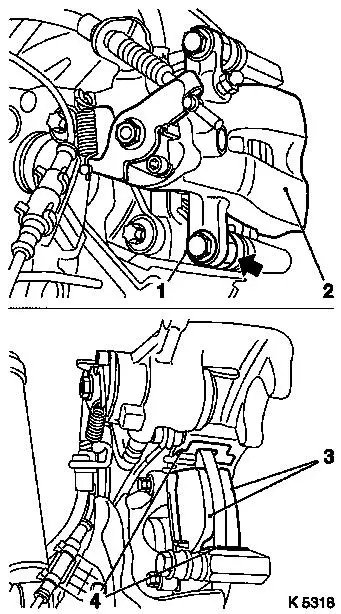
Remove fastening bolt for lower brake calliper guide bolt
(1)
| – |
Counterhold against hexagonal section of guide bolt (arrow)
with open-ended wrench
|
|
|
| 2. |
Fold brake calliper (2) upwards
| • |
Remove brake linings (3) from retaining frame
Note: Observe
installation position.
|
| • |
Remove sliding plates (4) from retaining frame
|
|
|
|
| 3. |
Clean brake calliper shaft and retaining frame with soft wire
brush.
|
 Install
Warning: Brake fluid increases in
brake fluid reservoir.
|
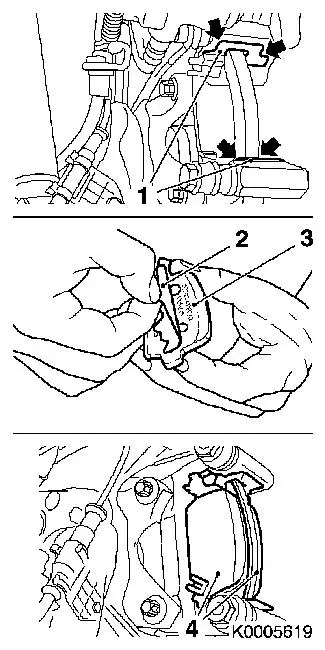
| 4. |
Press piston of brake calliper back into the housing with KM-6007 (1) and Adapter KM-6007-10 (2).
Note: In doing so,
ensure that when pushing back the piston, the piston is located
with a recess aligned with the inspection aperture of the brake
calliper (arrows see figure). Illustration shows completed
installation.
|
|

|
| 5. |
Coat retaining frame and sliding plates lightly with the
special grease contained in the brake linings kit in the area of
the contact surface between the sliding plates and retaining frame
(arrows)
|
| 6. |
Insert sliding plates (1) in the retaining frame
| • |
Detach adhesive film (2) from brake lining plate (3)
|
| • |
Insert brake linings (4) in the sliding plates on the retaining
frame
Note: Insert the brake
lining with acoustic wear indicator on the inside (piston side of
the brake calliper).
|
|
|
|
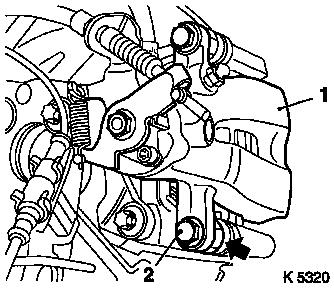
| 7. |
Fold brake calliper (1) downwards over brake linings
| • |
install new fastening bolt for lower brake calliper guide pin
(2) - tightening torque 45 Nm
| – |
Counterhold against hexagonal section of guide bolt (arrow)
with open-ended wrench
|
|
|
|
|
| 8. |
Fit rear wheels - tightening torque 110
Nm
|
|
