|
Hydraulic Chain Tensioner, Replace
 Remove Remove
Important: After the bracket has
been removed the accumulator must not be subjected to any external
force that would cause damage to the high pressure lines.
|
| 2. |
Remove the accumulator bracket
| • |
Detach accumulator from bracket
|
| • |
Remove the accumulator bracket
| – |
Remove engine transport shackle
|
|
|
|
|
| 3. |
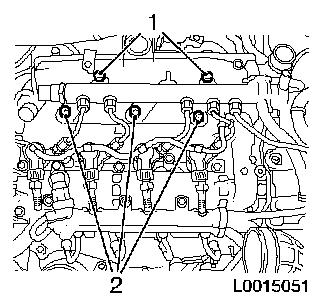
Remove closure bolt from exhaust side of camshaft housing
|
|
|
| 5. |
Fit exhaust camshaft
| • |
Screw in camshaft reference drift EN-46781 (1)
|
| • |
Check for proper installation position
Note: The fixing
reference drift must be fitted in a horizontal position. Fit the
guide mark on the reference drift (arrow).
|
|
|
|
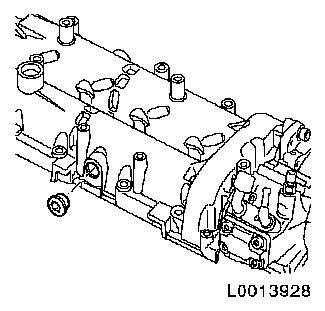
| 6. |
Lock exhaust camshaft
| • |
Turn the exhaust camshaft on the camshaft drive pinion screw in
direction of engine rotation until EN-46781 latches into exhaust camshaft
|
|
| 7. |
Raise vehicle all the way
|
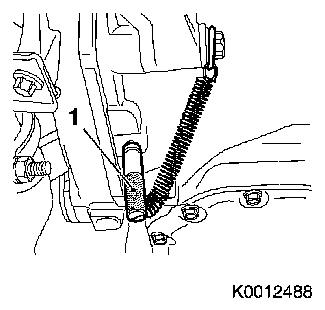
| 8. |
Fit EN-46785 (1)
| • |
In bore of transmission bell housing
Note: Position locating
pin in flywheel by turning the bolt on the torsional vibration
damper carefully.
|
|
|
|
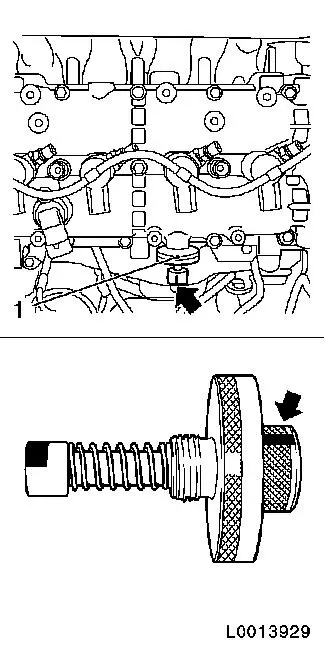
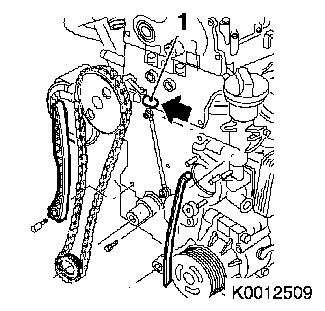
| 10. |
Detach hydraulic chain tensioner (1)
| • |
Secure chain tensioner
| – |
Release in the direction of the arrow
|
|
|
|
|
 Install
| 12. |
Attach hydraulic chain tensioner
| • |
Pretension hydraulic chain tensioner
|
|
| 13. |
Detach 2x camshaft reference drifts EN-46781
|
| 14. |
Raise vehicle all the way
|
| 16. |
Lower vehicle all the way
|
| 18. |
Fit 2 closure bolts
Note: Complete assembly
operations within 10 minutes
| • |
Use screw locking compound (red)
|
|
| 19. |
Install accumulator bracket
| • |
Insert accumulator bracket with engine transport shackle
|
| • |
Attach accumulator to bracket
|
|
|
