|
Window Aerial - Telephone System - Replace
(Upgrade Kit)
 Remove Remove
| 1. |
Remove glove compartment
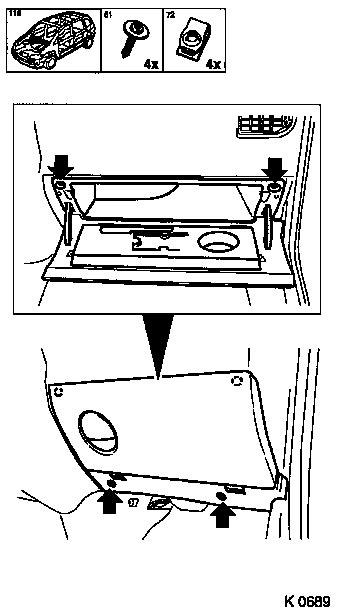
| • |
Unscrew 4x bolt (arrows)
|
|
|
|
| 2. |
Loosen front door seal near A-pillar (F08) 
|
| 3. |
Loosen front door seal near A-pillar (F68)
|
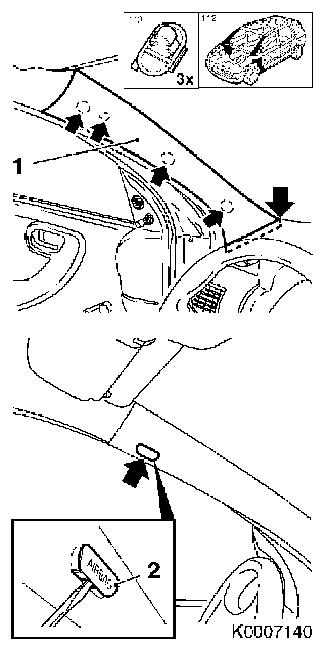
| 4. |
Remove inner panelling from upper A-pillar
| • |
Unclip 4x clip (arrows)
Note: On vehicles with
curtain airbag, the inner panelling is additionally positioned at
the top of the A-pillar with a clip (2) marked "Airbag". If any
fastenings (clips) of the upper A-pillar inner panelling are
damaged the service department must replace them with original
parts.
|
| • |
Use a plastic wedge to unclip the upper A-pillar inner
panelling at the positions shown.
Note: The top inner
panelling of the A pillar (1) fits between the top of the A-pillar
and the instrument panel padding.
|
|
|
|
|
| 5. |
Remove storage compartment panel
| • |
Remove lower inner panelling of instrument panel padding on
driver's side
|
|
| 6. |
Remove glove compartment on passenger side
| • |
Remove lower inner panelling of instrument panel padding on
passenger side
|
|
|
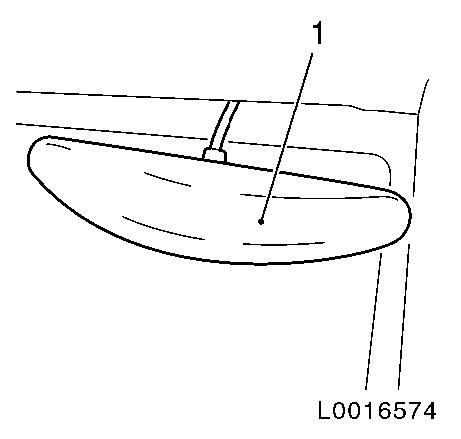
| 7. |
Remove windscreen aerial
| • |
Detach antenna (1)
| – |
Lever antenna off, using plastic wedge
|
|
|
|
|
| 8. |
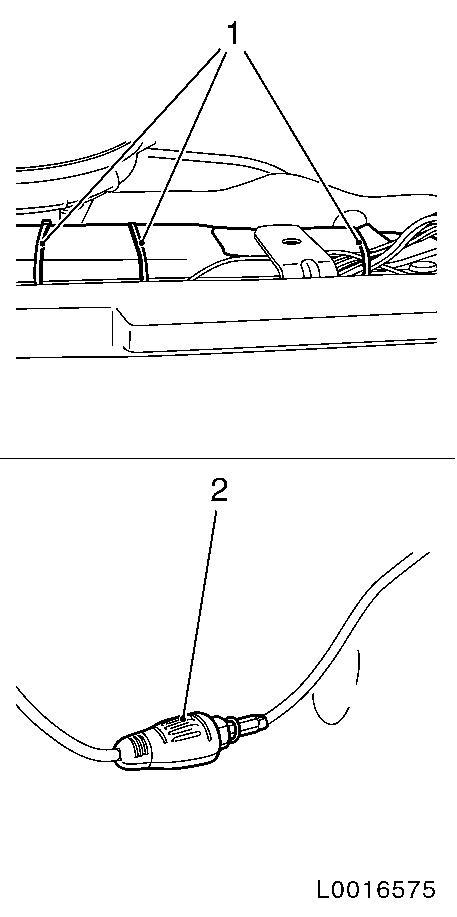
Disconnect and remove wiring harness
| • |
Disconnect antenna cable (2)
|
|
|
|
 Install
| 9. |
Install window antenna
| • |
Lay and secure wiring harness
|
| • |
Attach antenna
| – |
Pull off protective film and affix window antenna
|
|
|
| 10. |
Install upper A-pillar inner panelling
Note: Damaged fastening
clips must be replaced
| • |
Fit upper A-pillar inner panelling between top of A-pillar and
instrument panel padding
|
| • |
Clip in 4x clip
Note: On vehicles with
curtain airbag, clip in airbag clip
|
|
| 11. |
Fasten front door sea near A-pillar (F08)
|
| 12. |
Fasten front door sea near A-pillar (F68)
|
| 13. |
Install lower inner panelling of instrument panel padding on
driver's side
| • |
Install storage compartment panel on driver's side
|
|
| 14. |
Install lower inner panelling of instrument panel padding on
passenger side
|
| 15. |
Position glove compartment in instrument panel padding and
attach it
|
|
