|
Gearshift Cover, Remove and Install and/or Seal
(F13+/ F17+)
 Remove Remove
| 3. |
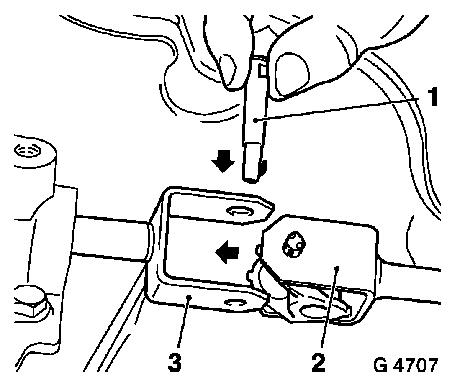
Detach universal joint from shift rod
| • |
Press in retaining spring (arrow) of the hollow pin
|
| • |
Prise out hollow pin with KM-569-A
|
|
| 4. |
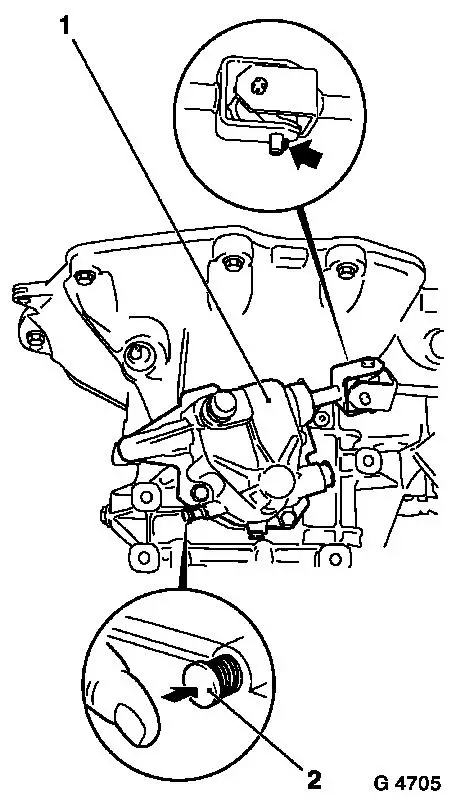
Press adjusting pin (2) into adjusting bore
| • |
Turn gearshift rod anti-clockwise (in direction of 3rd
gear)
|
|
| 5. |
Detach and remove gearshift cover (1) from transmission
| • |
Unscrew 4x bolts
Note: Cover opening in
transmission with a clean cloth
|
|
| 6. |
Remove gasket remnants and clean sealing surfaces
|
|
|
 Install
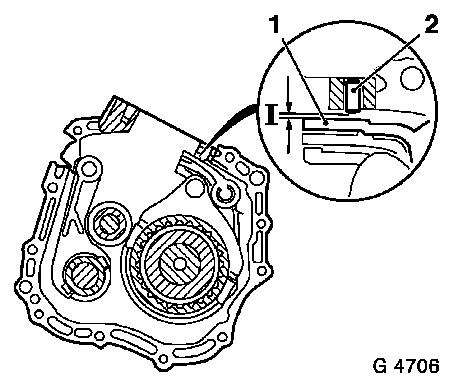
| 7. |
Measure the play (I) between dowel pin (2) and shift driver 5th
gear (1) using a feeler gauge
| • |
Clearance must be min. 0.3 mm
and max. 0.5 mm
|
|
| 8. |
Install new gasket
| • |
Stick gasket to transmission housing with grease
|
|
| 9. |
Place gearbox cover onto transmission
Note: Ensure that
adjusting pin is sitting in adjusting hole and locks gearbox.
|
| 10. |
Attach gearbox cover to transmission
| • |
Draw adjusting pin out of adjusting bore
|
|
|
|
| 11. |
Slide cross-joint (2) into shift fork (3)
| • |
Coat new hollow pin with grease
|
| • |
Push hollow pin (1) in direction of arrow until securing spring
engages
|
|
| 12. |
Check transmission fluid level and correct if necessary 
|
| 13. |
Check ease of gear shifting
|
|
|
| 14. |
Install battery support
|
| 16. |
Program volatile memories
|
|
