|
Valve Body Assembly (Transmission Housing),
Disassemble and Assemble
 Disassemble
|
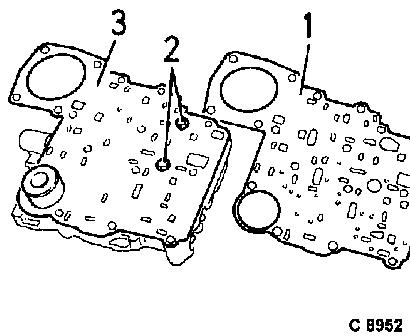
Remove gasket (1) from valve body assembly.
Remove 2 fastening bolts (2). Remove support plate (3) with
gasket beneath. Gaskets are not reused.
|
|
|
Caution
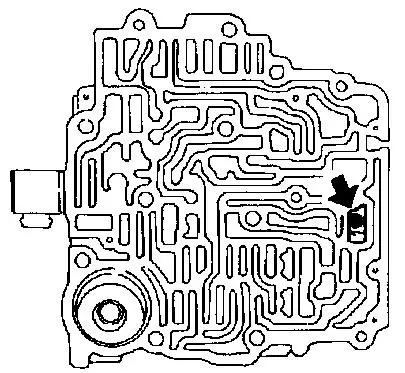
Do not lose valve ball.
 Remove Remove
Remove valve ball from valve body assembly. For this, do not use
magnet.
|
|
Disassemble
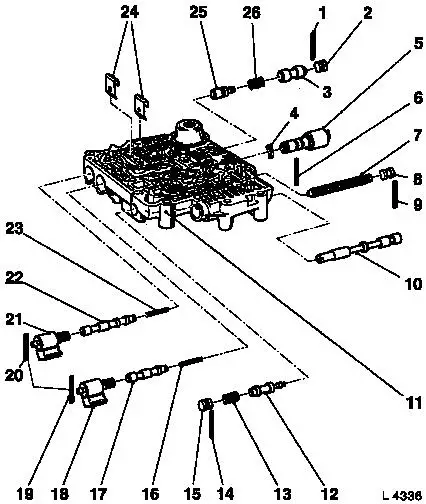
Disassemble valve body assembly according to illustration.
Components of valve body:
|
1
|
Roll pin
|
|
2
|
Closure Plugs
|
|
3
|
Valve 1/2 accumulator
|
|
4
|
Spring plate
|
|
5
|
Solenoid valve, brake band servo
|
|
6
|
Roll pin
|
|
7
|
Filter
|
|
8
|
Closure plug
|
|
9
|
Roll pin
|
|
10
|
Switch valve
|
|
11
|
Valve body (transmission housing)
|
|
|
|
12
|
Control valve
|
|
13
|
Spring
|
|
14
|
Roll pin
|
|
15
|
Closure Plugs
|
|
16
|
Spring
|
|
17
|
Valve, 2/3 shift
|
|
18
|
Solenoid valve, 2/3 shift
|
|
19
|
Roll pin
|
|
20
|
Roll pin
|
|
21
|
Solenoid valve, 1/2 and 3/4 shift
|
|
22
|
Valve, 1/2 and 3/4 shift
|
|
23
|
Spring
|
|
24
|
Bracket
|
|
25
|
Control valve, 1/2 accumulator
|
|
26
|
Spring plate
|
|
|
 Assemble
|
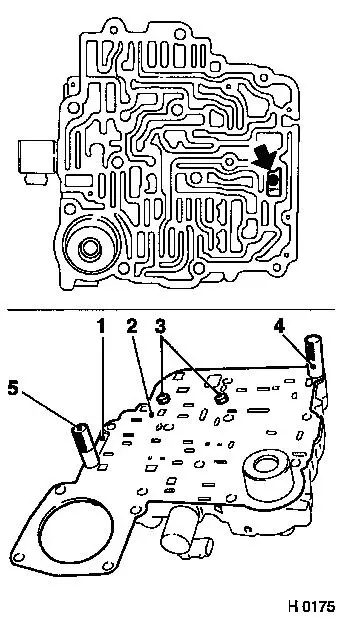
Insert check ball with installation grease in the provided fluid
channel (arrow).
Place the gasket (1) and the support plate above (2) on the
valve body assembly and position KM-677 (4 and 5) in the fitting
bores of the valve body (can be recognised from the
counterbores).
Align gasket and support plate and fasten with 2 fastening bolts
(3).
Torque
Gasket and support plate to valve body – 13 Nm / 9.5 lbf.
ft.
|
|
|
