Transmission Shift Linkage, Adjust (F 13/F 15/F 17/F 18/F 18+/F 25/F 35)
 Remove, Disconnect Remove, Disconnect Loosen bolt for shift rod clamp (1) - do not completely unscrew. Unclip gearshift lever cover at shift tunnel and fold upwards.
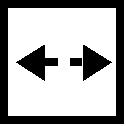
 Install, Connect Install, Connect Swing gearshift lever to lock bore holes (to the left for F 13/15/17/18/18+, and to the right for F 25 in direction of vehicle travel) in gearshift lever and gearshift lever housing (arrow) with KM-527-A. | 
|
 Adjust Adjust Engage adjustment pin in bore hole - located in shift cover for F 13, F 15, F 18, F 18+ (see illus. I) and on upper side of transmission for F 25 - by turning shift rod to left (towards 3rd gear) (1). Illustration II depicts F 17 transmission.
 Tighten (Torque) Tighten (Torque) Bolt for shift rod clamp - 12 Nm / 9 lbf. ft. + 180 ° . Remove KM-527-A from gearshift lever or shift housing. Clip gearshift lever cover to shift tunnel.
 Inspect Inspect Easy shifting in all gears with vehicle stationary, engine running and clutch released. Pin in adjustment bore is released automatically when first shifting towards "R" (2 and 3). Do not use force, or else pin will bend or break | 
|
 Important! Important! When adjusting transmission shift linkage, there is risk of damaging thread (clamp and hex bolt itself) if non-authorised hex bolts are used.
Remove, Disconnect Remove existing hex bolt (arrow) from clamp and replace with new, better quality hex bolt as described below. Remove shift linkage with clamp from shift rod pipe. Finally turn shift linkage (arrow) so that thread is accessible in clamp. | 
|
Remove, Disconnect Recut thread in clamp using tap M8 x 1.25 mm and corresponding extension. Screw new hex bolt M8 x 1.25 mm into clamp.
Important! When using commercially available bolt, always use bolt M8 x 1.25 mm with waved washer, quality 10.9 and length of 24 mm. Install shift linkage with clamp on shift rod pipe. Adjust shift mechanism - see operation "Transmission Shift Linkage, Adjust (F 13/F 15/F 17/F 18/F 18+/F 25/F 35)". Ensure that new hex bolt is tightened on clamp using 12 Nm / 9 lbf. ft. + 180 ° . | 
|
Gearshift Housing with Gate Shifting The F 13, F 17, F 18 and F 18+ transmissions are designed with gate shifting for precision shifting. The transmission is equipped with a detent for optimum engagement in neutral. A more accurate shift engagement is achieved by combining detent and gate shift. The guide pin (3) engages in the shift gate with intermediate shift lever (5). The intermediate shift lever can only be moved along the specified shift gate paths. The shift adjustment pin (4) is located at the front in the direction of travel. Notice: The operation "Remove and Install" corresponds to gearshift housing without gate shifting.
5 Intermediate shift lever with gate and detent
| 
|
|
