-
‒ →
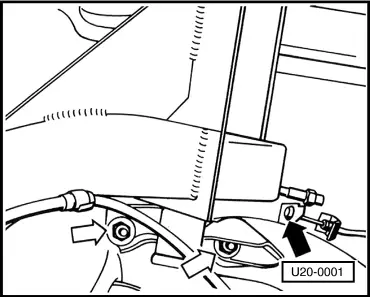
Detach brake hoses at rear axle on both sides -black arrow-.
-
‒ Detach rear axle from body on both sides -white arrows-, swing down and bellow it to be caught by handbrake cable guides.
-
‒ Unhook rear silencer support lugs.
-
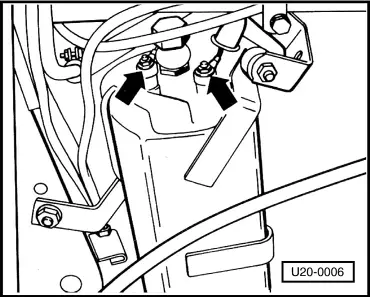
‒ Pull connecting hose from tank.
-
‒ Unbolt tensioning straps from body and lower the tank.
-
‒ Pull off vent pipes and two-pin plug and remove tank.
Installation:
-
‒ Follow steps in reverse order to install tank.
-
‒ Bleed brake system.
Note:
Only rubber strips are to be used as insulation between tank and tensioning straps. After installation it is imperative that tank be treated with durable undercoating -D35-.
Note fuel tank version:
From the model year 1980 onward a modified tank is installed:
-
‒ Front small vent pipe has been eliminated.
-
‒ Diameter of rear small vent pipe has been increased from 4.75...5.00 mm.
-
‒ Diameter of large vent pipe is reduced from 16 mm...12 mm.
Only newer version is on available as a replacement part.
Renewing vent pipes
A- When installing new fuel tank version in older vehicles:
-
‒ Remove existing vent pipes between tank and connecting piece.
-
‒ Shorten 12 mm dia. vent pipe part No. 171 201 159 B to about 1200 mm.
-
‒ Push coil spring in about 700 mm from end of connecting line.
-
‒ Seal pipe and pass through hole in frame. Then clean end of pipe, push it onto tank connection and secure with screw clip.
-
‒ Heat free end in boiling water, push it onto connecting piece and secure with a screw clip.
-
‒ Shorten 5.0 mm dia. Thin vent pipe part No. N 900 996 01 to about 1200 mm.
-
‒ Seal pipe and pass through hole in frame. Clean ends and push these onto fuel tank connection and onto lower connection on the connecting piece. Secure with hose clips.
-
‒ Seal free connecting piece with plug (Part No. 113 201 539) and secure with hose clips.
B- Vehicles without coil spring in large vent pipe (up to about 2/78):
-
‒ Cut off large vent pipe between hole in frame and rear axle. Separate end from filler neck and remove.
-
‒ Cut new pipe with coil spring to length of pipe removed and connect it to filler neck.
-
‒ Seal pipe and pass it through hole in frame. Then clean it throughly.
-
‒ Connect new pipe with that remaining on the vehicle using union -Part No. 171 121 140 D- and secure with screw clips.
|