
Golf Mk3
| Removing and installing right luggage compartment trim (Estate) |
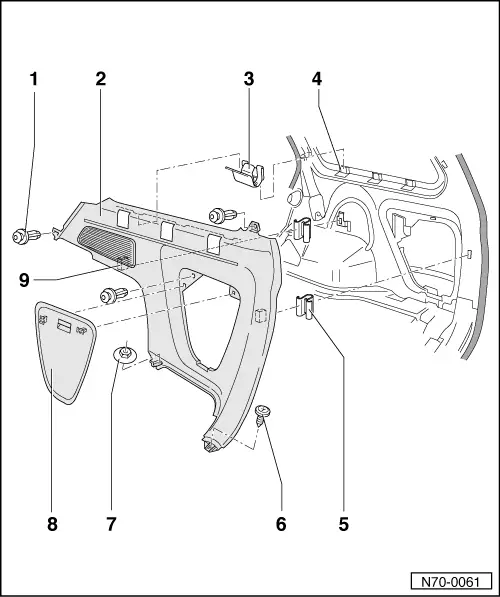
| 1 - | Clip |
| q | Two-piece. |
| q | Removing: unscrew inner part with hexagon socket head wrench |
| q | Installing: press outer part and inner part in turn into mounting hole |
| 2 - | Trim panel |
| q | Removing: |
| – | Remove rear bench seat and backrest . |
| – | Remove luggage compartment cover → Chapter. |
| – | Remove upper B-pillar trim → Item. |
| – | Remove upper C-pillar trim → Chapter. |
| – | Remove lower C-pillar trim → Chapter. |
| – | Remove D pillar trim panel → Chapter. |
| – | Removing load sill cover → Chapter. |
| – | Remove cross-head screw → Item. |
| – | Remove lid → Item and clips → Item. |
| – | Unscrew hexagon nuts → Item. |
| – | Pull trim with securing peg → Item at right angles out of clips → Item and pull upwards out of clips → Item. |
| q | Installing: |
| – | Check the seating of the clips → Item and → Item and correct if necessary. |
| – | Make sure the sealing on the rear lid is seated correctly. |
| 3 - | Clip |
| 4 - | Securing point |
| q | For clips → Item |
| 5 - | Clip |
| 6 - | Cross-head screw |
| 7 - | Hexagon nut |
| 8 - | Lid |
| 9 - | Securing peg |
| q | On rear |