
Golf Mk6
| Installing |
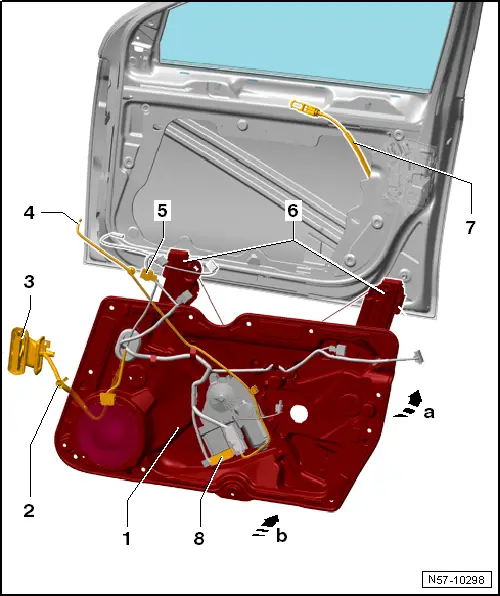
| – | Fit assembly carrier in door upwards diagonally -arrow a-. |
| – | Pull connector -3- through door and secure wiring retainer -2-. |
| – | Pull cable -7- through assembly carrier. Ensure that grommet is seated correctly. |
| – | Press assembly carrier -1- at bottom on door -arrow b-. |
| – | Route wiring -4- on assembly carrier. |
| – | Secure connectors -5 and 8-. |
 Note
Note| t | The assembly carrier must be pushed firmly against the door when the clips are secured. |
| t | Only then is it possible to push in the pins of the clips with ease and the seal of the assembly carrier will be properly seated. |
| t | If the assembly carrier is not pressed against the door firmly enough, the pins of the clips will be difficult to insert. |
| t | This will cause the clips to be crimped and the seal will not seat correctly. The door is not sealed! |
| t | Up to 3 clips can be replaced by rivets on a series of vehicles. |
| t | During installation these rivets are replaced by the clips again. |
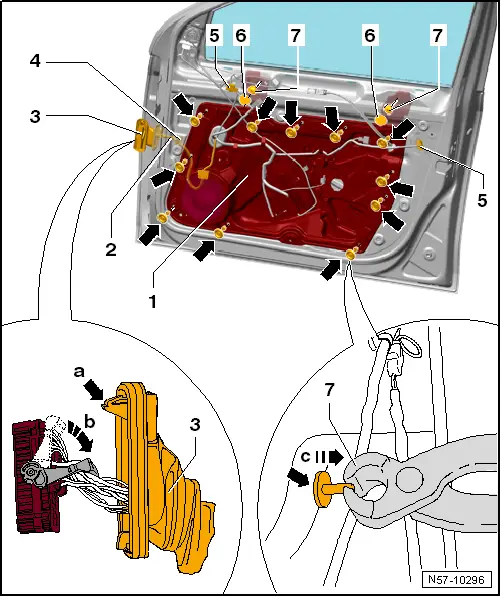
| – | Push assembly carrier -1- firmly against door. |
| – | Fit all clips -arrows- and insert the pins. |
| – | Install bolts -7-. Specified torque for bolts -7-: 8 Nm. |
| – | Secure door window → Chapter. |
| – | Connect connectors -3 and 5-. |
| – | Then perform remaining installation in reverse order of removal. |
| l | Carry out functional test function before installing door trim. |